Introduction to Peanut Butter Cup Nostalgia Cheesecake
The Allure of Nostalgic Desserts
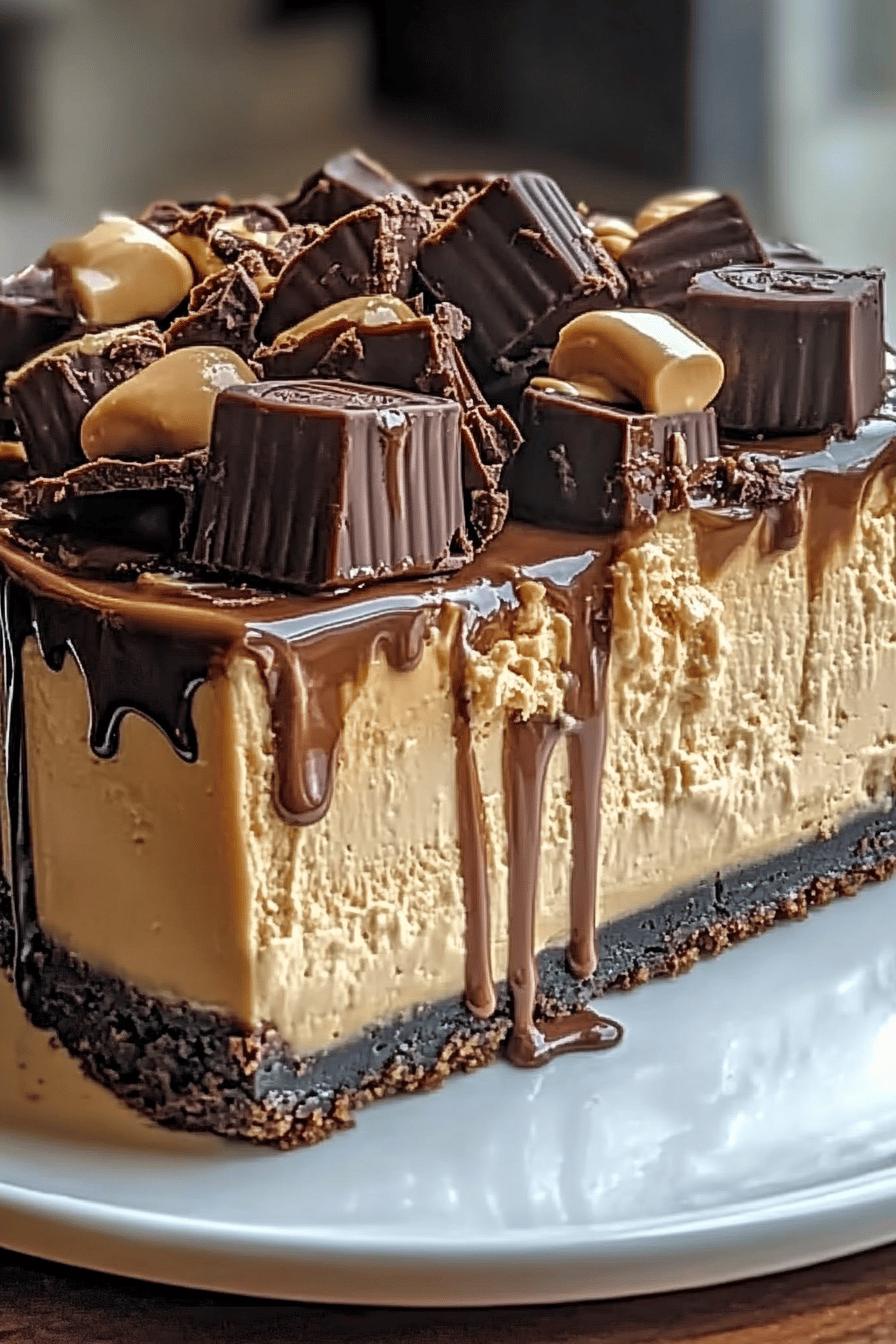
Nostalgic desserts have a special place in our hearts. They remind us of simpler times, childhood memories, and family gatherings. Each bite can take us back to moments filled with laughter and joy. Desserts like the Peanut Butter Cup Nostalgia Cheesecake blend flavors we love with memories we cherish. The creamy texture of cheesecake combined with the rich taste of peanut butter and chocolate creates a delightful experience. It’s not just about eating; it’s about reliving those sweet moments.
Why Peanut Butter Cup Nostalgia Cheesecake is a Must-Try
This Peanut Butter Cup Nostalgia Cheesecake is a must-try for several reasons. First, it combines two beloved flavors: peanut butter and chocolate. These flavors are a classic duo that many people adore. Second, the cheesecake is easy to make, requiring no baking. This means you can whip it up quickly, making it perfect for any occasion. Whether it’s a birthday party, a family gathering, or just a treat for yourself, this cheesecake fits the bill. Lastly, the addition of chopped Reese’s Peanut Butter Cups adds a fun twist, making each slice a delightful surprise. You won’t just enjoy the taste; you’ll also enjoy the memories it brings back.
Ingredients for Peanut Butter Cup Nostalgia Cheesecake
Creating the Peanut Butter Cup Nostalgia Cheesecake is simple and requires just a few key ingredients. Gather these items to ensure your cheesecake is rich, creamy, and full of flavor. Here’s what you’ll need:
- For the Crust:
- 1 ½ cups of graham cracker crumbs
- ½ cup of unsalted butter, melted
- ¼ cup of granulated sugar
- For the Cheesecake Filling:
- 16 ounces of cream cheese, softened
- 1 cup of creamy peanut butter
- 1 cup of powdered sugar
- 1 teaspoon of vanilla extract
- 1 cup of heavy whipping cream
- For the Mix-Ins:
- 1 cup of chopped Reese’s Peanut Butter Cups
- For the Drizzle:
- ½ cup of semi-sweet chocolate chips
- 2 tablespoons of creamy peanut butter
- 1 tablespoon of milk (to thin the drizzle)
These ingredients come together to create a cheesecake that is not only delicious but also brings back fond memories. Make sure to have everything ready before you start, as this will make the preparation process smooth and enjoyable!
Step-by-Step Preparation of Peanut Butter Cup Nostalgia Cheesecake
Step 1: Prepare the Crust
To start, you’ll need to prepare the crust. First, take a mixing bowl and combine the graham cracker crumbs, melted butter, and granulated sugar. Mix these ingredients well until they resemble wet sand. Next, press this mixture firmly into the bottom of a 9-inch springform pan. Make sure it’s even and compact. This crust will provide a delicious base for your cheesecake. Once done, set it aside while you move on to the filling.
Step 2: Make the Cheesecake Filling
Now, let’s create the creamy filling. In a large mixing bowl, beat the softened cream cheese until it’s smooth and fluffy. This usually takes about 2-3 minutes. Then, add the creamy peanut butter and continue mixing until well combined. Gradually add the powdered sugar and vanilla extract, mixing until everything is smooth. Finally, in a separate bowl, whip the heavy cream until stiff peaks form. Gently fold this whipped cream into the peanut butter mixture. This step adds lightness to your cheesecake, making it extra creamy.
Step 3: Incorporate the Peanut Butter Cups
Next, it’s time to add the fun part! Take your chopped Reese’s Peanut Butter Cups and fold them into the cheesecake filling. Be gentle to keep the chunks intact. This will ensure that every slice of your cheesecake has delightful bits of chocolate and peanut butter. The combination of flavors will make your dessert even more irresistible!
Step 4: Assemble the Cheesecake
With the crust and filling ready, it’s time to assemble your cheesecake. Pour the cheesecake filling over the prepared crust in the springform pan. Use a spatula to spread it evenly. Smooth the top to make it look nice. This step is crucial for presentation, especially if you plan to serve it at a gathering. Once it’s all set, cover the pan with plastic wrap or aluminum foil.
Step 5: Chill the Cheesecake
Now, the cheesecake needs to chill. Place it in the refrigerator for at least 4 hours, or overnight if you can wait. Chilling allows the cheesecake to set properly, making it easier to slice. The longer it chills, the better the flavors meld together. Patience is key here, but the wait will be worth it!
Step 6: Prepare the Drizzle
While your cheesecake is chilling, you can prepare the chocolate and peanut butter drizzle. In a microwave-safe bowl, combine the semi-sweet chocolate chips and creamy peanut butter. Heat in the microwave in 30-second intervals, stirring in between, until melted and smooth. If the mixture is too thick, add a tablespoon of milk to thin it out. Once ready, let it cool slightly before using it to drizzle over your cheesecake.
Variations of Peanut Butter Cup Nostalgia Cheesecake
Alternative Toppings for Peanut Butter Cup Nostalgia Cheesecake
While the chocolate and peanut butter drizzle is a delightful topping, there are many other options to enhance your Peanut Butter Cup Nostalgia Cheesecake. Here are some fun alternatives:
- Chopped Nuts: Sprinkle some chopped peanuts or walnuts on top for added crunch and flavor.
- Whipped Cream: A dollop of whipped cream can add a light and airy touch to your cheesecake.
- Chocolate Shavings: Grate some chocolate over the top for a beautiful and elegant finish.
- Caramel Sauce: Drizzle caramel sauce alongside the chocolate drizzle for a sweet twist.
- Fresh Berries: Add fresh strawberries or raspberries for a fruity contrast to the rich flavors.
These toppings not only enhance the visual appeal but also add different textures and flavors. Feel free to mix and match to find your favorite combination!
Gluten-Free Options for Peanut Butter Cup Nostalgia Cheesecake
If you or your guests are following a gluten-free diet, you can easily adapt this recipe. Here are some tips to make your Peanut Butter Cup Nostalgia Cheesecake gluten-free:
- Gluten-Free Crust: Use gluten-free graham cracker crumbs or crushed gluten-free cookies for the crust. Many brands offer delicious options that work perfectly.
- Check Ingredients: Ensure that the peanut butter cups you use are gluten-free. Some brands may contain gluten, so always read the labels.
- Substitute Ingredients: Most of the other ingredients in this recipe are naturally gluten-free, but double-check any pre-packaged items.
By making these simple adjustments, everyone can enjoy a slice of this nostalgic cheesecake without worry. It’s all about making sweet memories together!
Cooking Note for Peanut Butter Cup Nostalgia Cheesecake
When preparing the Peanut Butter Cup Nostalgia Cheesecake, there are a few important cooking notes to keep in mind. These tips will help ensure your cheesecake turns out perfectly every time.
- Room Temperature Ingredients: Make sure your cream cheese and peanut butter are at room temperature before mixing. This helps them blend smoothly, creating a creamy filling without lumps.
- Chilling Time: Don’t rush the chilling process. Allowing the cheesecake to chill for at least 4 hours, or preferably overnight, is crucial. This time helps the flavors meld and the texture to firm up, making it easier to slice.
- Springform Pan: Using a springform pan is ideal for this recipe. It allows for easy removal of the cheesecake without damaging its shape. Just be sure to line the bottom with parchment paper for extra protection.
- Drizzle Consistency: When preparing the chocolate and peanut butter drizzle, aim for a smooth consistency. If it’s too thick, add a little more milk until it reaches the desired pourable texture.
- Serving Temperature: For the best flavor and texture, serve the cheesecake slightly chilled. This enhances the creamy peanut butter and chocolate flavors, making each bite a delightful experience.
By following these cooking notes, you’ll create a Peanut Butter Cup Nostalgia Cheesecake that not only looks amazing but tastes incredible too. Enjoy the process and the delicious results!
Serving Suggestions for Peanut Butter Cup Nostalgia Cheesecake
Serving your Peanut Butter Cup Nostalgia Cheesecake can be just as fun as making it! Here are some delightful suggestions to elevate your dessert experience:
- Slice and Serve: Cut the cheesecake into generous slices. Each slice should showcase the creamy filling and chunks of Reese’s Peanut Butter Cups. Use a sharp knife for clean cuts, and wipe the blade between slices for a neat presentation.
- Garnish with Whipped Cream: Add a dollop of whipped cream on top of each slice. This light addition balances the rich flavors of the cheesecake and adds a lovely visual appeal.
- Pair with Ice Cream: Serve a slice alongside a scoop of vanilla or chocolate ice cream. The cold ice cream complements the creamy cheesecake, creating a delightful contrast.
- Chocolate Sauce Drizzle: For an extra touch of indulgence, drizzle some chocolate sauce over the cheesecake just before serving. This adds a beautiful finish and enhances the chocolate flavor.
- Fresh Fruit Side: Consider serving fresh fruit, like strawberries or raspberries, on the side. The fruity acidity cuts through the richness of the cheesecake, providing a refreshing balance.
- Festive Platter: If you’re serving at a party, arrange slices on a decorative platter. Add some extra chopped peanut butter cups and chocolate shavings around the cheesecake for a festive touch.
These serving suggestions not only enhance the presentation but also elevate the overall dessert experience. Whether it’s a family gathering or a special occasion, your Peanut Butter Cup Nostalgia Cheesecake will surely impress everyone!
Tips for Perfecting Your Peanut Butter Cup Nostalgia Cheesecake
Creating the perfect Peanut Butter Cup Nostalgia Cheesecake is all about attention to detail. Here are some helpful tips to ensure your cheesecake turns out delicious and visually appealing:
- Use Quality Ingredients: The flavor of your cheesecake greatly depends on the quality of the ingredients. Opt for high-quality cream cheese, fresh peanut butter, and real vanilla extract. These choices will enhance the overall taste.
- Don’t Overmix: When combining the cheesecake filling, be careful not to overmix. Overmixing can introduce too much air, leading to cracks in your cheesecake as it sets. Mix just until combined for a smooth texture.
- Chill Thoroughly: As mentioned earlier, chilling is crucial. If you can, let your cheesecake chill overnight. This allows the flavors to deepen and the texture to firm up, making it easier to slice.
- Check for Doneness: If you’re unsure whether your cheesecake is set, gently shake the pan. The center should jiggle slightly but not be liquid. This indicates it’s ready to chill.
- Use Parchment Paper: Lining the bottom of your springform pan with parchment paper can help prevent sticking. This makes it easier to remove the cheesecake without damaging its beautiful shape.
- Let It Rest: After removing the cheesecake from the refrigerator, let it sit at room temperature for about 15-20 minutes before serving. This enhances the flavors and makes it easier to slice.
- Experiment with Flavors: Don’t hesitate to get creative! You can add a pinch of sea salt to the filling for a sweet-salty contrast or mix in some crushed cookies for added texture.
- Presentation Matters: Take the time to present your cheesecake beautifully. A well-garnished cheesecake not only looks appealing but also makes it more inviting to eat. Use fresh fruits, chocolate shavings, or a drizzle of sauce for that extra touch.
By following these tips, you’ll be well on your way to creating a Peanut Butter Cup Nostalgia Cheesecake that is not only delicious but also a showstopper at any gathering. Enjoy the process and the delightful results!
Breakdown of Time for Peanut Butter Cup Nostalgia Cheesecake
Prep Time
The prep time for your Peanut Butter Cup Nostalgia Cheesecake is quite manageable. You’ll need about 30 minutes to gather your ingredients and prepare the crust and filling. This includes mixing the graham cracker crust, blending the cheesecake filling, and folding in the chopped Reese’s Peanut Butter Cups. It’s a fun and straightforward process that allows you to get creative in the kitchen!
Chilling Time
Chilling is a crucial step in making this cheesecake. After assembling the cheesecake, it needs to chill in the refrigerator for at least 4 hours. However, for the best results, aim for an overnight chill. This allows the flavors to meld beautifully and the cheesecake to set properly. Patience is key here, but the wait will be worth it when you take that first delicious bite!
Total Time
In total, you can expect to spend about 30 minutes on preparation and at least 4 hours for chilling. If you choose to chill overnight, the total time will extend to about 24 hours. This includes the time spent preparing and the time spent waiting for your cheesecake to reach its perfect consistency. Remember, good things come to those who wait, especially when it comes to desserts!
Nutritional Information for Peanut Butter Cup Nostalgia Cheesecake
Calories
When indulging in a slice of Peanut Butter Cup Nostalgia Cheesecake, it’s good to be aware of the calorie content. Each slice, which is approximately 1/12 of the cheesecake, contains around 350 calories. This number can vary slightly based on the specific brands of ingredients you use. While this dessert is rich and decadent, it’s perfect for special occasions or a sweet treat to enjoy in moderation.
Protein
This cheesecake is not only delicious but also provides a decent amount of protein. Each slice contains about 8 grams of protein. The protein comes mainly from the cream cheese and peanut butter, making it a satisfying dessert that can help curb your sweet cravings while still providing some nutritional value.
Sodium
For those watching their sodium intake, it’s important to note that each slice of Peanut Butter Cup Nostalgia Cheesecake has approximately 250 milligrams of sodium. This amount is relatively moderate, especially considering the rich flavors and creamy texture. If you’re concerned about sodium, you can opt for low-sodium versions of cream cheese and butter to help reduce the overall content.
Understanding the nutritional information can help you enjoy your Peanut Butter Cup Nostalgia Cheesecake guilt-free. Remember, it’s all about balance and enjoying treats in moderation!
FAQs about Peanut Butter Cup Nostalgia Cheesecake
Can I make Peanut Butter Cup Nostalgia Cheesecake ahead of time?
Absolutely! In fact, making the Peanut Butter Cup Nostalgia Cheesecake ahead of time is a great idea. This dessert actually tastes better after it has had time to chill and the flavors meld together. You can prepare it a day or two in advance. Just make sure to cover it well with plastic wrap or aluminum foil to keep it fresh in the refrigerator. This way, you can enjoy a stress-free dessert on the day of your event!
How should I store Peanut Butter Cup Nostalgia Cheesecake?
Storing your Peanut Butter Cup Nostalgia Cheesecake is simple. Keep it in the refrigerator, covered tightly to prevent it from absorbing any odors. If you have leftovers, it’s best to slice the cheesecake and store individual pieces in airtight containers. This makes it easy to grab a slice whenever you want a sweet treat. The cheesecake can last in the fridge for about 5-7 days, but it’s so delicious, it might not last that long!
Can I use other types of candy in Peanut Butter Cup Nostalgia Cheesecake?
Yes, you can definitely get creative with your candy choices! While Reese’s Peanut Butter Cups are a classic, feel free to experiment with other candies. Some great alternatives include chopped Snickers bars, M&M’s, or even crushed Oreos. Just make sure the candies you choose complement the flavors of peanut butter and chocolate. This way, you can create a unique twist on the original recipe!
Is Peanut Butter Cup Nostalgia Cheesecake suitable for special diets?
This cheesecake can be adapted for various dietary needs. For those who are gluten-free, simply use gluten-free graham cracker crumbs for the crust. If you need a lower-sugar option, consider using sugar substitutes in place of granulated and powdered sugar. Additionally, for a dairy-free version, you can use dairy-free cream cheese and coconut cream instead of heavy whipping cream. Always check the labels of your ingredients to ensure they meet your dietary requirements. With a few adjustments, everyone can enjoy this delightful dessert!
Conclusion: Enjoying Your Peanut Butter Cup Nostalgia Cheesecake
As you take that first bite of your Peanut Butter Cup Nostalgia Cheesecake, you’ll likely find yourself transported back to cherished moments of your childhood. The creamy peanut butter, rich chocolate, and delightful chunks of Reese’s Peanut Butter Cups create a symphony of flavors that is simply irresistible. This dessert is not just a treat; it’s a celebration of sweet memories and joyful gatherings.
Whether you’re serving it at a birthday party, a family gathering, or simply enjoying a quiet evening at home, this cheesecake is sure to impress. Its no-bake nature makes it easy to prepare, allowing you to focus on what truly matters—spending time with loved ones and creating new memories.
Remember, the joy of baking and sharing desserts lies in the love and care you put into them. So, don’t hesitate to get creative with toppings or variations. Each time you make this cheesecake, you can add your personal touch, making it uniquely yours.
So, gather your ingredients, follow the steps, and indulge in this delightful Peanut Butter Cup Nostalgia Cheesecake. Enjoy every creamy, chocolatey bite, and let it remind you of the sweet moments that life has to offer. Happy baking!
Relevant Recipes Link:
Craving more peanut butter and chocolate goodness? Indulge in these delectable recipes:
- Peanut Butter Cup Cottage Cheese Mousse: A Creamy Delight
- Peanut Butter Cup Cheesecake: An Irresistible Treat
- Peanut Butter Chocolate Chip Cookies: Simply Irresistible
For more tempting recipes and culinary inspiration, follow us on Pinterest!