Introduction to Oreo and Condensed Milk Ice Cream No-Churn Recipe
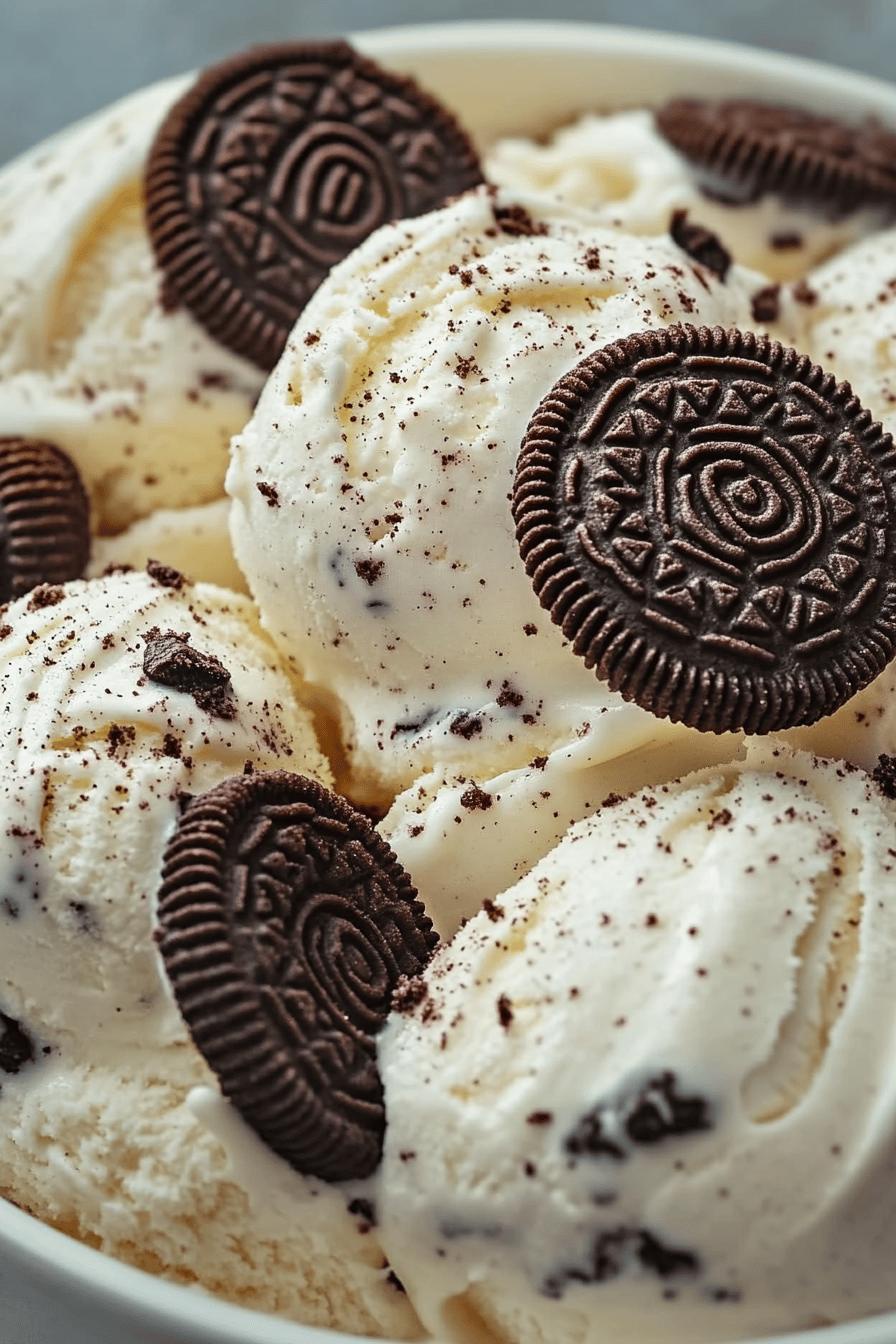
Are you craving something sweet and creamy? Look no further! The Oreo and condensed milk ice cream no-churn recipe is here to satisfy your dessert desires. This delightful treat combines the rich flavors of Oreo cookies with the smoothness of sweetened condensed milk. Best of all, you don’t need an ice cream maker to whip it up! Just a few simple ingredients and a little bit of time will lead you to a delicious homemade ice cream that everyone will love.
Why Choose a No-Churn Ice Cream Recipe?
No-churn ice cream recipes are perfect for those who want to enjoy homemade ice cream without the hassle of traditional methods. First, they save you time and effort. You won’t need to worry about churning or constantly checking the ice cream as it freezes. Instead, you can simply mix your ingredients and let the freezer do the work.
Additionally, no-churn recipes often require fewer ingredients. In this case, you only need heavy cream, sweetened condensed milk, and Oreos. This simplicity makes it easy for anyone to create a delicious dessert, even if you’re not an experienced cook.
Moreover, the texture of no-churn ice cream is incredibly creamy and smooth. The combination of whipped cream and condensed milk creates a rich base that perfectly complements the crunchy Oreo pieces. This means you can enjoy a delightful treat that feels indulgent without any complicated steps.
So, whether you’re hosting a summer barbecue or just want a sweet treat at home, this Oreo and condensed milk ice cream no-churn recipe is the way to go. Let’s dive into the ingredients you’ll need to get started!
Ingredients for Oreo and Condensed Milk Ice Cream No-Churn Recipe
To create your own Oreo and condensed milk ice cream, you’ll need just a few simple ingredients. This recipe is not only easy but also requires items you might already have in your kitchen. Here’s what you’ll need:
- 2 cups heavy cream: This is the base of your ice cream. Heavy cream whips up beautifully, giving your ice cream a rich and creamy texture.
- 1 can (14 ounces) sweetened condensed milk: This adds sweetness and creaminess. It’s the secret ingredient that makes this ice cream so indulgent.
- 15-20 Oreo cookies: Crushed into small pieces, these cookies provide that classic cookies and cream flavor. You can adjust the amount based on how cookie-filled you want your ice cream.
- Optional toppings: Consider adding chocolate syrup, whipped cream, or extra crushed Oreos for serving. These can enhance the presentation and flavor of your dessert.
With these ingredients on hand, you’re ready to make a delicious treat that will impress your family and friends. The combination of heavy cream, sweetened condensed milk, and Oreos creates a delightful balance of flavors and textures. Now, let’s move on to the step-by-step preparation of this easy no-churn ice cream!
Step-by-Step Preparation of Oreo and Condensed Milk Ice Cream No-Churn Recipe
Now that you have your ingredients ready, it’s time to dive into the fun part: making your Oreo and condensed milk ice cream! Follow these simple steps to create a creamy, dreamy dessert that will have everyone asking for seconds.
Step 1: Whipping the Heavy Cream
Start by pouring the heavy cream into a large mixing bowl. Using an electric mixer, whip the cream on medium speed. Keep whipping until soft peaks form. This usually takes about 3 to 5 minutes. You want the cream to be fluffy but not too stiff. Soft peaks will help your ice cream stay light and airy.
As you whip, you might notice the cream turning white and thickening. This is a good sign! Once you see those soft peaks, stop mixing. Over-whipping can lead to a grainy texture, so be careful not to go too far.
Step 2: Folding in the Sweetened Condensed Milk
Next, it’s time to add the sweetened condensed milk. Gently pour it over the whipped cream. Using a spatula, fold the condensed milk into the whipped cream. Be gentle! You want to keep as much air in the mixture as possible. This will ensure your ice cream is light and fluffy.
Continue folding until the mixture is well combined. You should see a smooth, creamy texture without any streaks of white. This step is crucial because the sweetened condensed milk adds sweetness and creaminess to your ice cream.
Step 3: Adding the Crushed Oreo Cookies
Now comes the fun part—adding the crushed Oreo cookies! Take your crushed Oreos and sprinkle them into the creamy mixture. Again, use your spatula to fold them in gently. Make sure the cookie pieces are evenly distributed throughout the ice cream.
Feel free to adjust the amount of Oreos based on your preference. If you love cookies, add more! This step adds that delightful crunch and classic cookies and cream flavor that everyone loves.
Step 4: Freezing the Mixture
Once everything is mixed together, it’s time to transfer your ice cream mixture into a freezer-safe container. Spread it out evenly and smooth the top with your spatula. You can also add a few extra crushed Oreos on top for decoration if you like.
Cover the container with a lid or plastic wrap. Place it in the freezer and let it freeze for at least 6 hours, or overnight for the best results. The longer it freezes, the firmer your ice cream will be.
And there you have it! You’ve just made your very own Oreo and condensed milk ice cream without any churning. Now, let’s explore some fun variations you can try with this delicious recipe!
Variations of Oreo and Condensed Milk Ice Cream No-Churn Recipe
While the classic Oreo and condensed milk ice cream is already a treat, you can easily customize it to suit your taste. Here are some fun variations to consider. These ideas will help you create a unique dessert that everyone will love!
Adding Different Mix-Ins
Mix-ins can take your ice cream to the next level! Here are some tasty options:
- Chocolate Chips: Add semi-sweet or dark chocolate chips for an extra chocolatey flavor. They add a delightful texture and richness.
- Peanut Butter: Swirl in some creamy or crunchy peanut butter for a nutty twist. This combination pairs wonderfully with Oreos!
- Caramel Sauce: Drizzle caramel sauce into the mixture before freezing. This will create a sweet, gooey surprise in every scoop.
- Mint Extract: For a refreshing twist, add a few drops of mint extract. This will give your ice cream a cool, minty flavor that complements the chocolate.
Feel free to get creative! You can mix and match these options to find your perfect combination. Just remember to fold in any mix-ins gently to keep the texture light and airy.
Flavor Swaps for the Base
If you want to change the flavor profile of your ice cream, consider swapping out the base ingredients. Here are some ideas:
- Vanilla Ice Cream Base: Instead of using Oreos, try adding crushed vanilla wafers or graham crackers for a different flavor. This will give you a classic cookies and cream taste with a twist.
- Chocolate Ice Cream Base: Use chocolate heavy cream or add cocoa powder to the mixture for a rich chocolate ice cream. This pairs well with any mix-ins!
- Fruit Flavors: For a fruity version, replace the Oreos with crushed strawberries or raspberries. You can also add a splash of fruit puree to the base for a refreshing treat.
These variations allow you to experiment and find the perfect flavor that suits your cravings. Whether you stick with the classic or try something new, your homemade ice cream will surely impress!
Cooking Note for Oreo and Condensed Milk Ice Cream No-Churn Recipe
When making your Oreo and condensed milk ice cream, there are a few important cooking notes to keep in mind. These tips will help ensure that your ice cream turns out perfectly every time.
First, make sure your heavy cream is cold. Cold cream whips up better, resulting in a fluffier texture. If possible, chill your mixing bowl and beaters in the refrigerator for about 15 minutes before starting. This extra step can make a big difference in achieving those soft peaks.
Next, be gentle when folding in the sweetened condensed milk and crushed Oreos. The goal is to maintain the airiness of the whipped cream. If you mix too vigorously, you may deflate the cream, leading to a denser ice cream.
Also, consider the freezing time. While 6 hours is the minimum, letting your ice cream freeze overnight will yield the best results. This allows the flavors to meld together beautifully and gives the ice cream a firmer texture.
Lastly, if you find your ice cream too hard after freezing, let it sit at room temperature for a few minutes before scooping. This will make it easier to serve and enjoy. With these cooking notes in mind, you’re all set to create a delicious batch of Oreo and condensed milk ice cream!
Serving Suggestions for Oreo and Condensed Milk Ice Cream No-Churn Recipe
Now that you’ve made your delicious Oreo and condensed milk ice cream, it’s time to think about how to serve it! Presentation can elevate your dessert experience, making it even more enjoyable. Here are some creative ways to serve your homemade ice cream that will impress your family and friends.
Creative Ways to Serve
Serving your ice cream can be as fun as making it! Here are some ideas to get you started:
- Ice Cream Sundaes: Scoop your ice cream into a bowl and top it with whipped cream, chocolate syrup, and extra crushed Oreos. This classic sundae style is sure to please!
- Ice Cream Sandwiches: Use two cookies, like chocolate chip or graham crackers, to create ice cream sandwiches. Just scoop the ice cream between the cookies and enjoy a delightful treat.
- Milkshakes: Blend a scoop of your ice cream with milk for a creamy milkshake. You can add a drizzle of chocolate syrup or a sprinkle of crushed Oreos for extra flavor.
- In a Cone: Serve your ice cream in waffle cones for a fun, portable treat. You can dip the tops in melted chocolate and sprinkle with crushed Oreos for a special touch.
These serving ideas not only make your dessert look appealing but also add a fun twist to enjoying your ice cream. Feel free to mix and match these suggestions to create your own unique serving style!
Pairing with Other Desserts
Your Oreo and condensed milk ice cream can also be paired with other desserts for a delightful combination. Here are some tasty pairings to consider:
- Brownies: Serve a scoop of ice cream on top of warm brownies. The contrast of warm and cold is simply irresistible!
- Fruit Pies: A slice of apple or cherry pie with a scoop of your ice cream makes for a classic dessert duo. The creamy ice cream complements the fruity flavors perfectly.
- Chocolate Cake: Pair your ice cream with a slice of rich chocolate cake. The combination of textures and flavors will leave everyone wanting more.
- Cheesecake: A scoop of ice cream on top of a slice of cheesecake adds a creamy layer that enhances the dessert experience.
These pairings can elevate your dessert game and create a memorable treat for any occasion. Whether you’re hosting a party or enjoying a quiet night in, these serving suggestions will make your Oreo and condensed milk ice cream even more delightful!
Tips for Perfecting Your Oreo and Condensed Milk Ice Cream No-Churn Recipe
Creating the perfect Oreo and condensed milk ice cream is all about attention to detail. With a few helpful tips, you can ensure that your homemade treat turns out creamy, delicious, and full of flavor. Here are some essential tips to keep in mind as you make your ice cream:
- Use High-Quality Ingredients: The better the ingredients, the better your ice cream will taste. Opt for fresh heavy cream and high-quality sweetened condensed milk. This will enhance the overall flavor and texture of your dessert.
- Don’t Over-Whip the Cream: As mentioned earlier, whipping the cream to soft peaks is key. If you over-whip, the cream can become grainy, which affects the smoothness of your ice cream. Stop whipping as soon as you see soft peaks forming.
- Chill Your Tools: For the best results, chill your mixing bowl and beaters before whipping the cream. Cold tools help the cream whip up faster and achieve a fluffier texture.
- Experiment with Cookie Varieties: While Oreos are a classic choice, don’t hesitate to try other cookies. Chocolate sandwich cookies, peanut butter cookies, or even graham crackers can add a unique twist to your ice cream.
- Layer Your Mix-Ins: If you’re adding multiple mix-ins, consider layering them in the ice cream mixture. This way, you’ll get a delightful surprise of flavors in every scoop!
- Let It Sit Before Serving: After freezing, let your ice cream sit at room temperature for about 5-10 minutes before scooping. This will make it easier to serve and enhance the creamy texture.
- Store Properly: To keep your ice cream fresh, store it in an airtight container. This prevents ice crystals from forming and keeps your ice cream smooth and creamy.
By following these tips, you’ll be well on your way to mastering the art of no-churn ice cream. Each scoop will be a delightful experience, filled with the rich flavors of Oreo and sweetened condensed milk. Enjoy your homemade creation and share it with friends and family!
Breakdown of Time for Oreo and Condensed Milk Ice Cream No-Churn Recipe
Understanding the time needed for each step of the Oreo and condensed milk ice cream no-churn recipe can help you plan your dessert-making session. Here’s a simple breakdown of the time involved, so you know exactly what to expect.
Prep Time
The prep time for this delicious ice cream is quite short. You’ll need about 15 minutes to gather your ingredients and prepare the mixture. This includes whipping the heavy cream, folding in the sweetened condensed milk, and adding the crushed Oreos. It’s a quick and easy process that anyone can manage!
Cooking Time
Since this is a no-churn recipe, there’s no actual cooking involved. However, the freezing time is essential. You’ll need to let your ice cream freeze for at least 6 hours. For the best results, consider freezing it overnight. This allows the flavors to meld beautifully and gives your ice cream a firmer texture.
Total Time
In total, you’re looking at about 15 minutes of prep time plus a minimum of 6 hours of freezing time. So, if you plan to make this ice cream, it’s best to start early in the day or the night before. This way, you can enjoy your homemade treat whenever you’re ready!
With this time breakdown, you can easily fit this delightful dessert into your schedule. Whether it’s a hot summer day or a cozy night in, your Oreo and condensed milk ice cream will be worth the wait!
Nutritional Information for Oreo and Condensed Milk Ice Cream No-Churn Recipe
Understanding the nutritional content of your homemade Oreo and condensed milk ice cream can help you enjoy it even more. While this treat is indulgent, it’s good to know what you’re consuming. Here’s a breakdown of the key nutritional information for a typical serving of this delicious ice cream.
Calories
One serving of Oreo and condensed milk ice cream (about 1/2 cup) contains approximately 250-300 calories. This number can vary based on the specific brands of ingredients you use and the amount of Oreos added. While it’s a sweet treat, it’s important to enjoy it in moderation!
Protein
In terms of protein, each serving provides around 3-4 grams. The protein mainly comes from the heavy cream and sweetened condensed milk. While this isn’t a high-protein dessert, it does offer a small boost, making it a delightful treat after a meal or as a snack.
Sodium
For sodium content, you can expect about 100-150 milligrams per serving. This amount is relatively low, especially considering that most desserts can be higher in sodium. However, if you’re watching your sodium intake, it’s always good to be mindful of portion sizes.
Overall, while this Oreo and condensed milk ice cream is a delicious indulgence, it’s best enjoyed as an occasional treat. Knowing the nutritional information can help you make informed choices while still satisfying your sweet tooth!
FAQs about Oreo and Condensed Milk Ice Cream No-Churn Recipe
Can I use other cookies instead of Oreos?
Absolutely! While Oreos are a classic choice, you can experiment with other cookies to create unique flavors. Consider using chocolate sandwich cookies, peanut butter cookies, or even graham crackers. Each type of cookie will give your ice cream a different taste and texture, so feel free to get creative!
How long does the ice cream need to freeze?
Your ice cream needs to freeze for at least 6 hours to achieve the right consistency. However, for the best results, it’s recommended to freeze it overnight. This allows the flavors to meld together beautifully and ensures a firmer texture, making it easier to scoop.
Is it possible to make this recipe dairy-free?
Yes, you can make a dairy-free version of this ice cream! Substitute the heavy cream with a dairy-free alternative, such as coconut cream or almond milk. For the sweetened condensed milk, look for dairy-free options available in stores or make your own using coconut milk and sugar. This way, you can enjoy a delicious treat without dairy!
What is the best way to store leftover ice cream?
To keep your leftover ice cream fresh, store it in an airtight container. This prevents ice crystals from forming and helps maintain its creamy texture. Make sure to press a piece of plastic wrap directly onto the surface of the ice cream before sealing the container. This extra step can help keep your ice cream smooth and delicious for longer!
Conclusion on Oreo and Condensed Milk Ice Cream No-Churn Recipe
In conclusion, the Oreo and condensed milk ice cream no-churn recipe is a delightful way to satisfy your sweet cravings. With its creamy texture and the irresistible crunch of Oreos, this homemade treat is sure to impress everyone. The best part? You don’t need any special equipment or complicated techniques to make it!
This recipe is perfect for any occasion, whether you’re hosting a summer gathering or enjoying a cozy night at home. The simplicity of the ingredients and the ease of preparation make it accessible for cooks of all skill levels. Plus, the ability to customize it with different mix-ins and flavors means you can create a unique dessert every time.
As you enjoy your homemade ice cream, remember to share it with family and friends. The joy of making and sharing delicious treats is what makes cooking so special. So, gather your loved ones, scoop out some ice cream, and indulge in the blissful combination of cookies and cream!
We hope you give this no-churn recipe a try and experience the joy of creating your own frozen dessert. Happy ice cream making!
Craving something sweet and creamy? Indulge in these delectable ice cream recipes:
- Creamy Coffee Ice Cream: A Perfect Sweet Treat
- Creamy Cinnamon Ice Cream: Perfect for Sweet Cravings
- Creamy Strawberry Ice Cream: A Summery Delight
For more fantastic recipes and food inspiration, follow us on Pinterest!