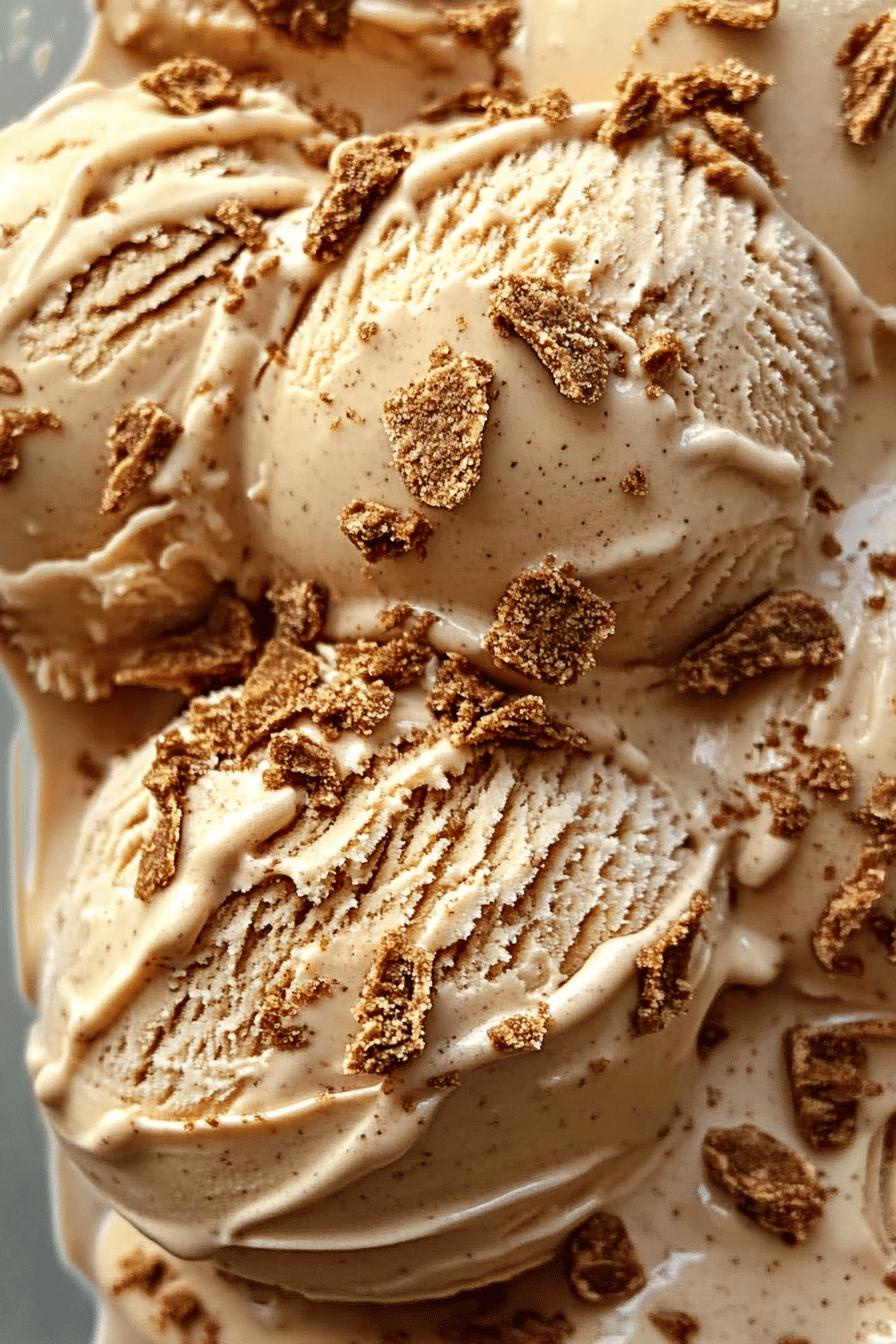
Introduction to No-Churn Cookie Butter Ice Cream
Are you ready to dive into a world of creamy delight? No-Churn Cookie Butter Ice Cream is here to satisfy your sweet tooth without the fuss of an ice cream maker. This delightful treat combines the rich flavor of cookie butter with the lightness of whipped cream, creating a dessert that is both indulgent and easy to make. Whether you’re hosting a summer gathering or simply treating yourself, this recipe is sure to impress.
What Makes No-Churn Cookie Butter Ice Cream Special?
What sets this ice cream apart? First, it’s the simplicity. You don’t need any fancy equipment or complicated techniques. Just a few ingredients and a little patience will yield a creamy, dreamy dessert. The cookie butter adds a unique flavor that is both sweet and slightly spiced, making each bite a delightful experience. Plus, the no-churn aspect means you can whip it up in no time, making it perfect for spontaneous cravings!
Why You Should Try This Recipe Today
Why wait? This No-Churn Cookie Butter Ice Cream is not only delicious but also incredibly versatile. You can enjoy it on its own, or use it as a topping for brownies, pies, or even pancakes. It’s a fantastic way to cool down on a hot day or to indulge in a cozy dessert at night. Plus, making it at home allows you to control the ingredients, ensuring a treat that’s just right for you. So grab your mixing bowl and get ready to create a scoop of happiness!
Ingredients for No-Churn Cookie Butter Ice Cream
To create your own No-Churn Cookie Butter Ice Cream, you’ll need just a handful of simple ingredients. Each one plays a vital role in achieving that creamy, dreamy texture and delightful flavor. Here’s what you’ll need:
- 2 cups heavy whipping cream: This is the base of your ice cream. The heavy cream provides the rich, velvety texture that makes this dessert so indulgent.
- 1 cup sweetened condensed milk: This ingredient adds sweetness and creaminess. It helps to create that smooth consistency without the need for churning.
- 1 cup cookie butter: The star of the show! Cookie butter brings a unique flavor that is both sweet and slightly spiced, making every bite a treat.
- 1 teaspoon vanilla extract: This adds a lovely depth of flavor, enhancing the overall taste of your ice cream.
- Pinch of salt: A little salt balances the sweetness and enhances the flavors.
With these ingredients on hand, you’re just a few steps away from enjoying a delicious homemade ice cream. The best part? You can easily find these items at your local grocery store. So, let’s gather them and get ready to whip up something special!
Step-by-Step Preparation of No-Churn Cookie Butter Ice Cream
Now that you have all your ingredients ready, it’s time to bring this delicious No-Churn Cookie Butter Ice Cream to life! Follow these simple steps, and you’ll be enjoying a creamy treat in no time.
Step 1: Gather Your Ingredients
Before you start, make sure you have everything you need. Gather your heavy whipping cream, sweetened condensed milk, cookie butter, vanilla extract, and a pinch of salt. Having everything in one place will make the process smoother and more enjoyable. Plus, it’s always fun to see your ingredients lined up, ready for action!
Step 2: Whip the Cream
Next, take your heavy whipping cream and pour it into a large mixing bowl. Using an electric mixer, whip the cream on medium speed until soft peaks form. This usually takes about 3 to 5 minutes. You want the cream to be fluffy and light, but be careful not to over-whip it. If you do, it can turn grainy. Soft peaks mean that when you lift the mixer, the cream holds its shape but still has a slight droop. This step is crucial for that airy texture!
Step 3: Combine Sweetened Condensed Milk and Cookie Butter
In another bowl, combine the sweetened condensed milk and cookie butter. Use a spatula or a whisk to mix them together until smooth. This mixture should be creamy and well-blended. The cookie butter will add a wonderful flavor, so make sure it’s fully incorporated. If you want to add a little extra flavor, now is the time to mix in the vanilla extract and a pinch of salt. This will enhance the sweetness and balance the flavors beautifully.
Step 4: Fold in the Whipped Cream
Now comes the fun part! Gently fold the whipped cream into the cookie butter mixture. Use a spatula and a gentle motion to combine them. Be careful not to deflate the whipped cream too much. You want to keep that light and airy texture. Continue folding until you see no streaks of white. This step is key to achieving that creamy, dreamy consistency that makes this ice cream so special!
Step 5: Transfer to a Container
Once everything is well combined, it’s time to transfer your mixture into a suitable container. A loaf pan or an airtight container works great. Spread the mixture evenly, smoothing the top with a spatula. This will help it freeze evenly. If you like, you can sprinkle a little extra cookie butter on top for added flavor and decoration. It’s all about those little touches!
Step 6: Freeze Until Firm
Finally, cover your container with a lid or plastic wrap and place it in the freezer. Let it freeze for at least 6 hours, or until it’s firm. If you can wait overnight, that’s even better! The longer it freezes, the better the texture will be. Once it’s ready, scoop out a generous portion and enjoy your homemade No-Churn Cookie Butter Ice Cream!
And there you have it! With these simple steps, you’ve created a delightful dessert that’s sure to impress. Now, let’s explore some fun variations to make this treat even more exciting!
Variations of No-Churn Cookie Butter Ice Cream
While the classic No-Churn Cookie Butter Ice Cream is already a delightful treat, there are many ways to customize it. Adding mix-ins or trying alternative flavor combinations can elevate your ice cream experience. Let’s explore some fun variations that will make your homemade ice cream even more exciting!
Adding Mix-Ins for Extra Flavor
Mix-ins are a fantastic way to add texture and flavor to your No-Churn Cookie Butter Ice Cream. Here are some tasty options to consider:
- Chocolate Chips: Fold in mini chocolate chips for a sweet surprise in every bite. The chocolate pairs wonderfully with the cookie butter.
- Crushed Cookies: Add crushed graham crackers or your favorite cookies for a delightful crunch. This adds a fun texture that complements the creaminess.
- Chopped Nuts: Walnuts or pecans can add a nutty flavor and a satisfying crunch. Just be sure to chop them finely so they mix well.
- Swirls of Caramel: Drizzle some caramel sauce into the mixture before freezing. This creates beautiful swirls and adds a rich sweetness.
Feel free to get creative! You can mix and match these options to find your perfect combination. Just remember to fold in your mix-ins gently to keep that airy texture intact.
Alternative Flavor Combinations
If you’re in the mood for something different, consider trying these alternative flavor combinations:
- Chocolate Cookie Butter: Use chocolate cookie butter instead of the regular kind. This will give your ice cream a rich chocolate flavor that’s hard to resist.
- Peanut Butter Swirl: Replace cookie butter with peanut butter for a nutty twist. You can also swirl in some jelly for a fun take on a classic sandwich!
- Spiced Pumpkin: For a seasonal treat, add pumpkin puree and a dash of pumpkin spice. This creates a creamy, fall-inspired ice cream.
- Mint Chocolate Chip: Add a few drops of mint extract and some chocolate chips for a refreshing minty flavor. This is perfect for those hot summer days!
These variations allow you to tailor your No-Churn Cookie Butter Ice Cream to your taste. Whether you stick with the classic recipe or try something new, you’re sure to enjoy every scoop!
Cooking Note for No-Churn Cookie Butter Ice Cream
When making No-Churn Cookie Butter Ice Cream, a few cooking notes can help ensure your dessert turns out perfectly every time. First, always use cold heavy whipping cream. Chilling your mixing bowl and beaters in the freezer for about 10 minutes before whipping can also help achieve better volume and texture. This simple step can make a big difference in the cream’s ability to hold its shape.
Next, be mindful of the folding technique. Gently folding the whipped cream into the cookie butter mixture is crucial. This method helps maintain the light and airy texture of the whipped cream, which is essential for a creamy ice cream. If you mix too vigorously, you risk deflating the whipped cream, leading to a denser final product.
Additionally, consider the freezing time. While the ice cream will be firm after about 6 hours, letting it freeze overnight is ideal. This allows the flavors to meld beautifully, resulting in a richer taste. If you’re in a hurry, you can scoop it out after 6 hours, but be prepared for a slightly softer texture.
Lastly, if you find your ice cream too hard to scoop after freezing, let it sit at room temperature for about 5 to 10 minutes before serving. This will soften it just enough to make scooping easier without compromising the texture. With these cooking notes in mind, you’re all set to create a delicious batch of No-Churn Cookie Butter Ice Cream that will impress your family and friends!
Serving Suggestions for No-Churn Cookie Butter Ice Cream
Now that you’ve made your delicious No-Churn Cookie Butter Ice Cream, it’s time to think about how to serve it! This creamy treat is versatile and can be enjoyed in many creative ways. Let’s explore some fun serving suggestions that will elevate your dessert experience.
Creative Ways to Serve
Serving your No-Churn Cookie Butter Ice Cream can be as fun as making it! Here are some creative ideas:
- Ice Cream Sundae: Create a delightful sundae by scooping your ice cream into a bowl and topping it with whipped cream, chocolate syrup, and a cherry on top. You can even sprinkle some crushed cookies for added texture!
- Cookie Butter Milkshake: Blend a scoop of your ice cream with milk for a creamy milkshake. Add a drizzle of cookie butter on top for an extra treat!
- Ice Cream Sandwiches: Use your favorite cookies to make ice cream sandwiches. Just scoop the ice cream between two cookies and enjoy a delicious handheld treat.
- Waffle Bowl: Serve your ice cream in a waffle bowl for a fun twist. The crispy texture of the waffle complements the creamy ice cream perfectly.
These serving ideas not only make your dessert look appealing but also enhance the overall flavor experience. Feel free to mix and match toppings and presentations to find your favorite way to enjoy this delightful treat!
Pairing with Other Desserts
No-Churn Cookie Butter Ice Cream pairs wonderfully with other desserts. Here are some delicious combinations to consider:
- Brownies: Serve a scoop of ice cream on top of warm brownies. The combination of warm and cold is simply irresistible!
- Fruit Pies: A scoop of ice cream alongside a slice of apple or cherry pie creates a classic dessert duo that everyone loves.
- Pancakes or Waffles: Add a scoop of ice cream on top of pancakes or waffles for a decadent breakfast treat. Drizzle with syrup for extra sweetness!
- Chocolate Cake: Pair your ice cream with a slice of rich chocolate cake. The creamy ice cream balances the cake’s richness beautifully.
These pairing suggestions will take your dessert game to the next level. Whether you enjoy your No-Churn Cookie Butter Ice Cream on its own or alongside other treats, it’s sure to be a hit!
Tips for Perfect No-Churn Cookie Butter Ice Cream
Creating the perfect No-Churn Cookie Butter Ice Cream is all about attention to detail. With a few helpful tips, you can ensure that your homemade ice cream turns out creamy, delicious, and ready to impress. Let’s dive into some essential tips for storage and troubleshooting common issues.
Storage Tips
Proper storage is key to maintaining the quality of your No-Churn Cookie Butter Ice Cream. Here are some tips to keep it fresh:
- Use an Airtight Container: Always store your ice cream in an airtight container. This prevents ice crystals from forming and keeps your ice cream smooth and creamy.
- Label and Date: If you’re making multiple flavors, label your containers with the flavor and date. This helps you keep track of freshness and ensures you enjoy your treats at their best.
- Keep it Cold: Store your ice cream in the back of the freezer, where the temperature is most consistent. Avoid placing it in the door, as the temperature fluctuates more there.
- Cover the Surface: For extra protection, place a piece of plastic wrap directly on the surface of the ice cream before sealing the container. This helps prevent freezer burn.
By following these storage tips, you can enjoy your No-Churn Cookie Butter Ice Cream for weeks to come without sacrificing flavor or texture!
Troubleshooting Common Issues
Even with the best intentions, sometimes things don’t go as planned. Here are some common issues you might encounter and how to fix them:
- Ice Cream Too Hard: If your ice cream is too hard to scoop, let it sit at room temperature for about 5 to 10 minutes before serving. This will soften it just enough for easy scooping.
- Ice Crystals Forming: If you notice ice crystals in your ice cream, it may be due to improper storage. Ensure your container is airtight and that you’re not leaving it out too long during serving.
- Not Sweet Enough: If you find your ice cream isn’t sweet enough, you can add a little more cookie butter or sweetened condensed milk next time. Taste the mixture before freezing to adjust the sweetness to your liking.
- Too Dense: If your ice cream turns out too dense, it may be due to over-mixing the whipped cream. Remember to fold gently to keep that light texture!
With these troubleshooting tips, you can easily overcome common challenges and enjoy a delightful No-Churn Cookie Butter Ice Cream every time. Happy scooping!
Breakdown of Time for No-Churn Cookie Butter Ice Cream
Understanding the time needed to make No-Churn Cookie Butter Ice Cream can help you plan your dessert-making adventure. Here’s a simple breakdown of the time involved in each step, so you know exactly what to expect!
Prep Time
The prep time for this delightful ice cream is quite short. You’ll need about 15 to 20 minutes to gather your ingredients, whip the cream, and combine everything together. This includes:
- Gathering all your ingredients and tools.
- Whipping the heavy cream until soft peaks form.
- Mixing the sweetened condensed milk and cookie butter.
- Folding the whipped cream into the mixture.
With just a little bit of time, you’ll be well on your way to creating a delicious treat!
Cooking Time
While there’s no actual cooking involved in this no-churn recipe, the freezing time is essential. After you’ve mixed everything together, you’ll need to freeze the ice cream for at least 6 hours. For the best results, consider letting it freeze overnight. This allows the flavors to meld beautifully and ensures a creamy texture. So, while the active time is minimal, the waiting time is crucial!
Total Time
In total, you’re looking at about 15 to 20 minutes of active preparation time, plus a minimum of 6 hours of freezing time. If you choose to let it freeze overnight, the total time will be around 6 hours and 20 minutes to 24 hours. Here’s a quick summary:
- Active Prep Time: 15 to 20 minutes
- Freezing Time: 6 hours (or overnight for best results)
- Total Time: 6 hours and 20 minutes to 24 hours
Now that you know the time breakdown, you can easily plan when to make your No-Churn Cookie Butter Ice Cream. Enjoy the process and the delicious results!
Nutritional Information for No-Churn Cookie Butter Ice Cream
Understanding the nutritional information of your No-Churn Cookie Butter Ice Cream can help you enjoy it mindfully. While this dessert is a delightful treat, it’s good to know what’s in it. Let’s break down the calories and macronutrients, as well as some health considerations to keep in mind.
Calories and Macronutrients
Each serving of No-Churn Cookie Butter Ice Cream is packed with flavor, but it also contains calories. Here’s a general breakdown of the nutritional content per serving (approximately 1/2 cup):
- Calories: About 250-300 calories
- Fat: 18-20 grams
- Saturated Fat: 10-12 grams
- Carbohydrates: 25-30 grams
- Sugar: 20-25 grams
- Protein: 2-3 grams
These values can vary based on the specific brands of ingredients you use. For instance, using a lower-fat cream or a sugar-free sweetened condensed milk can alter the nutritional profile. Always check the labels for the most accurate information!
Health Considerations
While No-Churn Cookie Butter Ice Cream is a delicious treat, it’s important to enjoy it in moderation. Here are some health considerations to keep in mind:
- High in Sugar: This ice cream contains a significant amount of sugar, primarily from the sweetened condensed milk and cookie butter. If you’re watching your sugar intake, consider enjoying smaller portions.
- Rich in Fat: The heavy cream contributes to the richness of this dessert. While fats are essential for a balanced diet, consuming them in moderation is key, especially saturated fats.
- Allergies: Be cautious if you have allergies. This recipe contains dairy and may also include allergens from cookie butter, such as nuts. Always check ingredient labels for potential allergens.
- Homemade Options: If you want a healthier version, consider making your own cookie butter using natural ingredients. This way, you can control the sugar and fat content.
By being aware of the nutritional information and health considerations, you can enjoy your No-Churn Cookie Butter Ice Cream while making informed choices. Treat yourself, but remember that balance is key!
FAQs About No-Churn Cookie Butter Ice Cream
Can I make No-Churn Cookie Butter Ice Cream without an ice cream maker?
Absolutely! The beauty of this No-Churn Cookie Butter Ice Cream recipe is that it requires no ice cream maker at all. You simply whip the cream, mix in the other ingredients, and freeze. This makes it an easy and accessible dessert for everyone, regardless of kitchen equipment. So, you can enjoy a creamy treat without any special tools!
How long does No-Churn Cookie Butter Ice Cream last in the freezer?
Your homemade No-Churn Cookie Butter Ice Cream can last in the freezer for about 2 to 3 weeks. To keep it fresh, store it in an airtight container. Just remember that the longer it sits, the more likely it is to develop ice crystals. For the best flavor and texture, try to enjoy it within the first couple of weeks!
Can I use homemade cookie butter for this recipe?
Yes, you can definitely use homemade cookie butter! In fact, making your own cookie butter allows you to control the ingredients and customize the flavor to your liking. Just ensure that your homemade version has a smooth consistency similar to store-bought cookie butter. This will help achieve the creamy texture you want in your ice cream.
What can I substitute for sweetened condensed milk?
If you need a substitute for sweetened condensed milk, there are a few options you can try. One popular alternative is to use coconut milk mixed with sugar. For every cup of coconut milk, add about 1/2 cup of sugar and heat until dissolved. Another option is to use evaporated milk combined with sugar, though this will not be as sweet. You can also find store-bought dairy-free sweetened condensed milk if you prefer a non-dairy option. Just keep in mind that these substitutes may slightly alter the flavor and texture of your ice cream.
Conclusion: Enjoying Your No-Churn Cookie Butter Ice Cream Experience
Congratulations! You’ve successfully created a delightful batch of No-Churn Cookie Butter Ice Cream. Now, it’s time to savor every creamy, dreamy bite. This homemade treat is not just a dessert; it’s an experience that brings joy and satisfaction. Whether you’re enjoying it on a hot summer day or cozying up with a bowl during a movie night, this ice cream is sure to please.
As you indulge in your creation, remember the versatility of this recipe. You can customize it with various mix-ins or flavor combinations to suit your taste. The possibilities are endless! Share it with family and friends, or keep it all to yourself—either way, you’re in for a treat.
Don’t forget to experiment with different serving ideas. From sundaes to milkshakes, there are so many fun ways to enjoy your No-Churn Cookie Butter Ice Cream. Pair it with your favorite desserts for an extra special touch, or simply enjoy it on its own. Each scoop is a little piece of heaven!
Finally, as you make this recipe a staple in your dessert repertoire, keep in mind the tips and tricks shared throughout this article. They’ll help you achieve the perfect texture and flavor every time. So, go ahead and treat yourself to this easy, decadent dessert. You deserve it!
Happy scooping, and enjoy your No-Churn Cookie Butter Ice Cream experience!
Relevant Recipes Link: