Introduction to No-Bake Peanut Butter Banana Oat Bars
Are you looking for a quick and healthy snack? Look no further! No-bake peanut butter banana oat bars are the perfect solution. These bars are not only easy to make, but they also pack a punch of flavor and nutrition. With just a few simple ingredients, you can whip up a delicious treat that satisfies your sweet tooth without the guilt. Whether you need a quick breakfast or a post-workout snack, these bars are a fantastic choice.
Why Choose No-Bake Peanut Butter Banana Oat Bars?
No-bake recipes are a lifesaver for busy individuals. They save time and energy while still delivering tasty results. These peanut butter banana oat bars require no oven, making them perfect for hot days or when you want to avoid heating up your kitchen. Plus, they are incredibly versatile! You can customize them to fit your taste preferences. Whether you like them chewy or crunchy, these bars can be adjusted to your liking.
The Benefits of Peanut Butter and Banana
Peanut butter and banana are a match made in heaven. Peanut butter is rich in protein and healthy fats, making it a great energy booster. It helps keep you full and satisfied for longer periods. On the other hand, bananas are packed with vitamins and minerals, especially potassium. They provide natural sweetness and a creamy texture that enhances the flavor of the bars. Together, they create a nutritious snack that fuels your body and delights your taste buds.
In summary, no-bake peanut butter banana oat bars are a delicious and healthy option for anyone looking to enjoy a quick snack. With their easy preparation and wholesome ingredients, they are sure to become a favorite in your household!
Ingredients for No-Bake Peanut Butter Banana Oat Bars
To create your own batch of no-bake peanut butter banana oat bars, you’ll need a few simple ingredients. Each one plays a vital role in delivering that delightful flavor and texture. Here’s what you’ll need:
- 2 ripe bananas: The riper, the better! They add natural sweetness and moisture.
- 1 cup creamy peanut butter: This is the star ingredient, providing richness and protein.
- 2 cups rolled oats: These give the bars their chewy texture and are a great source of fiber.
- 1/4 cup honey or maple syrup: This adds sweetness and helps bind the ingredients together.
- 1 teaspoon vanilla extract: A splash of vanilla enhances the overall flavor.
- Optional add-ins: Consider adding chocolate chips, nuts, or seeds for extra flavor and crunch.
These ingredients are not only easy to find but also healthy. They come together to create a delicious snack that you can feel good about eating. Plus, you can easily adjust the quantities based on your preferences or dietary needs. Now that you have your ingredients ready, let’s move on to the preparation steps!
Preparation of No-Bake Peanut Butter Banana Oat Bars
Now that you have all your ingredients ready, it’s time to prepare your no-bake peanut butter banana oat bars! The steps are simple and quick, making this a fun activity for the whole family. Let’s dive into the preparation process!
Step 1: Gather Your Ingredients
Before you start, make sure you have everything you need. Gather your ripe bananas, creamy peanut butter, rolled oats, honey or maple syrup, and vanilla extract. If you’re adding any optional ingredients like chocolate chips or nuts, have those ready too. Having everything in one place will make the process smoother and more enjoyable!
Step 2: Prepare the Banana
Next, it’s time to prepare the bananas. Peel the ripe bananas and place them in a mixing bowl. Using a fork, mash the bananas until they are smooth. You want a creamy consistency, as this will help bind the bars together. If you like a few chunks for texture, feel free to leave some small pieces. The mashed bananas will add natural sweetness and moisture to your bars!
Step 3: Mix the Ingredients
Now, add the creamy peanut butter, honey or maple syrup, and vanilla extract to the mashed bananas. Stir everything together until well combined. Once mixed, gradually add the rolled oats. Stir until the oats are fully coated with the mixture. If you’re using any optional add-ins like chocolate chips or nuts, fold them in at this stage. This is where you can get creative!
Step 4: Press the Mixture into a Pan
After mixing, it’s time to transfer the mixture into a pan. Line an 8×8 inch baking dish with parchment paper for easy removal. Pour the mixture into the pan and use a spatula or your hands to press it down firmly. Make sure it’s evenly spread out and compacted. This step is crucial for ensuring your bars hold together once set!
Step 5: Chill and Set the Bars
Finally, place the pan in the refrigerator. Let the mixture chill for at least 1-2 hours. This allows the bars to firm up and makes them easier to cut. Once they are set, remove the bars from the pan using the parchment paper. Cut them into squares or rectangles, depending on your preference. Now, your no-bake peanut butter banana oat bars are ready to enjoy!
These bars are perfect for snacking, breakfast, or even dessert. They are nutritious, delicious, and oh-so-easy to make. Enjoy your homemade treat!
Variations of No-Bake Peanut Butter Banana Oat Bars
While the classic no-bake peanut butter banana oat bars are delicious on their own, there are many fun variations you can try! These tweaks can add new flavors and textures, making your bars even more exciting. Let’s explore some tasty options!
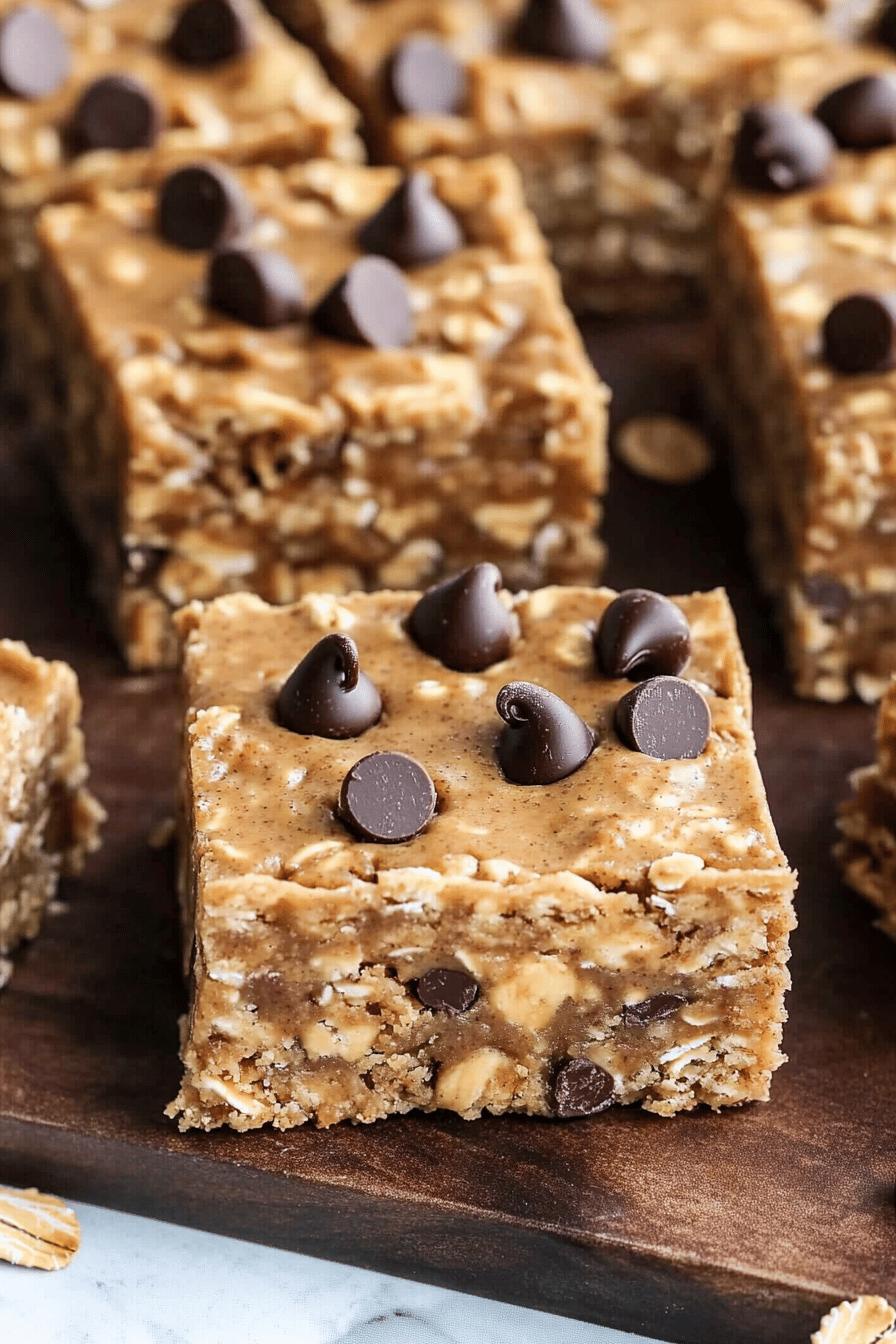
Adding Chocolate Chips
If you’re a chocolate lover, adding chocolate chips is a must! Simply fold in about 1/2 cup of semi-sweet or dark chocolate chips into the mixture during Step 3. The chocolate will melt slightly when mixed, creating a delightful contrast with the creamy peanut butter and sweet banana. This addition not only enhances the flavor but also makes the bars feel like a special treat!
Incorporating Nuts and Seeds
For those who enjoy a bit of crunch, consider adding nuts and seeds. Chopped almonds, walnuts, or pecans can be mixed in for added texture and healthy fats. You can also sprinkle in some chia seeds or flaxseeds for an extra boost of nutrition. Aim for about 1/4 to 1/2 cup of your chosen nuts or seeds. This variation not only adds flavor but also increases the protein content of your bars!
Using Different Nut Butters
While peanut butter is the star of this recipe, you can switch things up by using different nut butters. Almond butter, cashew butter, or sunflower seed butter can all work beautifully in this recipe. Each nut butter brings its unique flavor and nutritional benefits. Just make sure to choose a nut butter that you enjoy, as it will greatly influence the taste of your bars!
These variations allow you to customize your no-bake peanut butter banana oat bars to suit your taste. Feel free to mix and match these ideas to create your perfect snack. Enjoy experimenting!
Cooking Note for No-Bake Peanut Butter Banana Oat Bars
When making no-bake peanut butter banana oat bars, a few cooking notes can help ensure your bars turn out perfectly every time. These tips will guide you through the process and enhance your overall experience.
First, always use ripe bananas. The riper the bananas, the sweeter and creamier your bars will be. Look for bananas with brown spots, as they are ideal for mashing. If your bananas are not ripe enough, you might end up with a less flavorful bar.
Next, choose a high-quality peanut butter. Natural peanut butter without added sugars or oils will give you the best flavor and texture. If you prefer a sweeter bar, you can adjust the amount of honey or maple syrup to your liking. Just remember, a little goes a long way!
Additionally, be mindful of the consistency of your mixture. If it feels too dry, add a splash of milk or a bit more peanut butter. Conversely, if it’s too wet, sprinkle in a few more oats. Achieving the right balance is key to ensuring your bars hold together well.
Lastly, don’t skip the chilling step! Allowing the bars to set in the refrigerator is crucial. This step helps the ingredients bind together, making it easier to cut them into neat squares. If you’re in a hurry, you can place them in the freezer for about 30 minutes instead.
By following these cooking notes, you’ll create delicious no-bake peanut butter banana oat bars that are sure to impress. Enjoy your cooking adventure!
Serving Suggestions for No-Bake Peanut Butter Banana Oat Bars
Now that you’ve made your delicious no-bake peanut butter banana oat bars, it’s time to think about how to enjoy them! These bars are versatile and can be served in many delightful ways. Here are some perfect pairings and creative serving ideas to elevate your snacking experience.
Perfect Pairings for Your Bars
Pairing your no-bake bars with complementary foods can enhance their flavor and make for a more satisfying snack. Here are some great options:
- Fresh Fruit: Serve your bars with slices of fresh fruit like apples, strawberries, or blueberries. The juicy sweetness of the fruit balances the rich flavors of the bars.
- Yogurt: A dollop of Greek yogurt on the side adds creaminess and a protein boost. You can even drizzle some honey on top for extra sweetness!
- Nut Milk: Enjoy your bars with a glass of almond milk or oat milk. This refreshing drink complements the nutty flavors of the bars perfectly.
- Herbal Tea: A warm cup of herbal tea can be a soothing addition. Try chamomile or peppermint for a calming effect.
These pairings not only enhance the taste but also add nutritional value to your snack time. Feel free to mix and match based on your preferences!
Creative Ways to Serve
Serving your no-bake peanut butter banana oat bars can be fun and creative! Here are some ideas to make your presentation stand out:
- Bar Platter: Arrange the cut bars on a colorful platter. Add some fresh fruit and nuts around them for a beautiful display. This is perfect for gatherings or family snacks.
- Bar Sandwich: For a fun twist, spread a layer of yogurt or nut butter between two bars to create a sandwich. This adds extra flavor and makes for a filling treat!
- Chocolate Drizzle: Melt some dark chocolate and drizzle it over the bars before serving. This adds a touch of elegance and a rich chocolate flavor.
- Mini Bites: Cut the bars into smaller squares for bite-sized snacks. These are great for parties or lunchboxes, making them easy to grab and enjoy!
With these serving suggestions, you can enjoy your no-bake peanut butter banana oat bars in a variety of delightful ways. Get creative and have fun with your snacks!
Tips for Making the Best No-Bake Peanut Butter Banana Oat Bars
To ensure your no-bake peanut butter banana oat bars turn out perfectly every time, consider these helpful tips. They will guide you in choosing the right ingredients, storing your bars, and adjusting sweetness levels to suit your taste.
Choosing the Right Ingredients
When it comes to making delicious no-bake bars, the quality of your ingredients matters. Start with ripe bananas; they should have brown spots for the best flavor and sweetness. Next, opt for natural peanut butter without added sugars or oils. This choice enhances the taste and keeps your bars healthy. If you prefer a different nut butter, make sure it’s smooth and creamy for easy mixing. Lastly, select rolled oats that are whole and unprocessed. They provide the best texture and nutrition for your bars.
Storing Your Bars
Proper storage is key to keeping your no-bake peanut butter banana oat bars fresh. After cutting them into squares, place them in an airtight container. You can store them in the refrigerator for up to a week. If you want to keep them longer, consider freezing them. Wrap each bar in plastic wrap and place them in a freezer-safe bag. They can last for up to three months in the freezer. When you’re ready to enjoy, simply thaw them in the fridge or at room temperature.
Adjusting Sweetness Levels
Everyone has different preferences when it comes to sweetness. If you like your bars sweeter, feel free to add more honey or maple syrup. Start with a tablespoon at a time, mixing well after each addition. Taste the mixture before pressing it into the pan. If you find it too sweet, you can balance it out by adding a bit more oats or peanut butter. This flexibility allows you to create a snack that perfectly suits your taste buds!
By following these tips, you’ll be well on your way to making the best no-bake peanut butter banana oat bars. Enjoy the process and the delicious results!
Breakdown of Time for No-Bake Peanut Butter Banana Oat Bars
Understanding the time it takes to make no-bake peanut butter banana oat bars can help you plan your snack-making session. Here’s a simple breakdown of the time involved in preparing these delicious treats.
Prep Time
The prep time for these bars is quite short. You’ll need about 10-15 minutes to gather your ingredients, mash the bananas, and mix everything together. This quick preparation makes it easy to whip up a batch even on busy days!
Cooking Time
Since this is a no-bake recipe, there’s no actual cooking time involved. However, you will need to chill the mixture in the refrigerator. This chilling time typically takes about 1-2 hours. This step is essential for the bars to set properly, so be sure to plan for it!
Total Time
In total, you can expect to spend around 1 hour and 15 minutes to 2 hours and 15 minutes from start to finish. This includes both the prep time and the chilling time. Once the bars are set, you can enjoy them right away or store them for later!
With such a quick and easy process, making no-bake peanut butter banana oat bars is a fantastic choice for a healthy snack. You’ll love how simple it is to create a delicious treat that fits into your busy lifestyle!
Nutritional Information for No-Bake Peanut Butter Banana Oat Bars
Understanding the nutritional content of your no-bake peanut butter banana oat bars is essential for making informed choices about your snacks. These bars are not only delicious but also packed with nutrients that can benefit your health. Here’s a breakdown of the key nutritional components:
Calories
Each no-bake peanut butter banana oat bar contains approximately 150-200 calories, depending on the specific ingredients and portion size. This makes them a satisfying snack that provides energy without excessive calories. They are perfect for a mid-afternoon pick-me-up or a post-workout treat!
Protein
Protein is a vital nutrient for maintaining muscle and overall health. Each bar offers about 5-7 grams of protein, primarily from the peanut butter and oats. This protein content helps keep you feeling full and satisfied, making these bars a great option for a healthy snack or breakfast.
Sodium
When it comes to sodium, these bars are relatively low, containing around 50-100 milligrams per serving. This is a reasonable amount, especially considering that many snacks can be high in sodium. Keeping sodium levels in check is important for heart health, making these bars a smart choice for those watching their intake.
In summary, no-bake peanut butter banana oat bars are not only tasty but also nutritious. With a good balance of calories, protein, and low sodium, they make for a wholesome snack that you can enjoy guilt-free. So go ahead, indulge in these delicious bars while knowing you’re making a healthy choice!
FAQs about No-Bake Peanut Butter Banana Oat Bars
Can I use other fruits in the recipe?
Absolutely! While bananas are the star of this recipe, you can experiment with other fruits. Applesauce can be a great substitute for bananas, adding moisture and sweetness. You can also try mashed avocados for a creamy texture. If you want to add some fruit chunks, consider using dried fruits like raisins or cranberries. Just remember that the flavor and texture will change slightly, so choose fruits that you enjoy!
How long do these bars last?
When stored properly, no-bake peanut butter banana oat bars can last up to a week in the refrigerator. Make sure to keep them in an airtight container to maintain freshness. If you want to keep them longer, you can freeze them. They can last for up to three months in the freezer. Just wrap each bar in plastic wrap and place them in a freezer-safe bag. When you’re ready to enjoy, simply thaw them in the fridge or at room temperature!
Are these bars suitable for meal prep?
Yes, these bars are perfect for meal prep! They are easy to make in large batches and can be stored for quick snacks throughout the week. Just cut them into squares and store them in an airtight container. You can grab one on your way out the door or pack them in your lunch. They make a convenient and healthy option for busy days!
Can I freeze No-Bake Peanut Butter Banana Oat Bars?
Yes, you can freeze these bars! Freezing is a great way to extend their shelf life. Wrap each bar tightly in plastic wrap and place them in a freezer-safe bag. When you want to enjoy one, simply take it out and let it thaw in the fridge or at room temperature. This way, you’ll always have a delicious snack ready to go!
Conclusion on No-Bake Peanut Butter Banana Oat Bars
In conclusion, no-bake peanut butter banana oat bars are a fantastic addition to your snack repertoire. They are not only easy to make but also packed with nutrition and flavor. With their delightful combination of creamy peanut butter, sweet bananas, and wholesome oats, these bars are sure to satisfy your cravings without the guilt.
Final Thoughts on Enjoying Your Bars
As you enjoy your homemade no-bake peanut butter banana oat bars, remember that the possibilities are endless. Feel free to experiment with different ingredients and variations to find your perfect combination. Whether you enjoy them as a quick breakfast, a post-workout snack, or a sweet treat, these bars are versatile enough to fit any occasion.
Moreover, the nutritional benefits of these bars make them a smart choice for anyone looking to maintain a healthy lifestyle. With their balance of protein, healthy fats, and fiber, they can help keep you energized throughout the day. So, gather your ingredients, follow the simple steps, and indulge in a delicious snack that you can feel good about!
Happy snacking!
Relevant Recipes Link:
Craving the irresistible combination of peanut butter and chocolate? Dive into these must-try recipes:
- Irresistible Peanut Butter Chocolate Bars: A Decadent Delight
- Creamy Peanut Butter Ice Cream: A Cool and Creamy Treat
- Ultimate Peanut Butter Chocolate Milkshake: Pure Indulgence
For more delectable recipes and culinary inspiration, follow us on Pinterest!