Introduction to No-Bake Choco Velvet Fantasy
Are you ready to treat yourself to something truly delightful? The No-Bake Choco Velvet Fantasy is here to satisfy your sweet tooth without the hassle of baking. This dessert is not just a feast for the eyes; it’s a rich, creamy indulgence that melts in your mouth. With its smooth chocolate mousse and crunchy cookie crust, it’s a dessert that everyone will love.
What Makes No-Bake Choco Velvet Fantasy Special?
What sets the No-Bake Choco Velvet Fantasy apart is its simplicity and flavor. First, you don’t need an oven! This means you can whip it up even on the hottest days without heating your kitchen. The combination of a chocolate cookie crust and a velvety mousse creates a perfect balance of textures. Plus, it’s topped with fluffy whipped cream, making it a true chocolate lover’s dream.
Another special aspect is its versatility. You can easily customize it to suit your taste. Whether you prefer a hint of coffee, a splash of vanilla, or even a fruity twist, the options are endless. This dessert is not just a treat; it’s an experience that can be tailored to any palate.
The Perfect Dessert for Any Occasion
Whether it’s a birthday party, a family gathering, or just a cozy night in, the No-Bake Choco Velvet Fantasy fits right in. Its elegant appearance makes it suitable for celebrations, while its easy preparation means you can make it any day of the week. Imagine serving this stunning dessert at your next dinner party. Your guests will be impressed, and you’ll enjoy the compliments!
Moreover, this dessert is a great way to bond with family or friends. Get everyone involved in the preparation process. Kids will love helping with the mixing and layering. It’s a fun activity that ends with a delicious reward. So, gather your loved ones and dive into the world of no-bake desserts with this fantastic recipe!
Ingredients for No-Bake Choco Velvet Fantasy
To create your own No-Bake Choco Velvet Fantasy, you’ll need a few simple ingredients. Each component plays a vital role in achieving that rich, velvety texture and delightful flavor. Here’s what you’ll need:
- For the Chocolate Cookie Crust:
- 1 ½ cups chocolate cookie crumbs (like Oreos or chocolate graham crackers)
- ½ cup unsalted butter, melted
- 2 tablespoons granulated sugar (optional, for added sweetness)
- For the Chocolate Mousse Filling:
- 1 cup heavy whipping cream
- 1 cup semi-sweet chocolate chips
- ½ cup powdered sugar
- 1 teaspoon vanilla extract
- 1 tablespoon cocoa powder (for extra chocolate flavor)
- For the Topping:
- 1 cup heavy whipping cream (for whipped topping)
- 2 tablespoons powdered sugar (for sweetening the whipped cream)
- Chocolate shavings or cocoa powder (for garnish)
These ingredients come together to create a dessert that is not only delicious but also visually appealing. The chocolate cookie crust provides a crunchy base, while the mousse filling adds a creamy richness. Finally, the whipped cream topping gives it a light and airy finish. Gather these ingredients, and you’re ready to embark on your no-bake dessert adventure!
Step-by-Step Preparation of No-Bake Choco Velvet Fantasy
Now that you have all your ingredients ready, it’s time to dive into the fun part: preparing your No-Bake Choco Velvet Fantasy. Follow these simple steps to create a dessert that will wow everyone!
Step 1: Prepare the Chocolate Cookie Crust
First, let’s make the chocolate cookie crust. Start by crushing the chocolate cookies into fine crumbs. You can use a food processor for this, or simply place them in a zip-top bag and crush them with a rolling pin. Once you have your crumbs, transfer them to a mixing bowl.
Next, add the melted butter and granulated sugar (if using) to the cookie crumbs. Mix everything together until the crumbs are well-coated and resemble wet sand. This will help the crust hold together nicely.
Now, press the mixture firmly into the bottom of a 9-inch pie dish or springform pan. Make sure it’s even and compact. This step is crucial for a sturdy base. Once done, place the crust in the refrigerator to chill while you prepare the mousse.
Step 2: Make the Smooth Chocolate Mousse
For the chocolate mousse, start by melting the semi-sweet chocolate chips. You can do this in a microwave-safe bowl, heating in 30-second intervals, stirring in between until smooth. Allow the melted chocolate to cool slightly.
In a separate bowl, whip the heavy cream until soft peaks form. Gradually add the powdered sugar, vanilla extract, and cocoa powder while continuing to whip. This will add sweetness and enhance the chocolate flavor.
Once the whipped cream is ready, gently fold in the melted chocolate. Be careful not to deflate the whipped cream; you want to keep that light and airy texture. Mix until fully combined, and your mousse is ready!
Step 3: Assemble the No-Bake Choco Velvet Fantasy
Now it’s time to assemble your dessert! Take the chilled chocolate cookie crust out of the refrigerator. Spoon the chocolate mousse into the crust, spreading it evenly with a spatula. Make sure to fill it all the way to the edges for a beautiful presentation.
Once the mousse is spread out, gently tap the pan on the counter to remove any air bubbles. This will help the mousse settle nicely. After that, cover the dessert with plastic wrap and return it to the refrigerator. Let it chill for at least 4 hours, or overnight if you can wait!
Step 4: Top with Whipped Cream and Garnish
After the mousse has set, it’s time for the final touches! In a clean bowl, whip the heavy cream with powdered sugar until stiff peaks form. This will be your topping. Spread the whipped cream over the chilled mousse layer, creating a smooth and fluffy finish.
For the finishing touch, sprinkle chocolate shavings or a dusting of cocoa powder on top. This not only adds a decorative flair but also enhances the chocolatey goodness. Your No-Bake Choco Velvet Fantasy is now ready to be served!
Slice it up, serve it chilled, and watch as everyone enjoys this delightful treat. You’ve just created a dessert that’s sure to impress!
Variations of No-Bake Choco Velvet Fantasy
If you’re looking to mix things up a bit, the No-Bake Choco Velvet Fantasy offers plenty of room for creativity. You can easily switch up the crust or the mousse flavors to create a dessert that’s uniquely yours. Let’s explore some exciting variations!
Alternative Crust Options
While the classic chocolate cookie crust is delicious, you can try different bases to suit your taste. Here are a few ideas:
- Graham Cracker Crust: Use crushed graham crackers instead of chocolate cookies for a lighter flavor. Mix with melted butter and a bit of sugar for sweetness.
- Nut Crust: For a gluten-free option, blend nuts like almonds or walnuts into fine crumbs. Combine with melted butter and press into the pan for a crunchy base.
- Oreo Mint Crust: Use mint-flavored Oreos for a refreshing twist. This adds a delightful minty flavor that pairs well with chocolate.
- Chocolate Biscuit Crust: Try using chocolate digestive biscuits for a different texture and taste. They provide a unique flavor that complements the mousse beautifully.
Feel free to experiment with these crust options. Each one brings its own character to the dessert, making it fun to try new combinations!
Flavor Variations for the Mousse
The chocolate mousse filling is where you can really get creative. Here are some flavor variations to consider:
- White Chocolate Mousse: Swap semi-sweet chocolate chips for white chocolate chips. This creates a sweeter, creamier mousse that’s equally indulgent.
- Peanut Butter Mousse: Add ½ cup of creamy peanut butter to the melted chocolate. This gives a rich, nutty flavor that chocolate lovers will adore.
- Mint Chocolate Mousse: Incorporate a few drops of peppermint extract into the mousse for a refreshing minty taste. This is perfect for holiday gatherings!
- Fruit-Infused Mousse: Blend in pureed fruits like raspberries or strawberries for a fruity twist. This adds a burst of flavor and a beautiful color to your dessert.
These variations allow you to customize your No-Bake Choco Velvet Fantasy to match any occasion or personal preference. So, don’t hesitate to get creative and make it your own!
Cooking Note for No-Bake Choco Velvet Fantasy
When preparing the No-Bake Choco Velvet Fantasy, there are a few important cooking notes to keep in mind. These tips will help ensure that your dessert turns out perfectly every time.
First, make sure to use high-quality chocolate for the mousse. The flavor of the chocolate significantly impacts the overall taste of the dessert. Semi-sweet chocolate chips are a great choice, but feel free to experiment with dark or milk chocolate based on your preference.
Next, when whipping the cream, it’s essential to start with cold heavy cream. This helps achieve the best volume and texture. If your kitchen is warm, consider chilling your mixing bowl and beaters in the refrigerator for a few minutes before whipping. This simple step can make a big difference!
Additionally, be gentle when folding the melted chocolate into the whipped cream. Use a spatula and a light hand to maintain the airy texture of the mousse. Over-mixing can lead to a dense mousse, which is not what you want for this dessert.
Lastly, patience is key! Allow the dessert to chill for at least four hours, or overnight if possible. This time helps the mousse set properly, ensuring a smooth and creamy texture. Rushing this step may result in a mousse that doesn’t hold its shape when sliced.
By following these cooking notes, you’ll create a No-Bake Choco Velvet Fantasy that is not only delicious but also visually stunning. Enjoy the process and the delightful results!
Serving Suggestions for No-Bake Choco Velvet Fantasy
Now that your No-Bake Choco Velvet Fantasy is ready, it’s time to think about how to serve this delightful dessert. Presentation can elevate your dessert experience, making it even more enjoyable for you and your guests. Here are some creative serving suggestions to consider:
- Individual Servings: Instead of serving the dessert from a pie dish, consider using small glass cups or jars. Layer the chocolate mousse and whipped cream in each cup for a beautiful presentation. This also makes it easy for guests to grab their own serving!
- Garnish with Fresh Berries: Add a pop of color and freshness by topping each slice or cup with fresh berries. Strawberries, raspberries, or blueberries complement the chocolate flavor beautifully and add a fruity twist.
- Chocolate Drizzle: For an extra touch of indulgence, drizzle melted chocolate over the whipped cream topping. This adds a rich, glossy finish that looks stunning and tastes divine.
- Serve with Ice Cream: Pair your No-Bake Choco Velvet Fantasy with a scoop of vanilla or mint chocolate chip ice cream. The cold ice cream contrasts nicely with the creamy mousse, creating a delightful combination.
- Chocolate Shavings and Nuts: Sprinkle chocolate shavings or crushed nuts on top of the whipped cream for added texture and flavor. This not only enhances the visual appeal but also adds a delightful crunch.
When serving, don’t forget to provide spoons or dessert forks for easy enjoyment. You can also create a dessert bar where guests can customize their servings with different toppings. This interactive element adds fun to your gathering and allows everyone to enjoy their No-Bake Choco Velvet Fantasy just the way they like it!
With these serving suggestions, your No-Bake Choco Velvet Fantasy will not only taste amazing but also look like a masterpiece. Enjoy every bite and the smiles it brings to your table!
Tips for Perfecting Your No-Bake Choco Velvet Fantasy
Creating the perfect No-Bake Choco Velvet Fantasy is all about attention to detail. With a few helpful tips, you can elevate your dessert to a whole new level. Here are some essential tips to ensure your no-bake treat turns out flawlessly every time:
- Use Quality Ingredients: The flavor of your dessert starts with the ingredients. Opt for high-quality chocolate and fresh cream. This will enhance the overall taste and make your mousse richer and more decadent.
- Chill Your Tools: For the best results, chill your mixing bowl and beaters before whipping the cream. Cold tools help achieve better volume and a fluffier texture, making your mousse light and airy.
- Don’t Rush the Chilling Time: Allow your dessert to chill for at least four hours, or overnight if possible. This helps the mousse set properly, ensuring it holds its shape when sliced. Patience pays off!
- Fold Gently: When combining the melted chocolate with the whipped cream, use a gentle folding motion. This keeps the mousse light and prevents it from becoming dense. Over-mixing can ruin the texture.
- Experiment with Flavors: Don’t hesitate to try different flavors in your mousse or crust. Adding a hint of espresso or a splash of liqueur can create exciting variations. Get creative and make it your own!
- Presentation Matters: Take time to present your dessert beautifully. Use a piping bag for the whipped cream topping, and consider garnishing with fresh fruits or chocolate shavings. A well-presented dessert is always more appealing!
- Store Properly: If you have leftovers, store them in an airtight container in the refrigerator. This keeps your dessert fresh and delicious for a few days. Just remember to enjoy it within a week!
By following these tips, you’ll be well on your way to mastering the No-Bake Choco Velvet Fantasy. Each bite will be a delightful experience, and your guests will be asking for seconds!
Breakdown of Time for No-Bake Choco Velvet Fantasy
Understanding the time needed to create your No-Bake Choco Velvet Fantasy is essential for planning. This dessert is not only easy to make but also allows you to manage your time effectively. Here’s a breakdown of the time involved in preparing this delightful treat:
Prep Time
The prep time for the No-Bake Choco Velvet Fantasy is approximately 30 minutes. This includes gathering your ingredients, preparing the chocolate cookie crust, and making the chocolate mousse. It’s a quick process that allows you to enjoy the fun of creating a delicious dessert without spending hours in the kitchen.
Cooking Time
Since this is a no-bake dessert, there’s no actual cooking time involved. However, you will need to chill the dessert to allow the mousse to set properly. This chilling time is crucial for achieving the perfect texture. You should plan for at least 4 hours of chilling time in the refrigerator. If you can, letting it chill overnight will yield even better results!
Total Time
In total, you’re looking at about 4 hours and 30 minutes from start to finish. This includes the 30 minutes of prep time and the minimum 4 hours of chilling time. With this simple breakdown, you can easily fit the preparation of the No-Bake Choco Velvet Fantasy into your schedule, making it a fantastic option for any occasion.
So, gather your ingredients, set aside some time, and get ready to impress your family and friends with this delightful dessert!
Nutritional Information for No-Bake Choco Velvet Fantasy
Understanding the nutritional content of your No-Bake Choco Velvet Fantasy can help you enjoy this dessert while keeping track of your dietary needs. Here’s a breakdown of the key nutritional components per serving, which is typically one slice of the dessert:
Calories
Each slice of the No-Bake Choco Velvet Fantasy contains approximately 350 calories. This calorie count includes the chocolate cookie crust, the rich chocolate mousse, and the whipped cream topping. While it’s a decadent treat, it’s important to enjoy it in moderation, especially if you’re watching your calorie intake.
Protein
In terms of protein, each serving provides about 5 grams. The protein mainly comes from the heavy cream used in both the mousse and the whipped topping. While this isn’t a high-protein dessert, it does contribute to your daily intake, especially when paired with other protein-rich foods during your meal.
Sodium
Each slice of the No-Bake Choco Velvet Fantasy contains around 150 milligrams of sodium. This amount is relatively moderate, making it a suitable option for most diets. However, if you are on a low-sodium diet, you may want to be mindful of the ingredients, especially if you choose to use salted butter or other salty components.
Overall, the No-Bake Choco Velvet Fantasy is a delightful dessert that can fit into a balanced diet. Enjoy it as an occasional treat, and savor every rich, chocolatey bite!
FAQs about No-Bake Choco Velvet Fantasy
Can I make No-Bake Choco Velvet Fantasy ahead of time?
Absolutely! The No-Bake Choco Velvet Fantasy is perfect for making ahead of time. In fact, it tastes even better after chilling for a while. You can prepare it a day or two in advance and store it in the refrigerator. Just make sure to cover it well with plastic wrap to keep it fresh. This way, you can enjoy your dessert without any last-minute stress!
How long does No-Bake Choco Velvet Fantasy last in the fridge?
Your No-Bake Choco Velvet Fantasy can last in the fridge for about 3 to 5 days. To keep it at its best, store it in an airtight container. This helps maintain its creamy texture and delicious flavor. However, it’s best enjoyed fresh, so try to finish it within a few days for the ultimate taste experience!
Can I substitute ingredients in No-Bake Choco Velvet Fantasy?
Yes, you can definitely substitute ingredients in the No-Bake Choco Velvet Fantasy! If you have dietary restrictions or preferences, here are some ideas:
- For a gluten-free option, use gluten-free chocolate cookies or a nut crust.
- Instead of heavy cream, you can use coconut cream for a dairy-free version.
- If you want a lower-sugar option, consider using sugar substitutes in the mousse and whipped cream.
Feel free to get creative and adjust the recipe to suit your needs!
What can I use instead of whipped cream for No-Bake Choco Velvet Fantasy?
If you’re looking for alternatives to whipped cream, there are several options you can try:
- Coconut Whipped Cream: This is a great dairy-free option. Just chill a can of coconut milk, scoop out the solid part, and whip it until fluffy.
- Greek Yogurt: For a healthier twist, use whipped Greek yogurt. It adds creaminess and a bit of tang.
- Cool Whip: If you prefer a store-bought option, Cool Whip works well as a topping.
These alternatives can provide a different flavor and texture while still complementing the rich chocolate mousse beautifully!
Conclusion: Enjoying Your No-Bake Choco Velvet Fantasy
As you reach the end of your culinary journey with the No-Bake Choco Velvet Fantasy, it’s time to savor the fruits of your labor. This dessert is not just a treat; it’s an experience that brings joy to any occasion. Whether you’re celebrating a special event or simply indulging in a sweet craving, this no-bake delight is sure to impress.
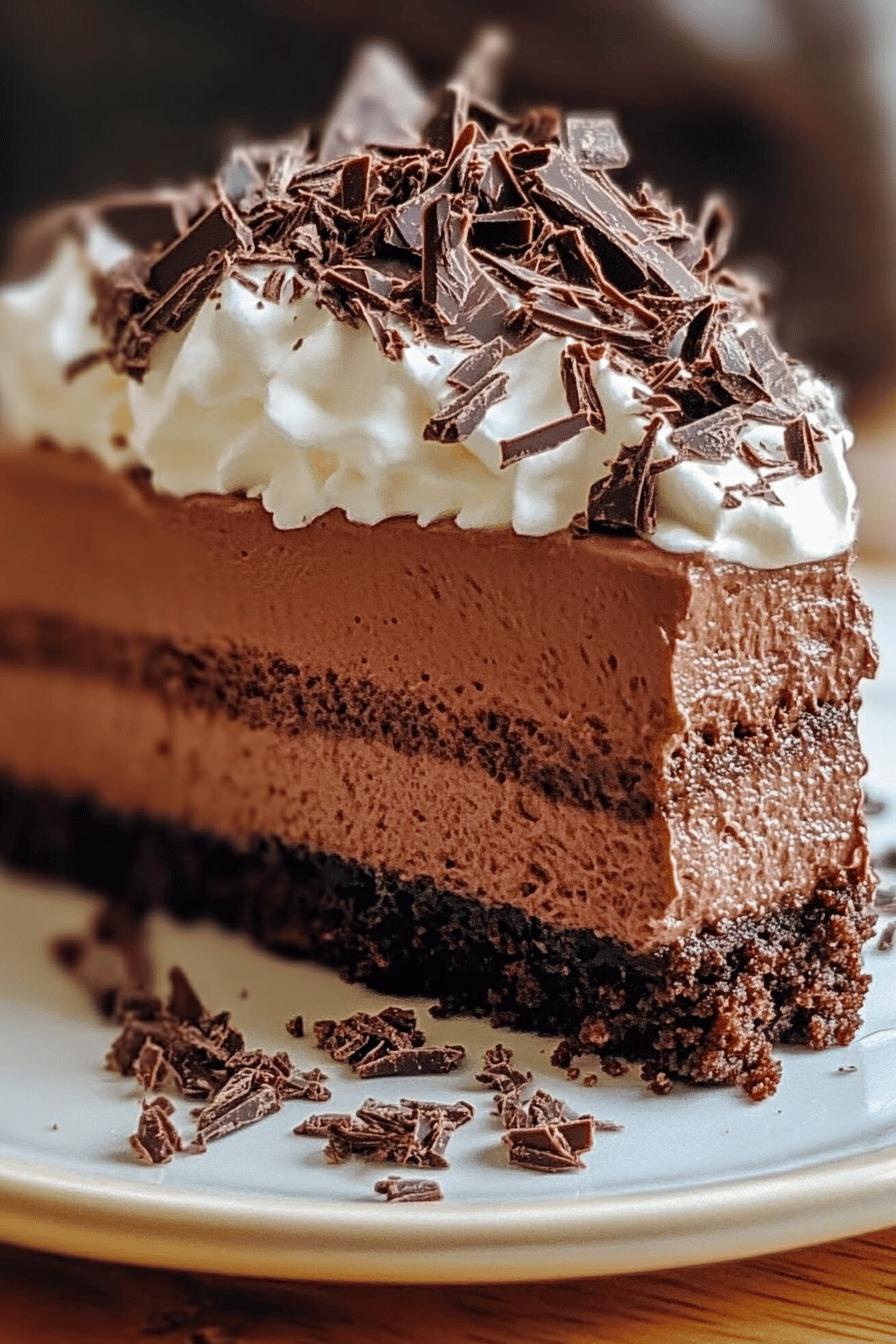
Imagine slicing into the velvety layers, revealing the rich chocolate mousse nestled in a crunchy cookie crust. The fluffy whipped cream topping adds a lightness that perfectly balances the dessert’s richness. Each bite is a harmonious blend of textures and flavors that will leave you wanting more.
Sharing this dessert with family and friends can create lasting memories. It’s a wonderful way to bring people together, whether you’re hosting a dinner party or enjoying a cozy night in. Encourage your loved ones to join in the fun of making this dessert, allowing everyone to add their personal touch. The laughter and joy shared during the preparation will make the final result even sweeter.
Don’t forget to explore the variations and serving suggestions we discussed. Personalizing your No-Bake Choco Velvet Fantasy can make it even more special. From different crusts to unique mousse flavors, the possibilities are endless. This flexibility allows you to cater to different tastes and preferences, ensuring that everyone at your table finds something to love.
So, gather your ingredients, follow the steps, and create your own No-Bake Choco Velvet Fantasy. Enjoy the process, relish the flavors, and most importantly, share the joy of this delightful dessert with those you care about. Happy indulging!
Relevant Recipes Link:
Craving more delectable recipes? Indulge in these mouthwatering options:
- No-Bake Peanut Butter Banana Oat Bars: A Healthy and Tasty Treat
- Midnight Cherry Velvet Dream Cake: A Decadent Delight
- Cottage Cheese Egg Bites: A Flavorful Breakfast Option
For more culinary inspiration and recipes, follow us on Pinterest!