Introduction to Maple Walnut Ice Cream
The Allure of Homemade Ice Cream
There’s something truly special about homemade ice cream. It’s not just a dessert; it’s an experience. When you make ice cream at home, you control every ingredient. This means you can create flavors that suit your taste perfectly. Plus, the process of making ice cream can be a fun activity for the whole family. Imagine gathering around the kitchen, mixing ingredients, and waiting eagerly for that first scoop. The excitement builds as you churn the mixture, and the sweet aroma fills the air. Homemade ice cream is creamy, fresh, and oh-so-delicious!
Why Choose Maple Walnut Ice Cream?
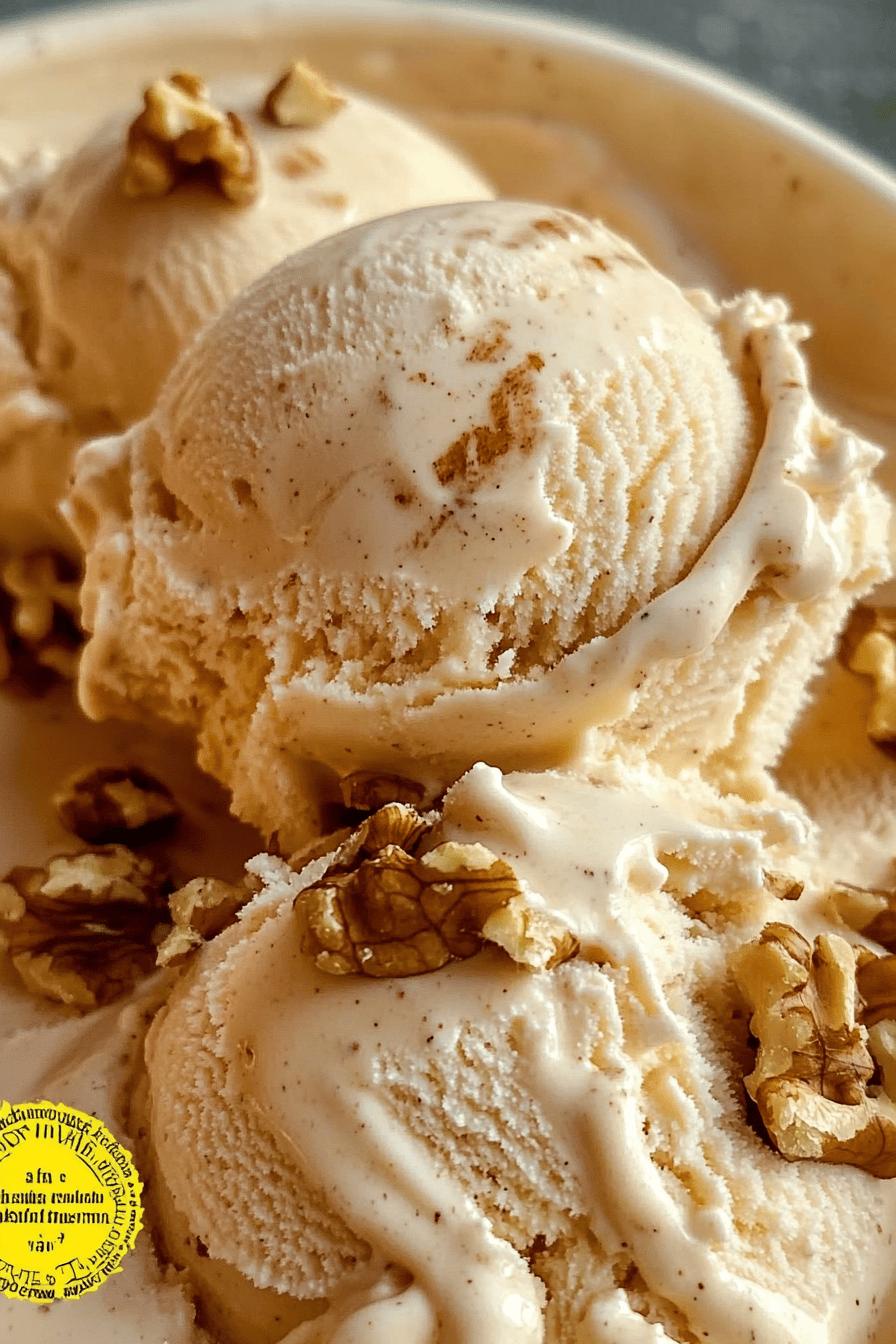
Maple Walnut Ice Cream stands out for its unique flavor combination. The rich, sweet taste of maple syrup pairs beautifully with the crunchy texture of toasted walnuts. This delightful mix creates a comforting dessert that feels like a warm hug on a cold day. Moreover, maple syrup is a natural sweetener, making it a healthier option compared to refined sugars. Choosing Maple Walnut Ice Cream means indulging in a treat that is both satisfying and wholesome. Whether you’re enjoying it on a hot summer day or as a cozy dessert in winter, this ice cream is sure to please your taste buds!
Ingredients for Maple Walnut Ice Cream
To create your own Maple Walnut Ice Cream, you’ll need a few simple ingredients. Each one plays a vital role in achieving that creamy texture and delightful flavor. Here’s what you’ll need:
- 2 cups heavy cream
- 1 cup whole milk
- 3/4 cup pure maple syrup
- 1/2 cup granulated sugar
- 4 large egg yolks
- 1 teaspoon pure vanilla extract
- 1 cup walnuts, chopped and toasted
These ingredients come together to create a luscious custard base. The heavy cream and whole milk provide the rich creaminess, while the maple syrup adds that signature sweetness. The granulated sugar enhances the flavor, and the egg yolks help to thicken the mixture, giving it a smooth texture. Don’t forget the toasted walnuts! They add a delightful crunch and nutty flavor that perfectly complements the sweetness of the maple syrup.
When selecting your ingredients, opt for high-quality maple syrup. This will elevate the flavor of your ice cream. Fresh walnuts are also essential; toasting them brings out their natural oils and enhances their taste. With these ingredients on hand, you’re ready to embark on your ice cream-making adventure!
Step-by-Step Preparation of Maple Walnut Ice Cream
Step 1: Preparing the Custard Base
To start, you’ll need to prepare the custard base. This is the heart of your Maple Walnut Ice Cream. Begin by heating the heavy cream and whole milk in a saucepan over medium heat. Stir gently until the mixture is warm but not boiling. In a separate bowl, whisk together the egg yolks and granulated sugar until the mixture is pale and creamy. This step is crucial as it helps to create a smooth texture.
Once the cream mixture is warm, slowly pour it into the egg yolk mixture while whisking continuously. This process is called tempering, and it prevents the eggs from scrambling. After combining, return the mixture to the saucepan. Cook over low heat, stirring constantly until it thickens slightly and coats the back of a spoon. This usually takes about 5 to 7 minutes. Once thickened, remove it from the heat and stir in the pure maple syrup and vanilla extract. Let the custard cool to room temperature before moving on to the next step.
Step 2: Toasting the Walnuts
Next, it’s time to toast the walnuts. This step enhances their flavor and adds a delightful crunch to your ice cream. Preheat your oven to 350°F (175°C). Spread the chopped walnuts evenly on a baking sheet. Toast them in the oven for about 8 to 10 minutes, or until they are golden brown and fragrant. Be sure to stir them halfway through to ensure even toasting. Once done, remove them from the oven and let them cool completely. The toasted walnuts will add a wonderful nutty flavor to your Maple Walnut Ice Cream!
Step 3: Combining Ingredients
Now that your custard base is cool and your walnuts are toasted, it’s time to combine everything. In a large mixing bowl, pour the cooled custard base. Add the toasted walnuts and mix well. This is where the magic happens! The walnuts will infuse their flavor into the creamy custard, creating a deliciously rich ice cream. Make sure the walnuts are evenly distributed throughout the mixture for the best taste in every scoop.
Step 4: Churning the Ice Cream
With your mixture ready, it’s time to churn the ice cream. Pour the combined mixture into your ice cream maker. Follow the manufacturer’s instructions for churning. Typically, this process takes about 20 to 25 minutes. You’ll know it’s ready when the ice cream has thickened and has a soft-serve consistency. Churning incorporates air into the mixture, making it light and fluffy. If you don’t have an ice cream maker, don’t worry! You can still make this ice cream by placing the mixture in a shallow dish and stirring it every 30 minutes until it reaches the desired consistency.
Step 5: Freezing the Ice Cream
Finally, it’s time to freeze your Maple Walnut Ice Cream. Transfer the churned ice cream into an airtight container. Smooth the top with a spatula and cover it with a lid. Place it in the freezer for at least 4 hours, or until it’s firm. This step is essential for achieving that perfect scoopable texture. Once frozen, your homemade ice cream is ready to be enjoyed! Scoop it into bowls or cones and savor the delightful flavors of maple and walnuts.
Variations of Maple Walnut Ice Cream
Adding Different Nuts
If you love the idea of Maple Walnut Ice Cream but want to switch things up, consider adding different nuts! Each nut brings its unique flavor and texture, making your ice cream even more exciting. For instance, pecans are a fantastic alternative. They have a buttery taste that pairs beautifully with maple syrup. Simply replace the walnuts with an equal amount of chopped pecans, and toast them just like you would the walnuts.
Another great option is almonds. Their crunchy texture and mild flavor can add a delightful twist to your ice cream. You can use sliced or chopped almonds, and toasting them will enhance their nutty aroma. If you’re feeling adventurous, try mixing different nuts together! A combination of walnuts, pecans, and almonds can create a nutty medley that will surprise your taste buds.
Incorporating Other Flavors
Maple Walnut Ice Cream is delicious on its own, but you can also incorporate other flavors to make it even more special. For example, adding a hint of cinnamon can bring warmth and spice to your ice cream. Simply mix in 1/2 teaspoon of ground cinnamon when you combine the custard base with the walnuts.
If you enjoy chocolate, consider adding chocolate chips or chunks. The rich chocolate will contrast beautifully with the sweetness of the maple syrup. Just fold in about 1/2 cup of chocolate chips after you’ve combined the custard and walnuts. You can also experiment with other flavors like coconut or even a splash of bourbon for a more adult twist. The possibilities are endless, and each variation can create a new favorite!
Cooking Note for Maple Walnut Ice Cream
When making Maple Walnut Ice Cream, attention to detail is key. Each step in the process contributes to the final flavor and texture of your ice cream. Here are some important cooking notes to keep in mind:
- Temperature Matters: Always ensure that your cream and milk mixture is warm, but not boiling. Boiling can cause the mixture to curdle, ruining the smooth texture of your custard base.
- Egg Yolks: Use fresh, high-quality eggs for the best flavor. The yolks not only thicken the custard but also add richness to your ice cream.
- Cooling Time: Allow the custard base to cool completely before adding the walnuts. This helps maintain the integrity of the walnuts and prevents them from becoming soggy.
- Churning Technique: If you’re using an ice cream maker, make sure it’s fully frozen before pouring in the mixture. This ensures that your ice cream churns properly and achieves the right consistency.
- Storage: Store your ice cream in an airtight container to prevent ice crystals from forming. This will keep your Maple Walnut Ice Cream creamy and delicious for longer.
By following these cooking notes, you’ll ensure that your Maple Walnut Ice Cream turns out perfectly every time. Enjoy the process and the delightful results!
Serving Suggestions for Maple Walnut Ice Cream
Pairing with Desserts
Maple Walnut Ice Cream is a versatile dessert that pairs wonderfully with various treats. One delightful option is to serve it alongside warm apple pie. The sweet, spiced flavors of the pie complement the creamy ice cream perfectly. Just imagine a scoop of Maple Walnut Ice Cream melting over a slice of pie—pure bliss!
Another great pairing is with brownies. The rich chocolatey goodness of brownies contrasts beautifully with the sweet maple flavor. You can even create a sundae by stacking a brownie, a scoop of ice cream, and a drizzle of chocolate sauce on top. It’s a dessert that will impress your family and friends!
If you’re looking for something lighter, consider serving your ice cream with fresh fruit. Slices of ripe strawberries or peaches add a refreshing touch. The natural sweetness of the fruit enhances the maple flavor, making for a delightful combination. You can also create a fruit salad and top it with a scoop of Maple Walnut Ice Cream for a colorful and tasty treat.
Creative Serving Ideas
Get creative with how you serve your Maple Walnut Ice Cream! One fun idea is to make ice cream sandwiches. Use soft cookies, like chocolate chip or oatmeal raisin, and sandwich a generous scoop of ice cream between them. This makes for a fun and portable dessert that everyone will love!
Another unique serving idea is to create a milkshake. Blend a scoop of Maple Walnut Ice Cream with a splash of milk until smooth. Pour it into a tall glass and top it with whipped cream and a sprinkle of toasted walnuts. This creamy milkshake is perfect for hot summer days!
For a more elegant presentation, consider serving your ice cream in a waffle cone bowl. These edible bowls add a fun twist and make for a delightful way to enjoy your dessert. You can also garnish your ice cream with a drizzle of maple syrup or a sprinkle of cinnamon for an extra touch of flavor.
With these serving suggestions, you can elevate your Maple Walnut Ice Cream experience. Whether you choose to pair it with desserts or get creative with your presentation, this ice cream is sure to be a hit!
Tips for Perfect Maple Walnut Ice Cream
Choosing the Right Maple Syrup
When it comes to making Maple Walnut Ice Cream, the type of maple syrup you choose can make a big difference. Opt for pure maple syrup instead of imitation syrup. Pure maple syrup is made from the sap of sugar maple trees and has a rich, complex flavor that enhances your ice cream. Look for Grade A or Grade B syrup; both have their unique qualities. Grade A is lighter and sweeter, while Grade B has a stronger, more robust flavor. Depending on your taste preference, you can choose either to create a delicious ice cream.
Additionally, consider sourcing your maple syrup from local producers. This not only supports local businesses but often results in fresher syrup. When you use high-quality maple syrup, you’ll notice a significant improvement in the overall taste of your ice cream. Remember, the better the syrup, the more delightful your Maple Walnut Ice Cream will be!
Storing Your Ice Cream
Proper storage is essential to keep your Maple Walnut Ice Cream fresh and creamy. After churning, transfer the ice cream to an airtight container. This helps prevent ice crystals from forming, which can ruin the smooth texture. Make sure to smooth the top of the ice cream with a spatula before sealing the container. This minimizes air exposure, keeping your ice cream delicious for longer.
Store your ice cream in the coldest part of your freezer, ideally at 0°F (-18°C) or lower. Homemade ice cream is best enjoyed within two weeks for optimal flavor and texture. However, if stored correctly, it can last up to a month. Just remember to let it sit at room temperature for a few minutes before scooping. This will make it easier to serve and ensure you get that perfect scoop every time!
Breakdown of Time for Maple Walnut Ice Cream
Prep Time
Preparing Maple Walnut Ice Cream is a delightful process that requires some time. The prep time for this recipe is approximately 20 minutes. During this time, you will gather your ingredients, prepare the custard base, and toast the walnuts. It’s a great opportunity to enjoy the aromas of the ingredients as you work. Make sure to take your time to ensure everything is done correctly. A little patience goes a long way in creating a delicious ice cream!
Cooking Time
The cooking time for Maple Walnut Ice Cream is about 15 to 20 minutes. This includes heating the cream and milk, tempering the egg yolks, and cooking the custard until it thickens. It’s important to stir constantly during this process to achieve that smooth, creamy texture. Once the custard is ready, you’ll also need to allow it to cool before adding the walnuts. This step is crucial for maintaining the integrity of the walnuts and ensuring they stay crunchy.
Total Time
In total, you can expect to spend around 4 to 5 hours to make Maple Walnut Ice Cream, including the freezing time. After churning the ice cream, it needs to freeze for at least 4 hours to reach the perfect scoopable consistency. While this may seem like a long wait, the end result is well worth it! You’ll have a creamy, rich dessert that’s perfect for any occasion. So, gather your ingredients, and get ready to enjoy a homemade treat that will impress everyone!
Nutritional Information for Maple Walnut Ice Cream
Calories
When indulging in homemade Maple Walnut Ice Cream, it’s good to know the nutritional content. A typical serving size of about 1/2 cup contains approximately 250 to 300 calories. This calorie count can vary based on the specific ingredients used, especially the type of maple syrup and cream. While it’s a treat, enjoying it in moderation can fit into a balanced diet. Remember, the creamy richness and delightful flavors make every scoop worth it!
Protein
Maple Walnut Ice Cream also provides a decent amount of protein. Each serving contains around 4 to 5 grams of protein. This protein mainly comes from the heavy cream and egg yolks used in the custard base. While it’s not a primary source of protein, it does contribute to the overall nutritional value of this delicious dessert. Pairing it with other protein-rich foods can help create a more balanced treat!
Sodium
In terms of sodium content, a serving of Maple Walnut Ice Cream typically has about 50 to 70 milligrams of sodium. This amount is relatively low, making it a suitable option for those watching their sodium intake. However, it’s always wise to check the specific ingredients you use, as some brands of cream or added ingredients may contain higher sodium levels. Enjoying this ice cream as an occasional treat can be a delightful way to satisfy your sweet tooth without worrying too much about sodium!
FAQs about Maple Walnut Ice Cream
Can I use store-bought maple syrup?
Absolutely! You can use store-bought maple syrup for your Maple Walnut Ice Cream. However, it’s best to choose pure maple syrup rather than imitation syrup. Pure maple syrup has a richer flavor that enhances your ice cream. Look for options labeled as Grade A or Grade B, as both provide delicious taste profiles. Using high-quality syrup will make a noticeable difference in the final product!
How long does homemade ice cream last?
Homemade Maple Walnut Ice Cream can last for about two weeks when stored properly in an airtight container. For the best flavor and texture, try to enjoy it within this time frame. If stored correctly, it can last up to a month. Just remember to let it sit at room temperature for a few minutes before scooping. This will help you get that perfect scoop every time!
Can I make this ice cream without an ice cream maker?
Yes, you can make Maple Walnut Ice Cream without an ice cream maker! Simply pour the combined mixture into a shallow dish and place it in the freezer. Every 30 minutes, take it out and stir vigorously with a fork. This process helps incorporate air into the mixture, creating a creamy texture. Repeat this until the ice cream reaches your desired consistency, usually about 3 to 4 hours.
What can I substitute for walnuts?
If you’re not a fan of walnuts or have allergies, there are plenty of substitutes! Pecans are a great alternative, offering a buttery flavor that pairs well with maple syrup. You can also use almonds, hazelnuts, or even macadamia nuts for a different twist. Just remember to toast them to enhance their flavor before adding them to your ice cream. Feel free to experiment with your favorite nuts!
Conclusion on Maple Walnut Ice Cream
Final Thoughts on Making Your Own Ice Cream
Making your own Maple Walnut Ice Cream is not just about creating a delicious dessert; it’s about the joy of crafting something special from scratch. The process allows you to connect with the ingredients and enjoy the satisfaction of creating a treat that is uniquely yours. Each scoop is a testament to your effort and creativity, bringing smiles to family and friends alike.
As you savor the creamy richness of your homemade ice cream, remember that the possibilities are endless. You can experiment with different nuts, flavors, and serving ideas to make it your own. Whether you enjoy it on a hot summer day or as a comforting dessert in winter, Maple Walnut Ice Cream is sure to delight your taste buds.
So, gather your ingredients, follow the steps, and embark on this delightful ice cream-making adventure. With each batch, you’ll not only enjoy a delicious treat but also create lasting memories in the kitchen. Happy churning!
Relevant Recipes Link: