Introduction to Homemade Rocky Road Ice Cream
What Makes Homemade Rocky Road Ice Cream Special?
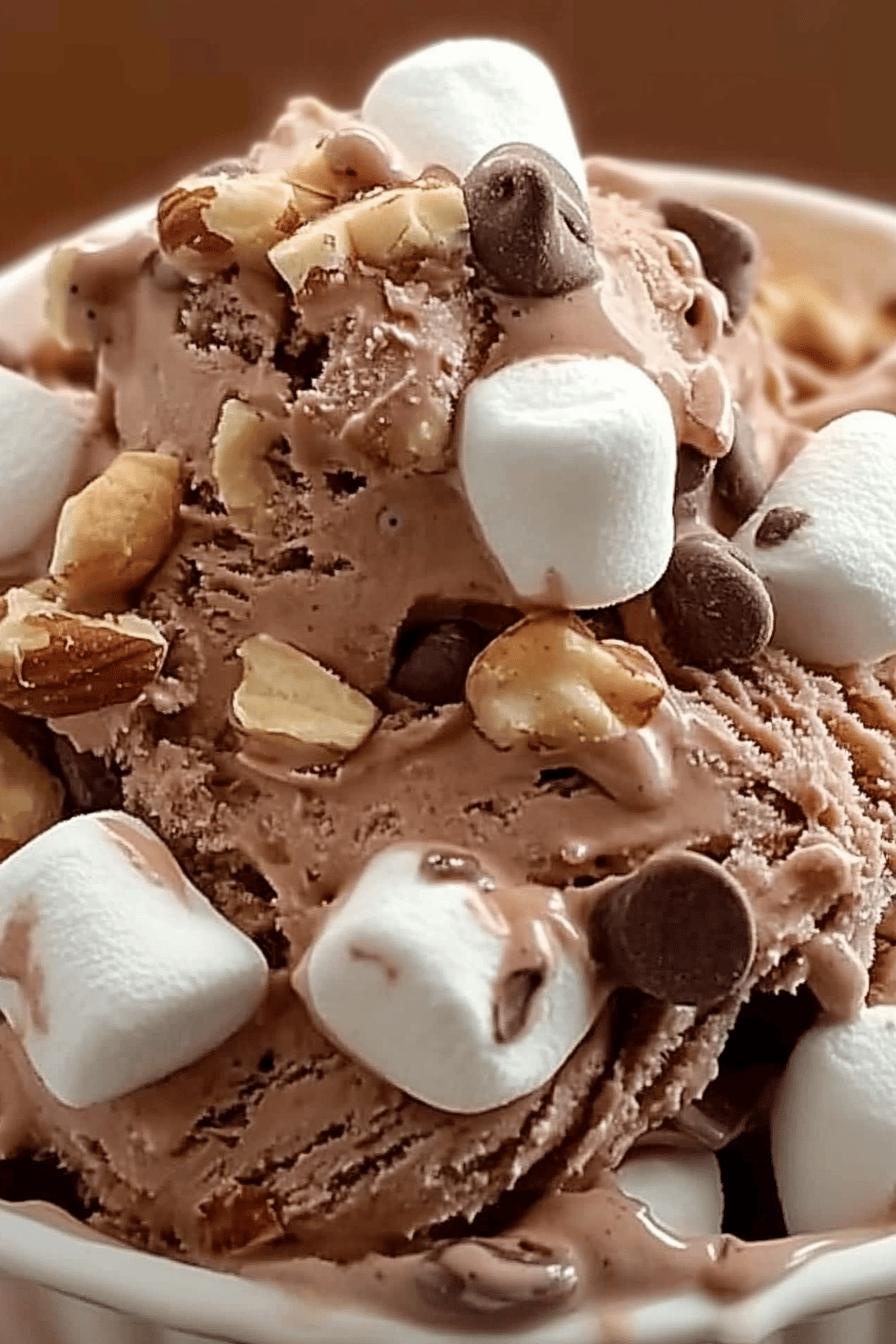
Homemade Rocky Road Ice Cream is not just any dessert; it’s a delightful experience! This classic treat brings together the rich flavors of chocolate, the fluffiness of mini marshmallows, and the crunch of nuts. Each scoop is a celebration of textures and tastes. Unlike store-bought versions, making it at home allows you to control the ingredients. You can choose high-quality chocolate, fresh nuts, and even organic marshmallows. This way, you create a dessert that’s not only delicious but also tailored to your preferences.
Moreover, the joy of crafting your own ice cream is unmatched. You can experiment with different ingredients and make it uniquely yours. Whether you prefer more chocolate chips or extra marshmallows, the choice is yours! This personal touch makes every scoop special, turning a simple dessert into a cherished memory.
The Joy of Making Ice Cream at Home
Making ice cream at home is a fun and rewarding activity. It’s a great way to bond with family and friends. Imagine gathering in the kitchen, measuring ingredients, and mixing them together. The laughter and excitement build as you wait for the ice cream to churn. Plus, the aroma of melting chocolate fills the air, making the experience even more delightful.
Another perk? You can enjoy your homemade Rocky Road Ice Cream any time you want! No need to wait in line at an ice cream shop. Just scoop out a bowl whenever you crave something sweet. It’s perfect for hot summer days or cozy nights in. So, roll up your sleeves and get ready to create a treat that will bring smiles to everyone’s faces!
Ingredients for Homemade Rocky Road Ice Cream
To create your own batch of delicious Homemade Rocky Road Ice Cream, you’ll need a few simple ingredients. Each one plays a vital role in achieving that creamy texture and delightful flavor. Here’s what you’ll need:
- 2 cups heavy cream: This is the base of your ice cream, providing richness and creaminess.
- 1 cup whole milk: Whole milk adds a smooth texture and balances the cream.
- 3/4 cup granulated sugar: Sugar sweetens the ice cream and helps it freeze properly.
- 1 cup unsweetened cocoa powder: This gives your ice cream its rich chocolate flavor.
- 1 teaspoon vanilla extract: Vanilla enhances the overall flavor of the ice cream.
- 1 cup mini marshmallows: These fluffy treats add sweetness and a fun texture.
- 1 cup chopped nuts: Choose your favorite nuts, like walnuts or almonds, for a crunchy bite.
- 1/2 cup chocolate chips: These add extra chocolatey goodness and a delightful surprise in every scoop.
Feel free to adjust the quantities based on your taste preferences. For instance, if you love marshmallows, add a bit more! The beauty of making ice cream at home is that you can customize it to your liking. Gather these ingredients, and you’re ready to embark on your ice cream-making adventure!
Step-by-Step Preparation of Homemade Rocky Road Ice Cream
Step 1: Gather Your Ingredients
Before you start making your Homemade Rocky Road Ice Cream, it’s essential to gather all your ingredients. This step ensures you have everything you need at your fingertips. Check your kitchen for the following:
- 2 cups heavy cream
- 1 cup whole milk
- 3/4 cup granulated sugar
- 1 cup unsweetened cocoa powder
- 1 teaspoon vanilla extract
- 1 cup mini marshmallows
- 1 cup chopped nuts (like walnuts or almonds)
- 1/2 cup chocolate chips
Once you have everything ready, you can move on to the next step. This preparation makes the process smoother and more enjoyable!
Step 2: Prepare the Chocolate Base
Now it’s time to create the rich chocolate base for your ice cream. In a large mixing bowl, combine the heavy cream, whole milk, and granulated sugar. Whisk these ingredients together until the sugar dissolves completely. Next, add the unsweetened cocoa powder and vanilla extract. Mix well until the mixture is smooth and creamy. This chocolate base is the heart of your Rocky Road Ice Cream, so take your time to ensure it’s well blended!
Step 3: Mix in the Rocky Road Ingredients
With your chocolate base ready, it’s time to add the fun ingredients! Gently fold in the mini marshmallows, chopped nuts, and chocolate chips. Make sure they are evenly distributed throughout the mixture. This step is where the magic happens! The marshmallows will add a delightful fluffiness, while the nuts provide a satisfying crunch. The chocolate chips will melt slightly, creating pockets of chocolatey goodness in every scoop.
Step 4: Churn the Ice Cream
Now comes the exciting part—churning! Pour your mixture into an ice cream maker. Follow the manufacturer’s instructions for churning time. Typically, it takes about 20 to 30 minutes for the ice cream to reach a soft-serve consistency. As it churns, the mixture will become thicker and creamier. This is when you can really start to smell that delicious chocolate aroma filling your kitchen!
Step 5: Freeze and Set
After churning, transfer the ice cream to an airtight container. Smooth the top with a spatula and cover it tightly. Place the container in the freezer for at least 4 hours, or until the ice cream is firm. This final freezing step is crucial for achieving that perfect scoopable texture. Once it’s set, your Homemade Rocky Road Ice Cream will be ready to enjoy!
Variations of Homemade Rocky Road Ice Cream
Different Nut Options for Homemade Rocky Road Ice Cream
One of the best parts about making Homemade Rocky Road Ice Cream is the ability to customize it to your taste. Nuts play a significant role in adding crunch and flavor. While traditional recipes often use walnuts or almonds, you can explore various nut options to create your unique twist. Here are some delicious alternatives:
- Pecans: These nuts have a buttery flavor that pairs wonderfully with chocolate. Chopped pecans add a delightful crunch.
- Hazelnuts: Known for their rich, nutty taste, hazelnuts can elevate your ice cream. Toast them lightly for an extra layer of flavor.
- Macadamia Nuts: If you’re looking for a creamy texture, macadamia nuts are perfect. Their rich taste complements the chocolate beautifully.
- Cashews: These nuts are softer and add a unique sweetness. Chopped cashews can provide a different texture and flavor profile.
Feel free to mix and match these nuts or even use a combination of them. The choice is yours! Each nut brings its own character to the ice cream, making every scoop a delightful surprise.
Alternative Sweeteners in Homemade Rocky Road Ice Cream
If you’re looking to reduce sugar or try something different, there are several alternative sweeteners you can use in your Homemade Rocky Road Ice Cream. Here are some popular options:
- Honey: This natural sweetener adds a unique flavor and can enhance the overall taste of your ice cream.
- Maple Syrup: Maple syrup brings a warm, rich sweetness. It pairs well with chocolate and adds a lovely aroma.
- Agave Nectar: Agave is sweeter than sugar, so you can use less. It dissolves easily and works well in cold mixtures.
- Coconut Sugar: This sugar has a caramel-like flavor and is less processed than regular sugar. It can add a hint of coconut flavor to your ice cream.
When using alternative sweeteners, adjust the quantity based on your taste preferences. Each sweetener has a different level of sweetness, so taste as you go! This way, you can create a Homemade Rocky Road Ice Cream that suits your dietary needs while still being delicious.
Cooking Note for Homemade Rocky Road Ice Cream
When making Homemade Rocky Road Ice Cream, a few cooking notes can help ensure your dessert turns out perfectly. First, always use high-quality ingredients. The better the ingredients, the richer and more flavorful your ice cream will be. For instance, opt for premium cocoa powder and fresh nuts. This choice makes a noticeable difference in taste.
Next, pay attention to the temperature of your ingredients. It’s best to use cold heavy cream and milk. This helps the mixture churn more effectively, resulting in a creamier texture. If your ingredients are at room temperature, the ice cream may not freeze as well, leading to a less desirable consistency.
Additionally, if you don’t have an ice cream maker, don’t worry! You can still make this delicious treat. Simply pour the mixture into a shallow dish and place it in the freezer. Stir it every 30 minutes for about 2-3 hours. This method helps break up ice crystals, giving you a smoother ice cream.
Lastly, remember to let your ice cream sit at room temperature for a few minutes before scooping. This makes it easier to serve and ensures you get those perfect, creamy scoops. With these tips in mind, you’re all set to create a delightful batch of Homemade Rocky Road Ice Cream!
Serving Suggestions for Homemade Rocky Road Ice Cream
Creative Ways to Serve Homemade Rocky Road Ice Cream
Once your Homemade Rocky Road Ice Cream is ready, it’s time to think about how to serve it! There are many fun and creative ways to enjoy this delicious treat. Here are some ideas to inspire you:
- Ice Cream Sundae: Create a classic sundae by scooping your Rocky Road Ice Cream into a bowl. Top it with whipped cream, a drizzle of chocolate syrup, and a cherry on top. This makes for a delightful dessert that everyone will love!
- Ice Cream Sandwiches: Use two cookies to make a tasty ice cream sandwich. Scoop the Rocky Road Ice Cream between chocolate chip or oatmeal cookies for a fun twist.
- Milkshakes: Blend a scoop of your ice cream with milk for a rich and creamy milkshake. You can even add a bit of extra chocolate syrup for an extra chocolatey flavor!
- Waffle Cones: Serve your ice cream in waffle cones for a classic ice cream shop experience. You can even dip the tops in melted chocolate and sprinkles for added fun!
- Layered Parfaits: Layer your Rocky Road Ice Cream with crushed cookies, nuts, and whipped cream in a glass. This not only looks beautiful but also adds different textures to each bite.
These serving ideas can elevate your Homemade Rocky Road Ice Cream experience. Whether you’re hosting a party or enjoying a quiet night in, these creative presentations will surely impress your guests and satisfy your sweet cravings!
Pairing Drinks with Homemade Rocky Road Ice Cream
To enhance your ice cream experience, consider pairing it with the right drinks. The right beverage can complement the rich flavors of your Homemade Rocky Road Ice Cream. Here are some delicious drink options:
- Chocolate Milk: For chocolate lovers, a glass of cold chocolate milk is a perfect match. The flavors will blend beautifully, making each bite even more enjoyable.
- Cold Brew Coffee: The smoothness of cold brew coffee pairs well with the sweetness of the ice cream. The slight bitterness of the coffee balances the rich chocolate flavor.
- Milkshakes: As mentioned earlier, blending your ice cream into a milkshake is a delightful way to enjoy it. You can customize the thickness to your liking!
- Fruit Juices: A refreshing fruit juice, like orange or berry, can provide a nice contrast to the creamy ice cream. The fruity flavors can cleanse your palate between bites.
- Sparkling Water: For a lighter option, serve your ice cream with sparkling water. The bubbles can refresh your taste buds and enhance the overall experience.
These drink pairings can elevate your dessert experience. Whether you’re enjoying a scoop on a hot day or serving it at a gathering, the right drink can make your Homemade Rocky Road Ice Cream even more delightful!
Tips for Perfect Homemade Rocky Road Ice Cream
Common Mistakes to Avoid
Making Homemade Rocky Road Ice Cream can be a fun adventure, but there are a few common mistakes to watch out for. First, don’t skip the chilling step! If your mixture isn’t cold enough before churning, it won’t freeze properly. Always chill your base in the refrigerator for at least an hour before using your ice cream maker.
Another mistake is over-churning the ice cream. While you want it to reach a soft-serve consistency, churning it for too long can lead to a grainy texture. Keep an eye on it and stop once it’s thick and creamy.
Also, be careful with the mix-ins. If you add too many nuts or marshmallows, they can weigh down the ice cream, making it hard to freeze. Stick to the recommended amounts for the best results. Lastly, remember to let your ice cream sit out for a few minutes before scooping. This will help you get those perfect, creamy scoops without straining your wrist!
How to Achieve the Creamiest Texture
To achieve the creamiest texture in your Homemade Rocky Road Ice Cream, start with high-fat ingredients. Using heavy cream and whole milk is key, as they provide the richness that makes ice cream smooth and luscious. Additionally, consider adding a tablespoon of corn syrup or glycerin. These ingredients help prevent ice crystals from forming, resulting in a creamier texture.
Another tip is to churn the ice cream until it’s just thick enough. Over-churning can lead to a less creamy texture, so keep an eye on it. Once you’ve reached the right consistency, transfer it to an airtight container and freeze it immediately. This helps maintain the creamy texture you’ve worked hard to create.
Lastly, if you have the time, let your ice cream sit in the freezer for a few hours after churning. This allows the flavors to meld and the texture to firm up, giving you that perfect scoop every time. With these tips, you’ll be well on your way to making the best Homemade Rocky Road Ice Cream!
Breakdown of Time for Homemade Rocky Road Ice Cream
Prep Time
Preparing your Homemade Rocky Road Ice Cream is a breeze! The prep time typically takes about 15 to 20 minutes. This includes gathering your ingredients, mixing the chocolate base, and folding in the delightful mix-ins. Make sure to take your time during this step to ensure everything is well combined. A little extra care now will lead to a more delicious ice cream later!
Cooking Time
When it comes to cooking time, the main task is churning the ice cream. This usually takes around 20 to 30 minutes in an ice cream maker. During this time, the mixture transforms into a creamy delight. Keep an eye on it, and stop once it reaches a soft-serve consistency. If you’re using the alternative method of stirring every 30 minutes, plan for about 2 to 3 hours of freezing time to achieve the right texture.
Total Time
In total, you should expect to spend about 4 to 4.5 hours from start to finish. This includes the prep time, churning, and the final freezing stage. While it may seem like a long process, most of this time is simply waiting for the ice cream to set. The good news is that the end result is a delicious, homemade treat that’s well worth the wait!
Nutritional Information for Homemade Rocky Road Ice Cream
Calories in Homemade Rocky Road Ice Cream
When indulging in Homemade Rocky Road Ice Cream, it’s good to know what you’re enjoying. A typical serving size of about half a cup contains approximately 250 to 300 calories. This number can vary based on the specific ingredients you use, such as the type of nuts or the amount of sugar. While it’s a treat, being aware of the calorie content can help you enjoy it in moderation. Remember, it’s all about balance!
Protein Content in Homemade Rocky Road Ice Cream
Protein is an essential nutrient, and your Homemade Rocky Road Ice Cream can provide a small boost! Each serving typically contains around 4 to 5 grams of protein. This comes mainly from the milk and cream used in the recipe. While it’s not a significant source of protein, every little bit helps, especially when paired with other nutritious foods. Enjoying this ice cream as part of a balanced diet can be a delightful way to satisfy your sweet tooth while still getting some nutrients!
Sodium Levels in Homemade Rocky Road Ice Cream
Sodium is another important factor to consider. A serving of Homemade Rocky Road Ice Cream usually contains about 50 to 100 milligrams of sodium. This amount can vary depending on the ingredients, especially if you use salted nuts. Keeping an eye on sodium levels is essential for those watching their intake. However, in moderation, this delicious treat can fit into a healthy lifestyle without any worries!
FAQs about Homemade Rocky Road Ice Cream
Can I make Homemade Rocky Road Ice Cream without an ice cream maker?
Absolutely! You can make Homemade Rocky Road Ice Cream without an ice cream maker. Simply pour your mixture into a shallow dish and place it in the freezer. Every 30 minutes, take it out and stir vigorously with a fork. This helps break up ice crystals and creates a smoother texture. Continue this process for about 2 to 3 hours until your ice cream is firm and creamy. It’s a simple method that yields delicious results!
How long does Homemade Rocky Road Ice Cream last in the freezer?
Your Homemade Rocky Road Ice Cream can last in the freezer for about 2 to 3 weeks. To keep it fresh, store it in an airtight container. Make sure to press a piece of plastic wrap directly onto the surface of the ice cream before sealing the container. This helps prevent freezer burn and keeps your ice cream tasting great. However, for the best flavor and texture, try to enjoy it within the first week!
What can I substitute for nuts in Homemade Rocky Road Ice Cream?
If you want to make your Homemade Rocky Road Ice Cream nut-free, there are plenty of tasty alternatives! You can use seeds like sunflower seeds or pumpkin seeds for a crunchy texture. Another option is to add extra mini marshmallows or chocolate chips for added sweetness and flavor. You could also consider using crushed cookies or graham crackers to give your ice cream a delightful crunch without the nuts!
Is Homemade Rocky Road Ice Cream suitable for vegans?
Yes, you can make a vegan version of Homemade Rocky Road Ice Cream! To do this, substitute the heavy cream and whole milk with coconut cream or almond milk. Use a plant-based sweetener like maple syrup or agave nectar instead of granulated sugar. For the mix-ins, ensure that your chocolate chips and marshmallows are dairy-free. With these adjustments, you can enjoy a delicious vegan Rocky Road Ice Cream that everyone will love!
Conclusion: Enjoying Your Homemade Rocky Road Ice Cream
Now that you’ve crafted your very own Homemade Rocky Road Ice Cream, it’s time to enjoy the fruits of your labor! This delightful treat is perfect for any occasion, whether you’re celebrating a special event or simply treating yourself after a long day. The combination of creamy chocolate, fluffy marshmallows, crunchy nuts, and rich chocolate chips creates a symphony of flavors that will surely satisfy your sweet cravings.
As you scoop out your ice cream, take a moment to appreciate the effort you put into making it. Each scoop is a reminder of the joy of creating something delicious from scratch. You can share it with family and friends, or savor it all by yourself—either way, it’s a win! Consider hosting an ice cream party where everyone can customize their own bowls with toppings and mix-ins. This adds an extra layer of fun and creativity to your dessert experience.
Remember, the beauty of Homemade Rocky Road Ice Cream lies in its versatility. Feel free to experiment with different ingredients, flavors, and serving styles. Whether you enjoy it in a cone, as a sundae, or blended into a milkshake, the possibilities are endless. So, gather your loved ones, scoop out some ice cream, and create sweet memories together!
In the end, making and enjoying Homemade Rocky Road Ice Cream is not just about the dessert itself; it’s about the joy of sharing and the happiness it brings. So, go ahead, indulge in this creamy delight, and let every bite transport you to a world of chocolatey bliss!
Indulge in more delightful homemade ice cream flavors with these must-try recipes:
- Rich Chocolate Ice Cream: A Decadent Treat
- Mint Chip Ice Cream: Cool and Refreshing
- Blackberry Pie Ice Cream: Sweet and Fruity
For more delightful recipes and food inspiration, follow us on Pinterest!