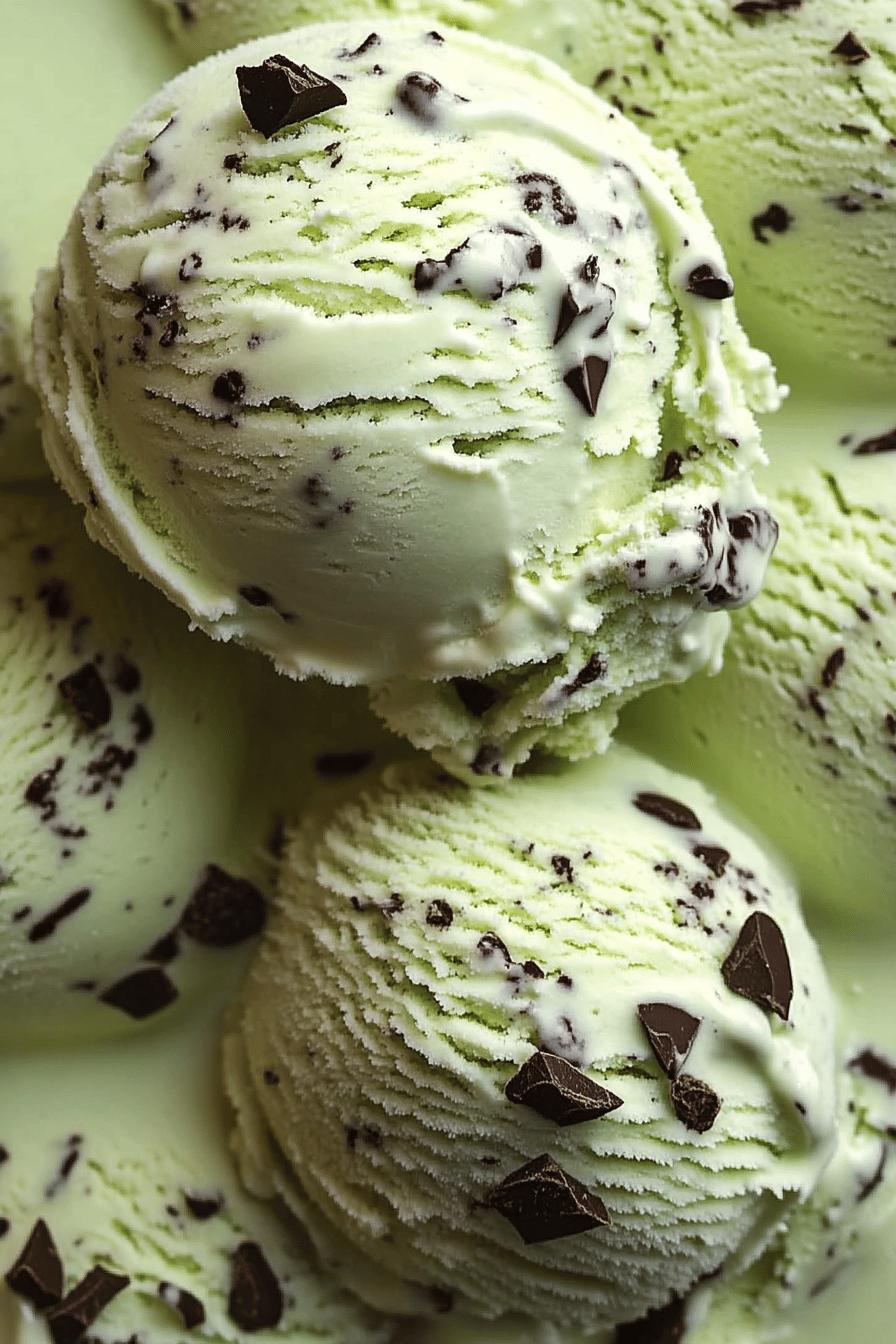
Introduction to Homemade Mint Chip Ice Cream
The Allure of Homemade Ice Cream
There’s something magical about homemade ice cream. It’s not just a dessert; it’s an experience. When you make ice cream at home, you control every ingredient. You can choose fresh, high-quality items that suit your taste. Plus, the process of making ice cream can be a fun activity for the whole family. Imagine the joy of churning your own creamy delight while sharing laughter and stories. Homemade ice cream brings people together, creating sweet memories that last a lifetime.
Why Choose Homemade Mint Chip Ice Cream?
Homemade mint chip ice cream stands out for several reasons. First, the flavor is incredibly fresh. Store-bought versions often contain artificial flavors and preservatives. In contrast, when you make it at home, you can use real mint extract or fresh mint leaves. This gives your ice cream a vibrant, natural taste that’s hard to beat.
Moreover, you can customize the sweetness and creaminess to your liking. Want it extra minty? Go ahead and add more mint extract! Prefer a richer texture? Use heavy cream instead of milk. The possibilities are endless. Plus, making your own ice cream is a great way to impress friends and family. They’ll be amazed at your culinary skills when you serve them a scoop of your homemade mint chip ice cream.
So, why wait? Dive into this delightful recipe and discover the joy of creating your own mint chip ice cream. It’s a refreshing treat that’s perfect for any occasion, especially during those hot summer days!
Ingredients for Homemade Mint Chip Ice Cream
To create your own delicious homemade mint chip ice cream, you’ll need a few simple ingredients. Each one plays a vital role in achieving that creamy texture and refreshing mint flavor. Here’s what you’ll need:
- 2 cups heavy cream: This gives your ice cream a rich and creamy base.
- 1 cup whole milk: Whole milk adds a smooth texture and balances the creaminess.
- 3/4 cup granulated sugar: This sweetens the ice cream perfectly.
- 1 teaspoon pure mint extract: For that refreshing mint flavor. Adjust to taste!
- 1/2 cup chocolate chips: Use semi-sweet or dark chocolate for a delightful crunch.
- Pinch of salt: A little salt enhances the flavors and balances the sweetness.
Optional ingredients can also elevate your ice cream experience:
- Fresh mint leaves: If you prefer a more natural mint flavor, consider using fresh mint leaves.
- Green food coloring: For a fun, vibrant color, add a drop or two of green food coloring.
Gather these ingredients, and you’re ready to embark on your ice cream-making adventure! Each component contributes to the overall flavor and texture, ensuring that your homemade mint chip ice cream is a hit. Now, let’s move on to the preparation steps!
Step-by-Step Preparation of Homemade Mint Chip Ice Cream
Step 1: Gather Your Ingredients
Before you start making your homemade mint chip ice cream, it’s essential to gather all your ingredients. Having everything ready will make the process smoother and more enjoyable. Check your kitchen for the items listed in the ingredients section. Make sure you have your heavy cream, whole milk, sugar, mint extract, chocolate chips, and salt. If you’re using optional ingredients like fresh mint leaves or food coloring, grab those too. Once you have everything, you’re all set to begin!
Step 2: Prepare the Base
Now that you have your ingredients ready, it’s time to prepare the base for your ice cream. In a large mixing bowl, combine the heavy cream and whole milk. Whisk them together until they are well blended. Next, add the granulated sugar and a pinch of salt. Continue whisking until the sugar is completely dissolved. This step is crucial because it ensures a smooth texture in your ice cream. Once everything is mixed, you’ll have a creamy base that’s ready for flavoring!
Step 3: Infuse the Mint Flavor
To give your ice cream that refreshing minty taste, it’s time to infuse the mint flavor. Add the pure mint extract to your creamy base. If you’re using fresh mint leaves, you can steep them in the mixture. Simply heat the cream and milk mixture gently on the stove, then add the fresh mint leaves. Let it simmer for about 10 minutes, then strain out the leaves. This method will give your ice cream a natural mint flavor that’s simply delightful. If you prefer a stronger mint taste, feel free to add a bit more extract!
Step 4: Mix in the Chocolate Chips
Once your base is flavored with mint, it’s time to add the chocolate chips. Gently fold in the chocolate chips into the mixture. This step adds a delightful crunch to your creamy ice cream. You can use semi-sweet or dark chocolate chips, depending on your preference. Make sure the chips are evenly distributed throughout the mixture. This way, every scoop will have that perfect balance of mint and chocolate!
Step 5: Churn the Ice Cream
Now comes the fun part—churning the ice cream! If you have an ice cream maker, pour your mixture into the machine and follow the manufacturer’s instructions. Typically, it takes about 20-30 minutes for the ice cream to reach a soft-serve consistency. If you don’t have an ice cream maker, don’t worry! You can pour the mixture into a shallow dish and place it in the freezer. Stir it every 30 minutes for about 2-3 hours until it reaches the desired texture.
Step 6: Freeze and Set
After churning, transfer your ice cream to an airtight container. Smooth the top with a spatula and cover it tightly. Place it in the freezer for at least 4 hours, or until it’s firm. This final freezing step is essential for achieving that perfect scoopable texture. Once it’s set, your homemade mint chip ice cream will be ready to enjoy! Just scoop it into bowls or cones, and savor the deliciousness!
Variations of Homemade Mint Chip Ice Cream
Dairy-Free Options
If you’re looking for a dairy-free version of homemade mint chip ice cream, you’re in luck! There are several alternatives that can give you the same creamy texture without using traditional dairy products. One popular option is to use coconut milk. It has a rich, creamy consistency that works wonderfully in ice cream. Simply replace the heavy cream and whole milk with full-fat coconut milk. This will not only make your ice cream dairy-free but also add a subtle coconut flavor that pairs beautifully with mint.
Another great option is almond milk or cashew milk. These nut-based milks are lighter but can still create a delicious ice cream. To enhance the creaminess, consider adding a few tablespoons of coconut cream or a ripe banana to the mixture. This will help achieve that smooth texture you desire. Remember to adjust the sweetness, as some dairy-free milks can be less sweet than regular milk. With these alternatives, you can enjoy a refreshing mint chip ice cream that everyone can savor!
Different Mint Flavors
While traditional mint chip ice cream is delightful, you can experiment with different mint flavors to create unique variations. For instance, try using peppermint extract instead of spearmint. Peppermint has a stronger flavor and can give your ice cream a more intense minty kick. If you want something a bit different, consider using chocolate mint leaves. These leaves have a natural chocolate flavor that can add a delicious twist to your ice cream.
For a fruity twist, you can also mix in some fresh fruit purees. A hint of lime or lemon can brighten the mint flavor and create a refreshing summer treat. Just blend your favorite fruit and swirl it into the ice cream mixture before churning. This will give you a delightful combination of mint and fruit that’s perfect for warm days. The possibilities are endless, so don’t hesitate to get creative with your mint chip ice cream!
Cooking Note for Homemade Mint Chip Ice Cream
When making homemade mint chip ice cream, a few cooking notes can help ensure your success. First, always use high-quality ingredients. Fresh cream and milk will enhance the flavor and texture of your ice cream. If possible, opt for organic products, as they often have a richer taste.
Next, pay attention to the temperature of your ingredients. For the best results, make sure your heavy cream and milk are cold before mixing. This helps the ice cream churn more effectively, leading to a smoother texture. If you’re using fresh mint leaves, remember to wash them thoroughly to remove any dirt or pesticides.
Additionally, if you’re using an ice cream maker, make sure the bowl is completely frozen before pouring in your mixture. This step is crucial for achieving that creamy consistency. If you don’t have an ice cream maker, remember to stir your mixture every 30 minutes while it’s freezing. This will help break up ice crystals and create a smoother ice cream.
Lastly, patience is key! Allow your ice cream to freeze for at least four hours after churning. This will ensure it sets properly and is easy to scoop. With these cooking notes in mind, you’ll be well on your way to creating a delicious batch of homemade mint chip ice cream that everyone will love!
Serving Suggestions for Homemade Mint Chip Ice Cream
Pairing with Toppings
When it comes to serving your homemade mint chip ice cream, the right toppings can elevate your dessert to a whole new level. Here are some delightful options to consider:
- Whipped Cream: A dollop of freshly whipped cream adds a light and airy touch. It complements the minty flavor beautifully.
- Chocolate Sauce: Drizzle some rich chocolate sauce over your ice cream for an extra chocolatey experience. It creates a delicious contrast with the mint.
- Crushed Oreos: For a fun crunch, sprinkle crushed Oreo cookies on top. The chocolatey cookies pair perfectly with the mint flavor.
- Chopped Nuts: Add some chopped almonds or walnuts for a nutty crunch. They provide a nice texture and enhance the overall flavor.
- Fresh Mint Leaves: Garnish with a few fresh mint leaves for a pop of color and an extra hint of minty freshness.
Feel free to mix and match these toppings to create your perfect bowl of mint chip ice cream. The combination of flavors and textures will surely impress your family and friends!
Creative Serving Ideas
Serving your homemade mint chip ice cream can be as creative as you want! Here are some fun ideas to make your dessert stand out:
- Ice Cream Sundae: Create a classic sundae by layering your mint chip ice cream with toppings in a tall glass. Add whipped cream, chocolate sauce, and a cherry on top for a delightful treat.
- Ice Cream Sandwiches: Use two cookies to make ice cream sandwiches. Place a scoop of mint chip ice cream between two chocolate chip cookies for a delicious handheld dessert.
- Mint Chip Milkshake: Blend a scoop of your mint chip ice cream with milk for a refreshing milkshake. Top it with whipped cream and a sprinkle of chocolate chips for a fun twist.
- Mint Chip Float: Pour some soda or sparkling water over a scoop of mint chip ice cream in a glass. This fizzy treat is perfect for hot summer days!
- Ice Cream Cone: Serve your mint chip ice cream in a waffle cone for a classic ice cream experience. It’s fun to eat and perfect for outdoor gatherings.
With these serving suggestions, you can turn your homemade mint chip ice cream into a memorable dessert that everyone will love. Enjoy the creativity and have fun with your delicious creation!
Breakdown of Time for Homemade Mint Chip Ice Cream
Prep Time
Preparing your homemade mint chip ice cream is a breeze! The prep time typically takes about 15 to 20 minutes. This includes gathering your ingredients, mixing the base, and infusing the mint flavor. If you’re using fresh mint leaves, you might need a few extra minutes to steep them properly. Overall, this step is quick and easy, making it perfect for a fun afternoon activity!
Cooking Time
The cooking time for your mint chip ice cream mainly involves churning and freezing. If you have an ice cream maker, churning will take around 20 to 30 minutes. If you’re making it without a machine, you’ll need to stir the mixture every 30 minutes for about 2 to 3 hours while it freezes. This helps achieve that creamy texture we all love. So, whether you’re churning or stirring, the cooking time is manageable and well worth the wait!
Total Time
In total, you can expect to spend about 4 to 5 hours from start to finish. This includes the prep time, cooking time, and the final freezing period. While it may seem like a long time, most of it is hands-off. You can relax and enjoy your day while your ice cream sets in the freezer. Once it’s ready, you’ll have a delicious homemade mint chip ice cream that’s perfect for sharing with family and friends!
Nutritional Information for Homemade Mint Chip Ice Cream
Calories
When indulging in homemade mint chip ice cream, it’s good to know the calorie content. A typical serving size of about half a cup contains approximately 200 to 250 calories. This can vary based on the specific ingredients you use, such as the type of milk or cream. If you opt for lighter alternatives, you can reduce the calorie count while still enjoying this delightful treat. Remember, moderation is key, especially when enjoying such a creamy dessert!
Protein
Protein is an essential nutrient, and homemade mint chip ice cream can provide a modest amount. In a half-cup serving, you can expect to find around 3 to 5 grams of protein. This protein mainly comes from the milk and cream used in the recipe. If you choose to use dairy-free alternatives, the protein content may vary. For instance, coconut milk has less protein compared to cow’s milk. If you’re looking to boost the protein content, consider adding a scoop of protein powder to the mixture before churning.
Sodium
Sodium levels in your homemade mint chip ice cream are generally low. A half-cup serving typically contains about 50 to 100 milligrams of sodium. This amount can vary based on the ingredients you select. For example, if you use salted butter or certain brands of chocolate chips, the sodium content may increase. If you’re watching your sodium intake, be mindful of these ingredients. Overall, homemade ice cream can be a delicious treat that fits into a balanced diet when enjoyed in moderation.
FAQs about Homemade Mint Chip Ice Cream
Can I use fresh mint instead of extract?
Absolutely! Using fresh mint can enhance the flavor of your homemade mint chip ice cream. To do this, simply steep fresh mint leaves in your cream and milk mixture. Heat the mixture gently, add the mint leaves, and let it simmer for about 10 minutes. Afterward, strain out the leaves before mixing in the sugar. This method will give your ice cream a vibrant, natural mint flavor that’s truly refreshing. Just remember, fresh mint can be stronger than extract, so adjust the amount based on your taste preference!
How long does homemade ice cream last?
Homemade mint chip ice cream can last in the freezer for about 2 to 3 weeks when stored properly. To keep it fresh, make sure to transfer it to an airtight container. This helps prevent ice crystals from forming and keeps your ice cream creamy. However, for the best taste and texture, it’s recommended to enjoy it within the first week. After that, the flavor may start to fade, and the texture can become less smooth. So, gather your friends and family and enjoy your delicious creation while it’s at its best!
Can I make this recipe without an ice cream maker?
Yes, you can definitely make homemade mint chip ice cream without an ice cream maker! If you don’t have one, simply pour your mixture into a shallow dish and place it in the freezer. Every 30 minutes, take it out and stir vigorously with a fork. This helps break up ice crystals and creates a smoother texture. Continue this process for about 2 to 3 hours until your ice cream reaches the desired consistency. It may take a bit more effort, but the result will still be a delicious treat!
Conclusion on Homemade Mint Chip Ice Cream
Final Thoughts on Making Your Own Ice Cream
Making your own homemade mint chip ice cream is not just about enjoying a delicious treat; it’s about the joy of creating something special. The process allows you to connect with your ingredients and customize flavors to suit your taste. Whether you’re making it for a family gathering, a summer party, or just a cozy night in, this ice cream is sure to impress.
As you scoop into your creamy creation, you’ll appreciate the freshness of the mint and the delightful crunch of chocolate chips. Plus, the satisfaction of knowing you made it yourself adds an extra layer of enjoyment. Remember, the beauty of homemade ice cream lies in its versatility. You can experiment with different flavors, textures, and toppings to make it uniquely yours.
So, gather your ingredients, invite your loved ones to join in the fun, and embark on this sweet adventure. Homemade mint chip ice cream is a delightful way to cool off on hot days and create lasting memories. Enjoy every scoop, and don’t forget to share your delicious results with friends and family. Happy ice cream making!
Craving more delightful frozen treats? Indulge in these must-try ice cream recipes:
- Rich Chocolate Ice Cream: A Decadent Delight
- Baileys Ice Cream: A Boozy Twist
- Vanilla Custard Ice Cream: Classic and Creamy
For more tempting recipes and culinary inspiration, follow us on Pinterest!