Introduction to Coconut Ice Cream
Coconut Ice Cream is not just a dessert; it’s a delightful escape to a tropical paradise. This creamy treat brings the essence of summer right to your bowl. With its rich coconut flavor and smooth texture, it’s perfect for hot days or any time you crave something sweet. Whether you’re lounging by the pool or hosting a summer barbecue, this ice cream is sure to impress your guests and satisfy your taste buds.
What Makes Coconut Ice Cream Special?
What sets Coconut Ice Cream apart is its unique flavor profile. Unlike traditional ice creams, it uses coconut milk, which gives it a rich and creamy consistency. This dairy-free option is perfect for those who are lactose intolerant or simply prefer plant-based desserts. The natural sweetness of coconut milk, combined with a hint of vanilla, creates a deliciously smooth treat. Plus, adding shredded coconut gives it a delightful crunch, making each bite a little adventure.
The Appeal of Tropical Flavors in Desserts
Tropical flavors have a special charm that can brighten any dessert. They evoke feelings of warmth, sunshine, and relaxation. Coconut, pineapple, mango, and passion fruit are just a few examples of these vibrant flavors. When combined in desserts, they create a refreshing experience that transports you to a beachside getaway. Coconut Ice Cream, with its tropical essence, is a perfect example of how these flavors can elevate a simple dessert into something extraordinary. So, why not indulge in this creamy delight and let your taste buds take a vacation?
Ingredients for Coconut Ice Cream
Creating your own Coconut Ice Cream at home is simple and requires just a few key ingredients. Here’s what you’ll need to whip up this tropical delight:
- 2 cans of full-fat coconut milk: This is the base of your ice cream, providing a rich and creamy texture.
- 1/2 cup of granulated sugar: This adds sweetness to balance the coconut flavor.
- 1 teaspoon of pure vanilla extract: A hint of vanilla enhances the overall taste.
- 1/2 cup of shredded coconut: For added texture and a delightful crunch.
- Pinch of salt: This helps to elevate the flavors.
Optional ingredients can also be added to customize your Coconut Ice Cream. Consider using:
- Fresh fruit: Chunks of pineapple or mango can add a burst of flavor.
- Chocolate chips: For a sweet twist, mix in some dark or white chocolate chips.
- Nuts: Chopped almonds or cashews can provide a satisfying crunch.
With these ingredients, you’re all set to create a delicious Coconut Ice Cream that will surely impress your family and friends. Let’s move on to the next step and learn how to prepare this delightful treat!
Step-by-Step Preparation of Coconut Ice Cream
Now that you have all your ingredients ready, it’s time to dive into the fun part: making your Coconut Ice Cream! Follow these simple steps to create a creamy, dreamy dessert that will have everyone asking for seconds.
Step 1: Gather Your Ingredients
Before you start, make sure you have everything you need. Gather the following:
- 2 cans of full-fat coconut milk
- 1/2 cup of granulated sugar
- 1 teaspoon of pure vanilla extract
- 1/2 cup of shredded coconut
- A pinch of salt
Optional items like fresh fruit, chocolate chips, or nuts can also be set aside if you want to add a twist to your ice cream. Having everything in one place makes the process smoother and more enjoyable!
Step 2: Mix the Base for Coconut Ice Cream
In a large mixing bowl, combine the coconut milk, granulated sugar, vanilla extract, and a pinch of salt. Use a whisk to mix everything together until the sugar is fully dissolved. This step is crucial as it ensures that your ice cream will be sweet and flavorful. If you’re adding any optional ingredients, like shredded coconut or fruit, now is the time to mix them in!
Step 3: Churn the Coconut Ice Cream
If you have an ice cream maker, pour the mixture into it and churn according to the manufacturer’s instructions. This usually takes about 20 to 30 minutes. The churning process incorporates air into the mixture, making it light and fluffy. If you don’t have an ice cream maker, don’t worry! You can still make this delicious treat by following the next steps.
Step 4: Freeze the Mixture
Once the mixture is churned, transfer it to an airtight container. If you used an ice cream maker, this is where you’ll want to freeze it for at least 4 hours or until it’s firm. If you’re making it without an ice cream maker, place the mixture in a container and freeze it. Every 30 minutes, stir the mixture with a fork to break up any ice crystals. Repeat this for about 2 to 3 hours until it reaches a creamy consistency.
Step 5: Serve and Enjoy Your Coconut Ice Cream
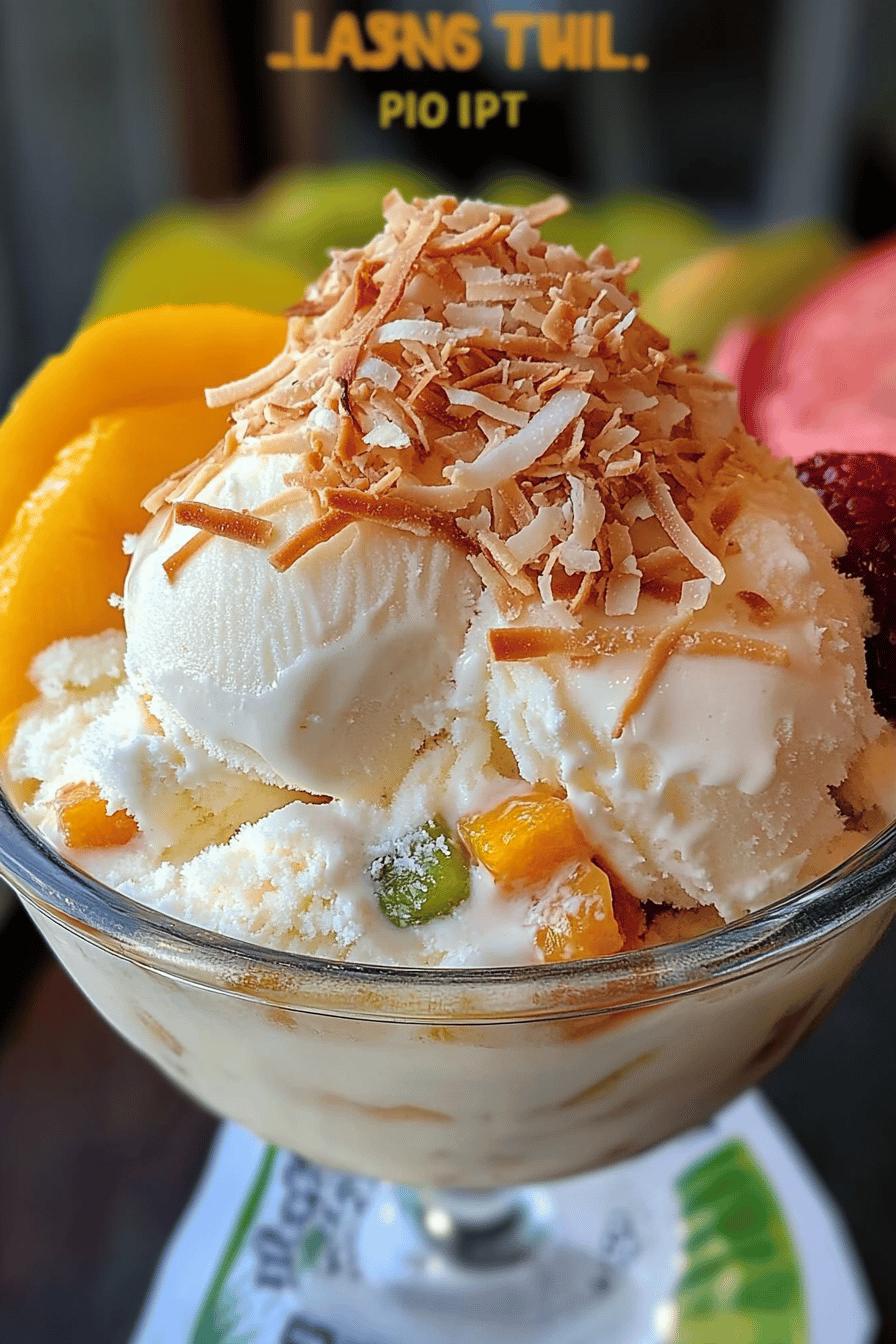
After your Coconut Ice Cream has frozen to perfection, it’s time to serve! Scoop it into bowls or cones and enjoy it as is, or top it with fresh tropical fruits, chocolate chips, or nuts for an extra special treat. Each bite will remind you of sunny beaches and warm breezes. So, grab a spoon and dig in!
Variations of Coconut Ice Cream
While the classic Coconut Ice Cream is already a delightful treat, there are many ways to customize it. By adding different flavors and mix-ins, you can create a unique version that suits your taste. Let’s explore some fun variations that will take your Coconut Ice Cream to the next level!
Adding Different Flavors to Coconut Ice Cream
One of the best things about making Coconut Ice Cream is the ability to experiment with flavors. Here are some ideas to inspire your creativity:
- Pineapple Coconut Ice Cream: Blend in some crushed pineapple for a tropical twist. This combination is reminiscent of piña coladas!
- Mango Coconut Ice Cream: Puree fresh or frozen mango and mix it into the base. The sweet and tangy flavor pairs perfectly with coconut.
- Chocolate Coconut Ice Cream: Add cocoa powder or melted chocolate to the mixture for a rich, chocolatey delight. This is a great option for chocolate lovers!
- Mint Coconut Ice Cream: Stir in some fresh mint leaves or mint extract for a refreshing flavor. This variation is perfect for hot summer days.
Feel free to mix and match these flavors to create your own signature Coconut Ice Cream. The possibilities are endless, and each variation brings a new taste experience!
Incorporating Mix-Ins for Coconut Ice Cream
Mix-ins can add texture and surprise to your Coconut Ice Cream. Here are some tasty options to consider:
- Shredded Coconut: For an extra coconut kick, add more shredded coconut to the base. This will enhance the flavor and provide a delightful crunch.
- Chocolate Chips: Dark or white chocolate chips can add a sweet touch. They melt slightly in the ice cream, creating a delicious contrast.
- Nuts: Chopped almonds, cashews, or macadamia nuts can provide a satisfying crunch. They also add healthy fats and protein.
- Fresh Fruits: Chunks of strawberries, blueberries, or bananas can brighten up your ice cream. They add natural sweetness and a burst of flavor.
When adding mix-ins, be sure to fold them in gently after mixing the base. This way, they’ll be evenly distributed throughout your Coconut Ice Cream. Enjoy experimenting with these variations to find your favorite combination!
Cooking Note for Coconut Ice Cream
Making Coconut Ice Cream is a fun and rewarding experience. However, there are a few important cooking notes to keep in mind to ensure your ice cream turns out perfectly every time. Here are some tips to help you along the way:
- Choose Quality Ingredients: The flavor of your Coconut Ice Cream largely depends on the quality of the ingredients. Opt for full-fat coconut milk for a rich and creamy texture. Look for brands that use minimal additives for the best results.
- Temperature Matters: Make sure your mixing bowl and ice cream maker (if using) are chilled before starting. This helps the mixture freeze faster, resulting in a smoother texture. If you’re using a bowl, place it in the freezer for about 15 minutes before mixing.
- Sweetness Level: Adjust the sugar to your taste. If you prefer a less sweet ice cream, feel free to reduce the amount of sugar. Remember, the sweetness can also depend on any mix-ins or additional flavors you add.
- Mixing Technique: When mixing the base, whisk until the sugar is fully dissolved. This step is crucial for achieving a smooth consistency. If you notice any sugar granules, continue mixing until they disappear.
- Freezing Time: Be patient during the freezing process. Allow your Coconut Ice Cream to freeze for at least 4 hours for the best texture. If you’re stirring every 30 minutes, make sure to do it for a few hours to break up ice crystals.
By keeping these cooking notes in mind, you’ll be well on your way to creating a delicious Coconut Ice Cream that everyone will love. Enjoy the process and the delightful results!
Serving Suggestions for Coconut Ice Cream
Once your Coconut Ice Cream is ready, it’s time to think about how to serve it. This creamy treat pairs beautifully with a variety of toppings and sides. Here are some delightful serving suggestions that will elevate your dessert experience!
Pairing Coconut Ice Cream with Tropical Fruits
Tropical fruits are a natural match for Coconut Ice Cream. Their vibrant colors and refreshing flavors complement the creamy texture perfectly. Here are some fruits to consider:
- Pineapple: Fresh pineapple chunks add a juicy sweetness that pairs wonderfully with coconut.
- Mango: Slices of ripe mango bring a tropical flair and a burst of flavor.
- Banana: Sliced bananas add creaminess and a hint of natural sweetness.
- Kiwi: The tartness of kiwi provides a nice contrast to the rich ice cream.
- Passion Fruit: Drizzle some passion fruit pulp over the ice cream for a tangy kick.
To serve, simply scoop the Coconut Ice Cream into bowls and top with your choice of tropical fruits. This not only enhances the flavor but also makes for a beautiful presentation. Your guests will be impressed by the colorful and delicious combination!
Creative Ways to Serve Coconut Ice Cream
There are many fun and creative ways to serve Coconut Ice Cream that can make your dessert even more special. Here are some ideas to inspire you:
- Ice Cream Sundae: Create a tropical sundae by layering Coconut Ice Cream with fresh fruits, chocolate sauce, and a sprinkle of nuts. Top it off with a cherry for a classic touch!
- Ice Cream Sandwich: Use cookies or brownies to make ice cream sandwiches. The combination of soft cookies and creamy ice cream is simply irresistible.
- In a Coconut Shell: For a fun presentation, serve the ice cream in halved coconut shells. This adds a unique touch and enhances the tropical theme.
- Milkshake: Blend Coconut Ice Cream with a splash of coconut milk for a delicious milkshake. Serve it in a tall glass with a straw for a refreshing drink.
- Frozen Fruit Cups: Freeze small cups of blended tropical fruits and serve a scoop of Coconut Ice Cream on top. This makes for a refreshing and healthy dessert.
These creative serving ideas will not only make your Coconut Ice Cream more enjoyable but also impress your family and friends. So, get ready to serve up some smiles with these delightful presentations!
Tips for Making the Perfect Coconut Ice Cream
Making Coconut Ice Cream can be a fun and rewarding experience. To ensure your ice cream turns out perfectly every time, here are some helpful tips to keep in mind. These tips will help you achieve a creamy texture and rich flavor that everyone will love!
- Use Full-Fat Coconut Milk: For the best results, always opt for full-fat coconut milk. This will give your ice cream a rich and creamy texture. Low-fat versions may result in a less satisfying consistency.
- Chill Your Ingredients: Before mixing, chill your coconut milk and mixing bowl in the refrigerator. This helps the mixture freeze faster, leading to a smoother ice cream.
- Sweeten to Taste: Adjust the sugar according to your preference. If you like it sweeter, feel free to add a bit more sugar. Remember, the sweetness can also come from any mix-ins you choose.
- Don’t Skip the Salt: A pinch of salt enhances the flavors in your ice cream. It balances the sweetness and brings out the coconut flavor beautifully.
- Stir Regularly if Not Using an Ice Cream Maker: If you’re making ice cream without a machine, remember to stir the mixture every 30 minutes while it freezes. This prevents ice crystals from forming and keeps the texture creamy.
- Let It Sit Before Serving: After freezing, let your Coconut Ice Cream sit at room temperature for about 5-10 minutes before serving. This makes it easier to scoop and enhances the overall experience.
- Experiment with Flavors: Don’t be afraid to get creative! Try adding different flavors or mix-ins to customize your Coconut Ice Cream. The more you experiment, the more fun you’ll have!
By following these tips, you’ll be well on your way to making the perfect Coconut Ice Cream. Enjoy the process and the delicious results that come with it!
Breakdown of Time for Coconut Ice Cream
Understanding the time needed to make Coconut Ice Cream can help you plan better. Here’s a simple breakdown of the time involved in each step of the process. This way, you can enjoy your delicious treat without any surprises!
Prep Time for Coconut Ice Cream
The prep time for Coconut Ice Cream is quite short. You’ll need about 15 to 20 minutes to gather your ingredients and mix the base. This includes:
- Gathering all the ingredients
- Mixing the coconut milk, sugar, vanilla, and salt
- Incorporating any optional mix-ins
Once you have everything mixed, you’re ready to move on to the next step!
Cooking Time for Coconut Ice Cream
The cooking time mainly depends on whether you’re using an ice cream maker or not. Here’s what to expect:
- If using an ice cream maker: Churning the mixture will take about 20 to 30 minutes. This process incorporates air, making your ice cream light and fluffy.
- If not using an ice cream maker: You’ll need to freeze the mixture for about 2 to 3 hours, stirring every 30 minutes. This helps break up ice crystals and ensures a creamy texture.
So, the cooking time can vary from 20 minutes to a few hours, depending on your method!
Total Time for Coconut Ice Cream
In total, you should plan for about 4 to 5 hours to make Coconut Ice Cream. This includes:
- 15 to 20 minutes for prep
- 20 to 30 minutes for churning (if using an ice cream maker)
- 4 hours for freezing (if using an ice cream maker) or 2 to 3 hours of stirring and freezing (if not using an ice cream maker)
So, while the active time is relatively short, the freezing time is essential for achieving that perfect creamy texture. Once you’ve waited, you’ll be rewarded with a delicious Coconut Ice Cream that’s worth every minute!
Nutritional Information for Coconut Ice Cream
Understanding the nutritional content of your Coconut Ice Cream can help you enjoy it even more. This delicious treat not only satisfies your sweet tooth but also provides some essential nutrients. Let’s break down the nutritional information for a typical serving of Coconut Ice Cream.
Calories in Coconut Ice Cream
A standard serving of Coconut Ice Cream (about 1/2 cup) contains approximately 200 to 250 calories. The calorie count can vary based on the specific ingredients you use, especially if you add mix-ins like chocolate chips or nuts. While it’s a treat, it’s good to enjoy it in moderation, especially if you’re watching your calorie intake.
Protein Content in Coconut Ice Cream
In terms of protein, Coconut Ice Cream typically contains around 2 to 3 grams per serving. The protein mainly comes from the coconut milk used in the recipe. While it’s not a high-protein dessert, it does offer a small amount that can contribute to your daily intake. If you want to boost the protein content, consider adding nuts or seeds as mix-ins.
Sodium Levels in Coconut Ice Cream
The sodium content in Coconut Ice Cream is relatively low, usually around 10 to 20 milligrams per serving. This makes it a heart-healthy option compared to many store-bought ice creams, which can be higher in sodium. The pinch of salt added during preparation helps enhance the flavors without significantly increasing the sodium levels.
Overall, Coconut Ice Cream can be a delightful addition to your dessert options. With its creamy texture and tropical flavor, it’s a treat that can be enjoyed without too much guilt. Just remember to savor each scoop!
FAQs About Coconut Ice Cream
Can I make Coconut Ice Cream without an ice cream maker?
Absolutely! You can make Coconut Ice Cream without an ice cream maker. After mixing your ingredients, pour the mixture into a shallow container. Place it in the freezer and stir it every 30 minutes for about 2 to 3 hours. This stirring helps break up ice crystals, ensuring a creamy texture. It’s a simple method that yields delicious results!
How long does Coconut Ice Cream last in the freezer?
Coconut Ice Cream can last in the freezer for about 2 to 3 weeks. To keep it fresh, store it in an airtight container. Make sure to press a piece of plastic wrap directly onto the surface of the ice cream before sealing the container. This helps prevent ice crystals from forming and keeps your ice cream creamy and delicious!
Is Coconut Ice Cream dairy-free?
Yes, Coconut Ice Cream is dairy-free! It’s made with coconut milk instead of traditional dairy products. This makes it a great option for those who are lactose intolerant or following a vegan diet. Enjoy this creamy treat without any dairy worries!
What can I use instead of coconut milk in Coconut Ice Cream?
If you don’t have coconut milk, you can use other non-dairy milk alternatives like almond milk, cashew milk, or oat milk. However, keep in mind that these alternatives may not provide the same rich and creamy texture as coconut milk. For a similar consistency, consider using full-fat versions of these non-dairy milks or adding a bit of coconut cream for extra creaminess. Experimenting with different milks can lead to unique flavors!
Conclusion on Coconut Ice Cream
Recap of the Delightful Experience of Making Coconut Ice Cream
Making Coconut Ice Cream is not just about creating a delicious dessert; it’s an enjoyable experience that brings a taste of the tropics right to your kitchen. From gathering fresh ingredients to mixing and freezing, each step is filled with excitement and anticipation. The creamy texture and rich coconut flavor make this treat a standout, whether you’re serving it at a summer gathering or enjoying it on a quiet evening at home. Plus, the ability to customize it with various flavors and mix-ins means you can make it uniquely yours!
Encouragement to Try the Recipe at Home
So, why not give this Coconut Ice Cream recipe a try? It’s easy to make and requires minimal effort, yet the results are incredibly rewarding. Whether you’re a seasoned cook or a beginner in the kitchen, this recipe is perfect for everyone. Gather your ingredients, follow the steps, and soon you’ll be savoring a bowl of creamy, tropical goodness. Don’t forget to share your creations with family and friends—they’ll be impressed by your culinary skills! Enjoy the delightful journey of making Coconut Ice Cream, and let each scoop transport you to a sunny paradise.
Relevant Recipes Link: