Introduction to Classic Mounds Bars Recipe
Are you ready to indulge in a sweet treat that brings joy with every bite? The Classic Mounds Bars Recipe is just what you need! These bars combine the delightful flavors of coconut and chocolate, creating a perfect harmony that is hard to resist. Whether you’re hosting a gathering or simply craving something sweet, these bars are sure to impress.
What Makes Classic Mounds Bars Special?
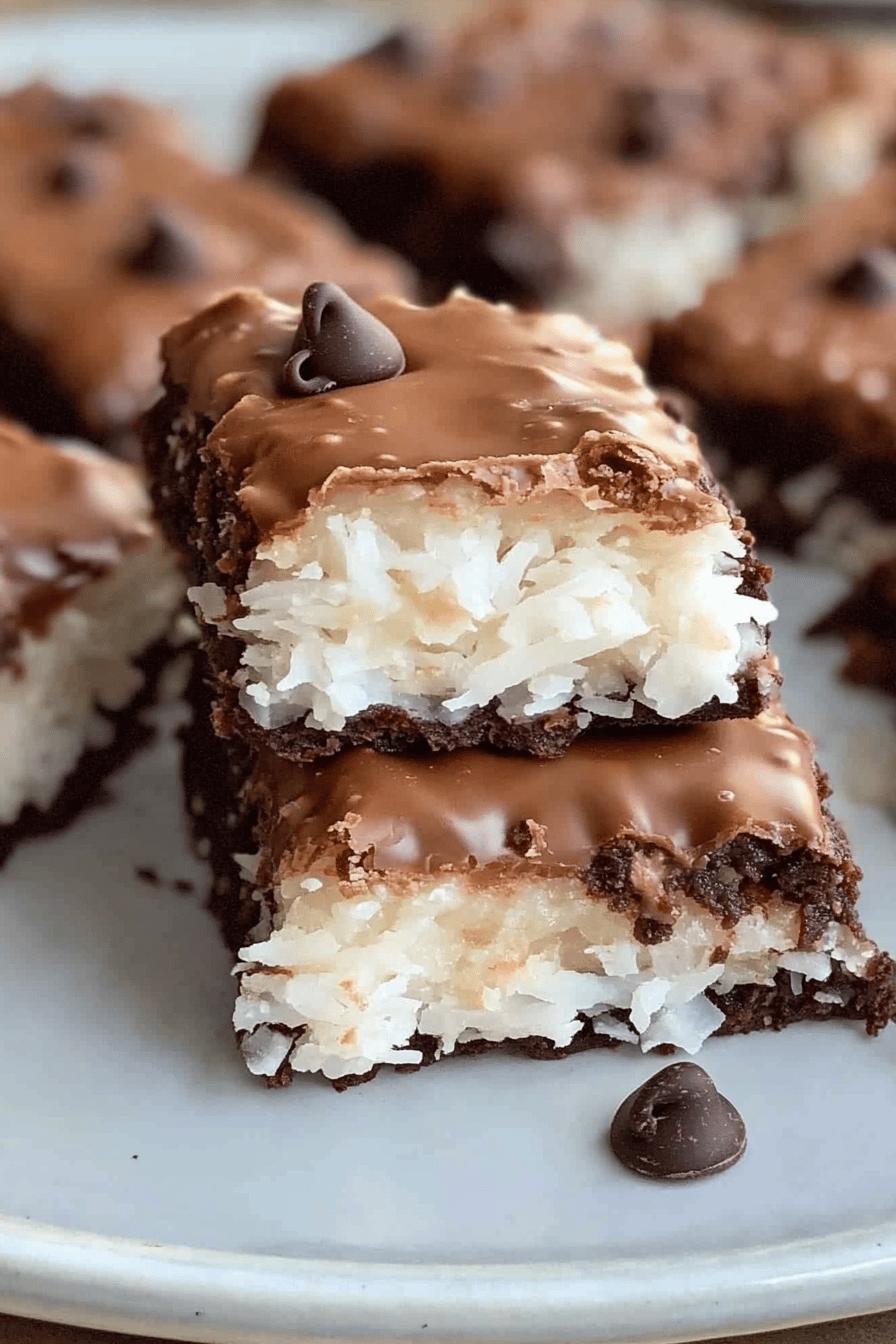
What sets Classic Mounds Bars apart is their unique combination of textures and flavors. The chewy, sweetened coconut filling pairs beautifully with the rich, smooth chocolate coating. This delightful contrast makes each bite a little piece of heaven. Plus, they are no-bake, which means you can whip them up quickly without turning on the oven. Perfect for hot summer days or any time you want a quick dessert!
A Brief History of Mounds Bars
Mounds Bars have a fascinating history that dates back to the 1920s. Originally created by the Peter Paul Candy Manufacturing Company, these bars were designed to cater to the growing demand for coconut-flavored treats. Over the years, Mounds Bars have become a beloved classic, known for their simple yet delicious ingredients. They are often enjoyed as a sweet snack or dessert, making them a staple in many households. Today, you can find them in stores, but nothing beats the taste of homemade Mounds Bars!
Ingredients for Classic Mounds Bars Recipe
To create your own delicious Classic Mounds Bars Recipe, you’ll need a few simple ingredients. These items are easy to find and will help you whip up this delightful treat in no time. Here’s what you’ll need:
- 2 cups shredded sweetened coconut
- 1 cup sweetened condensed milk
- 1 teaspoon vanilla extract
- 2 cups semi-sweet chocolate chips (or milk chocolate chips)
- 2 tablespoons coconut oil (optional, for smoother chocolate)
Each ingredient plays a vital role in achieving that classic taste. The shredded coconut provides the chewy texture, while the sweetened condensed milk adds sweetness and moisture. The chocolate coating brings everything together, creating a rich and satisfying flavor. If you want to enhance the chocolate’s smoothness, consider adding coconut oil. It helps the chocolate melt evenly and gives a glossy finish.
Now that you have your ingredients ready, you’re one step closer to enjoying these delightful bars. Let’s move on to the next section, where we’ll guide you through the step-by-step preparation of your Classic Mounds Bars!
Step-by-Step Preparation of Classic Mounds Bars Recipe
Now that you have all your ingredients ready, it’s time to dive into the fun part: making your Classic Mounds Bars Recipe! Follow these simple steps, and you’ll have a delicious treat in no time.
Step 1: Gather Your Ingredients
Before you start, make sure you have everything you need. Gather your shredded coconut, sweetened condensed milk, vanilla extract, chocolate chips, and coconut oil. Having all your ingredients in one place will make the process smoother and more enjoyable. Plus, it’s always nice to see everything laid out!
Step 2: Prepare the Coconut Mixture
In a large mixing bowl, combine the shredded coconut, sweetened condensed milk, and vanilla extract. Stir everything together until the coconut is fully coated with the milk. This mixture should be sticky and hold together well. If it seems too dry, you can add a little more sweetened condensed milk. Once mixed, it’s time to move on to the next step!
Step 3: Form the Bars
Now comes the fun part! Take a small amount of the coconut mixture and shape it into a rectangular bar. Aim for about 1 inch wide and 2 inches long. Repeat this process until all the mixture is shaped into bars. Place them on a baking sheet lined with parchment paper. This will prevent them from sticking and make cleanup easier.
Step 4: Melt the Chocolate
Next, it’s time to melt the chocolate. You can do this in a microwave-safe bowl or using a double boiler. If you’re using the microwave, heat the chocolate chips in 30-second intervals, stirring in between until smooth. If you’re using a double boiler, place the chocolate chips in the top bowl and stir until melted. If you want a smoother chocolate, add the coconut oil during this step.
Step 5: Coat the Bars in Chocolate
Once your chocolate is melted, it’s time to coat the bars! Dip each coconut bar into the melted chocolate, ensuring it’s fully covered. Use a fork to lift the bar out, allowing any excess chocolate to drip off. Place the coated bars back on the parchment-lined baking sheet. This step is where the magic happens, as the chocolate adds a rich layer of flavor!
Step 6: Chill and Set
Finally, place the baking sheet in the refrigerator for about 30 minutes. This will allow the chocolate to harden and set perfectly. Once they’re firm, your Classic Mounds Bars are ready to be enjoyed! You can store them in an airtight container in the fridge for up to a week, but we doubt they’ll last that long!
Now that you’ve mastered the preparation of these delightful bars, you’re well on your way to impressing friends and family with your homemade treats. Let’s explore some variations to make your Classic Mounds Bars even more exciting!
Variations of Classic Mounds Bars Recipe
While the original Classic Mounds Bars Recipe is delicious on its own, there are plenty of fun variations to try! These tweaks can add new flavors and textures, making your bars even more exciting. Let’s explore two popular variations that you can easily incorporate into your recipe.
Adding Nuts for Extra Crunch
If you love a bit of crunch in your treats, consider adding nuts to your Classic Mounds Bars. Chopped almonds, walnuts, or pecans can bring a delightful texture contrast to the chewy coconut filling. To do this, simply mix about ½ cup of your favorite nuts into the coconut mixture during Step 2. This addition not only enhances the flavor but also provides a satisfying crunch with every bite. Plus, nuts are a great source of healthy fats and protein!
Using Dark Chocolate Instead of Milk Chocolate
For those who prefer a richer taste, swapping milk chocolate for dark chocolate is a fantastic option. Dark chocolate has a deeper flavor and pairs beautifully with the sweetness of the coconut. To make this change, simply use 2 cups of dark chocolate chips in Step 4. The result will be a more sophisticated treat that still satisfies your sweet tooth. Dark chocolate also contains antioxidants, making it a slightly healthier choice!
These variations allow you to customize your Classic Mounds Bars to suit your taste. Whether you choose to add nuts for crunch or opt for dark chocolate for a richer flavor, you can create a unique treat that everyone will love. Now, let’s move on to some important cooking notes to ensure your bars turn out perfectly!
Cooking Note for Classic Mounds Bars Recipe
When making your Classic Mounds Bars Recipe, there are a few cooking notes to keep in mind. These tips will help you achieve the best results and ensure your bars turn out delicious every time.
First, be sure to use fresh shredded coconut. Fresh coconut will provide a better texture and flavor compared to older, dried coconut. If you can, opt for sweetened shredded coconut, as it adds the perfect amount of sweetness to your bars.
Next, when melting the chocolate, be patient. If you heat it too quickly, it can seize up and become grainy. Stirring frequently while melting helps maintain a smooth consistency. If you find your chocolate is too thick, adding a little coconut oil can help thin it out and make it easier to coat the bars.
Additionally, when forming the bars, make sure they are compact. This will help them hold their shape when coated in chocolate. If they are too loose, they may fall apart during the dipping process.
Lastly, allow the bars to chill completely before serving. This step is crucial for the chocolate to set properly. If you’re in a hurry, you can place them in the freezer for about 15 minutes instead of the refrigerator. Just keep an eye on them to prevent freezing!
By following these cooking notes, you’ll be well on your way to creating perfect Classic Mounds Bars that everyone will love. Now, let’s explore some serving suggestions to make your dessert experience even better!
Serving Suggestions for Classic Mounds Bars Recipe
Now that you’ve created your delicious Classic Mounds Bars Recipe, it’s time to think about how to serve them! These bars are not only tasty but also versatile. Here are some perfect pairings and occasions to enjoy your homemade treats.
Perfect Pairings with Beverages
When it comes to enjoying your Classic Mounds Bars, the right beverage can enhance the experience. Here are a few delightful options:
- Coffee: A warm cup of coffee pairs beautifully with the sweet coconut and chocolate flavors. The bitterness of the coffee balances the sweetness of the bars.
- Tea: Herbal teas, like chamomile or peppermint, offer a soothing contrast to the rich bars. They can cleanse your palate and provide a refreshing experience.
- Milk: A classic choice! Cold milk complements the sweetness of the bars and makes for a nostalgic treat.
- Coconut Water: For a tropical twist, serve your bars with coconut water. This pairing enhances the coconut flavor and adds a refreshing touch.
These beverages not only taste great with your Classic Mounds Bars but also create a delightful moment to savor your homemade dessert.
Ideal Occasions for Serving
Your Classic Mounds Bars are perfect for various occasions. Here are some ideas on when to serve them:
- Birthday Parties: These bars make a fun and unique dessert option for birthday celebrations. They can be cut into bite-sized pieces for easy sharing.
- Picnics: Pack your bars for a picnic! They are easy to transport and provide a sweet treat after a day outdoors.
- Holiday Gatherings: Whether it’s Christmas, Easter, or any festive occasion, these bars add a special touch to your dessert table.
- Movie Nights: Enjoy your Classic Mounds Bars while watching your favorite films. They make a great snack for cozy nights in!
With these serving suggestions, you can elevate your Classic Mounds Bars experience. Whether you’re enjoying them with a warm drink or sharing them at a gathering, these bars are sure to bring smiles and satisfaction. Now, let’s move on to some tips for perfecting your Classic Mounds Bars Recipe!
Tips for Perfecting Your Classic Mounds Bars Recipe
To ensure your Classic Mounds Bars Recipe turns out perfectly every time, here are some helpful tips. These suggestions will help you maintain freshness and troubleshoot any common issues you might encounter during the process.
Storage Tips for Freshness
Storing your Classic Mounds Bars properly is key to keeping them fresh and delicious. Here are some effective storage tips:
- Airtight Container: Place your bars in an airtight container. This will help prevent them from drying out and keep them fresh for longer.
- Refrigeration: Store your bars in the refrigerator. The cool temperature helps maintain the chocolate coating and keeps the coconut filling from becoming too soft.
- Layering: If you have multiple layers of bars, separate them with parchment paper. This prevents them from sticking together and makes it easier to grab one when you’re ready to enjoy!
- Freezing: If you want to keep your bars for an extended period, consider freezing them. Wrap each bar in plastic wrap and place them in a freezer-safe bag. They can last up to three months in the freezer. Just thaw them in the fridge before serving.
By following these storage tips, you can enjoy your Classic Mounds Bars at their best, whether you’re savoring them right away or saving some for later!
Troubleshooting Common Issues
Even the best recipes can have a few hiccups. Here are some common issues you might face while making your Classic Mounds Bars and how to fix them:
- Bars Falling Apart: If your bars are crumbling, it may be due to not enough sweetened condensed milk. Make sure the coconut mixture is sticky enough to hold together. You can add a little more milk to help bind it.
- Chocolate Seizing: If your chocolate becomes grainy while melting, it may have been overheated. Always melt chocolate slowly and stir frequently. If it seizes, you can try adding a teaspoon of coconut oil to help smooth it out.
- Chocolate Not Coating Well: If the chocolate isn’t coating the bars smoothly, it might be too thick. Adding a bit of coconut oil can help thin it out, making it easier to dip.
- Too Sweet: If you find the bars too sweet for your taste, consider using unsweetened coconut or dark chocolate for a more balanced flavor. This can help cut the sweetness while still delivering that delicious coconut-chocolate combo.
With these troubleshooting tips, you can overcome common challenges and create the perfect Classic Mounds Bars every time. Now that you’re equipped with these tips, let’s move on to the breakdown of time for your Classic Mounds Bars Recipe!
Breakdown of Time for Classic Mounds Bars Recipe
Understanding the time needed for your Classic Mounds Bars Recipe is essential for planning. Here’s a simple breakdown of the time you’ll need for each step, so you can enjoy your delicious bars without any surprises!
Prep Time
The prep time for making your Classic Mounds Bars is quite short. You’ll need about 15 minutes to gather your ingredients and prepare the coconut mixture. This includes mixing the shredded coconut, sweetened condensed milk, and vanilla extract. It’s a quick and easy process that gets you one step closer to enjoying your sweet treat!
Cooking Time
Since this is a no-bake recipe, the cooking time is minimal. The only time you’ll need to consider is the time it takes to melt the chocolate, which should take about 5 minutes. After coating the bars, you’ll need to chill them in the refrigerator for about 30 minutes. This allows the chocolate to set properly, ensuring a perfect finish.
Total Time
In total, you can expect to spend around 50 minutes from start to finish. This includes 15 minutes of prep time, 5 minutes for melting the chocolate, and 30 minutes for chilling. With such a quick turnaround, you can whip up these delightful bars anytime you have a craving for something sweet!
Now that you know the time breakdown, you can easily fit this recipe into your day. Let’s move on to the nutritional information for your Classic Mounds Bars Recipe!
Nutritional Information for Classic Mounds Bars Recipe
Understanding the nutritional content of your Classic Mounds Bars Recipe is important, especially if you’re mindful of your diet. These bars are a delightful treat, but knowing their calories and macronutrients can help you enjoy them responsibly. Let’s break down the nutritional information for a standard serving of these delicious bars.
Calories and Macronutrients
Each Classic Mounds Bar contains approximately 150 calories. Here’s a closer look at the macronutrient breakdown per bar:
- Calories: 150
- Fat: 8g
- Carbohydrates: 20g
- Fiber: 2g
- Sugar: 15g
- Protein: 1g
The bars are rich in carbohydrates, primarily from the sweetened condensed milk and shredded coconut. The fat content mainly comes from the chocolate and coconut, providing a satisfying richness. While they are not a significant source of protein, they do offer a small amount, making them a sweet treat rather than a meal replacement.
Health Considerations
While Classic Mounds Bars are a delightful indulgence, it’s important to enjoy them in moderation. Here are a few health considerations to keep in mind:
- High in Sugar: These bars contain a fair amount of sugar due to the sweetened condensed milk and chocolate. If you’re watching your sugar intake, consider enjoying them as an occasional treat.
- Allergy Awareness: If you have nut allergies, be cautious when adding nuts to the recipe. Always check labels for cross-contamination.
- Gluten-Free Option: The ingredients used in this recipe are naturally gluten-free, making them a suitable option for those with gluten sensitivities.
- Healthy Fats: The coconut and chocolate provide healthy fats, which can be beneficial in moderation. Coconut is known for its medium-chain triglycerides (MCTs), which may offer some health benefits.
By being aware of the nutritional content and health considerations, you can enjoy your Classic Mounds Bars while maintaining a balanced diet. Now that you have all the information you need, let’s move on to some frequently asked questions about this delightful recipe!
FAQs about Classic Mounds Bars Recipe
Can I make Classic Mounds Bars gluten-free?
Absolutely! The ingredients in the Classic Mounds Bars Recipe are naturally gluten-free. The shredded coconut, sweetened condensed milk, and chocolate chips do not contain gluten. However, always check the labels to ensure there are no cross-contaminations, especially with the chocolate chips. This way, you can enjoy these delicious bars without any worries!
How long do Classic Mounds Bars last?
Your homemade Classic Mounds Bars can last up to a week when stored properly. Keep them in an airtight container in the refrigerator to maintain their freshness. If you want to keep them longer, consider freezing them. They can last up to three months in the freezer. Just remember to thaw them in the fridge before enjoying!
Can I use unsweetened coconut for this recipe?
Yes, you can use unsweetened coconut if you prefer a less sweet option. However, keep in mind that the bars may taste less sweet than the original recipe. To balance the flavors, you might want to add a little extra sweetened condensed milk or a touch of sugar. This way, you can still achieve that delightful coconut flavor while controlling the sweetness!
What is the best way to store Classic Mounds Bars?
The best way to store your Classic Mounds Bars is in an airtight container in the refrigerator. This helps keep the chocolate coating firm and the coconut filling fresh. If you have multiple layers, separate them with parchment paper to prevent sticking. For longer storage, you can freeze them. Just wrap each bar in plastic wrap and place them in a freezer-safe bag. They’ll be ready to enjoy whenever you have a craving!
Conclusion on Classic Mounds Bars Recipe
In conclusion, the Classic Mounds Bars Recipe is a delightful treat that brings together the rich flavors of coconut and chocolate in a simple, no-bake format. Whether you’re a seasoned baker or a beginner in the kitchen, this recipe is easy to follow and yields delicious results. With just a few ingredients and minimal effort, you can create a dessert that is sure to impress family and friends.
Final Thoughts and Encouragement to Try the Recipe
We hope this guide has inspired you to try making your own Classic Mounds Bars. The joy of creating something sweet and sharing it with loved ones is truly rewarding. Remember, you can customize the recipe to suit your taste, whether by adding nuts or opting for dark chocolate. So, gather your ingredients, roll up your sleeves, and dive into this fun and tasty project!
Don’t forget to share your creations with us! We’d love to hear how your Classic Mounds Bars turned out and any variations you tried. Happy baking, and enjoy every delicious bite of your homemade treats!
Relevant Recipes Link:
Craving more classic recipes to elevate your cooking game? You’ll love these delicious options:
- Classic Vanilla Cake Recipe for Every Celebration
- Classic Fish and Chips Recipe for a Perfect Dinner
- Classic Texas Sheet Cake Recipe for Chocolate Lovers
For more amazing recipes and culinary inspiration, follow us on Pinterest!