Introduction to Cherry Pie Bars A Sweet & Buttery Treat!
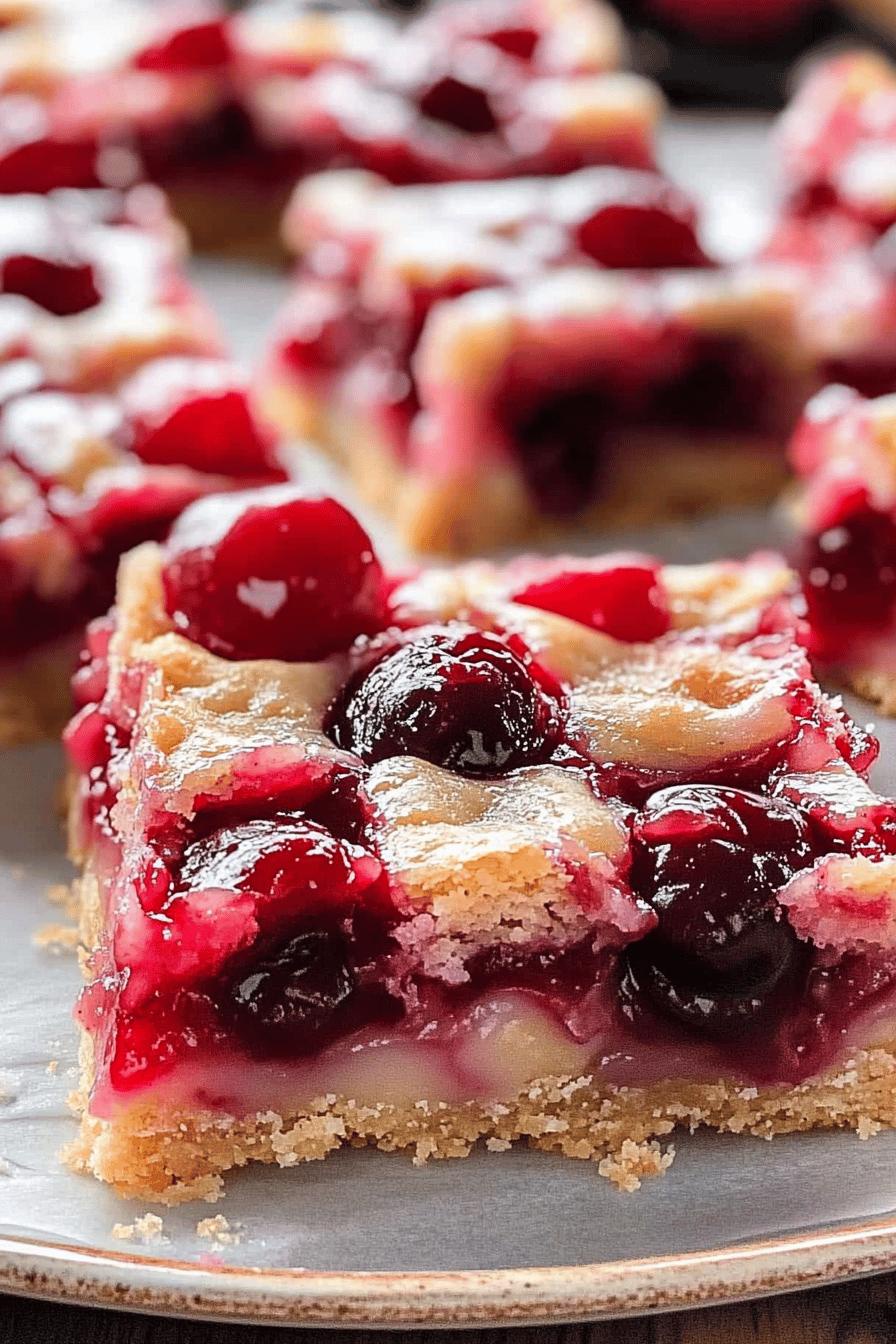
Cherry Pie Bars are a delightful twist on the classic cherry pie. They combine the best of both worlds: a buttery, crumbly crust and a luscious cherry filling. These bars are not only easy to make, but they also bring a burst of flavor that will leave you wanting more. Whether you’re hosting a summer picnic or simply enjoying a cozy evening at home, these bars are sure to impress.
What Makes Cherry Pie Bars Special?
What sets Cherry Pie Bars apart is their simplicity and versatility. Unlike traditional pies, which can be tricky to handle, these bars are straightforward to prepare. The buttery crust is easy to press into a pan, and the cherry filling is quick to whip up. Plus, you can customize the filling to suit your taste. Whether you prefer sweet or tart cherries, these bars can adapt to your preferences. The addition of a simple glaze on top adds a touch of sweetness, making each bite a delightful experience.
The Perfect Dessert for Any Occasion
Cherry Pie Bars are perfect for any occasion. They make a fantastic dessert for summer barbecues, birthday parties, or family gatherings. Their portable nature means you can easily pack them for picnics or road trips. Additionally, they can be served warm or cold, making them a versatile treat for any season. With their vibrant color and delicious flavor, these bars are sure to be a hit with both kids and adults alike!
Ingredients for Cherry Pie Bars A Sweet & Buttery Treat!
To create these delicious Cherry Pie Bars, you’ll need a few simple ingredients. Each component plays a vital role in achieving that perfect balance of flavors and textures. Here’s what you’ll need:
- For the Crust:
- 1 cup unsalted butter, softened
- 1 cup granulated sugar
- 2 cups all-purpose flour
- 1/2 teaspoon salt
- 1 teaspoon vanilla extract
- For the Cherry Filling:
- 2 cups fresh or frozen cherries, pitted
- 1 cup granulated sugar
- 2 tablespoons cornstarch
- 1 tablespoon lemon juice
- 1/2 teaspoon almond extract (optional)
- For the Glaze:
- 1 cup powdered sugar
- 2 tablespoons milk
- 1/2 teaspoon vanilla extract
These ingredients come together to create a sweet and buttery treat that’s hard to resist. The buttery crust provides a perfect base, while the cherry filling adds a juicy burst of flavor. Finally, the glaze ties everything together with a sweet finish. Gather these ingredients, and you’ll be ready to make your Cherry Pie Bars!
Step-by-Step Preparation of Cherry Pie Bars A Sweet & Buttery Treat!
Now that you have all your ingredients ready, it’s time to dive into the fun part: making your Cherry Pie Bars! Follow these simple steps to create a delicious dessert that everyone will love.
Step 1: Prepare the Crust
Start by preheating your oven to 350°F (175°C). In a large mixing bowl, cream together the softened butter and granulated sugar until the mixture is light and fluffy. This should take about 2-3 minutes. Next, add the vanilla extract and mix well. Gradually add the flour and salt, mixing until the dough comes together. It should be soft but not sticky.
Once your dough is ready, press it evenly into the bottom of a greased 9×13-inch baking pan. Make sure to cover the entire bottom, creating a nice, even layer. This crust will be the foundation of your Cherry Pie Bars, so take your time to get it just right!
Step 2: Make the Cherry Filling
In a medium saucepan, combine the pitted cherries, granulated sugar, cornstarch, lemon juice, and almond extract (if using). Cook over medium heat, stirring gently until the mixture starts to bubble. This should take about 5-7 minutes. The cherries will release their juices, and the mixture will thicken slightly. Once it’s ready, remove it from the heat and let it cool for a few minutes.
Step 3: Assemble the Bars
Now it’s time to assemble your Cherry Pie Bars! Pour the cherry filling over the prepared crust, spreading it evenly. To create a beautiful topping, crumble the remaining crust dough over the cherry filling. This will give your bars a lovely texture and a nice golden color when baked.
Step 4: Bake to Perfection
Place the baking pan in the preheated oven and bake for about 30-35 minutes. You’ll know they’re done when the top is golden brown and the cherry filling is bubbly. Keep an eye on them to avoid over-baking. Once they’re ready, remove the pan from the oven and let it cool completely on a wire rack.
Step 5: Add the Glaze
While your Cherry Pie Bars are cooling, it’s time to prepare the glaze. In a small bowl, whisk together the powdered sugar, milk, and vanilla extract until smooth. Once the bars are completely cool, drizzle the glaze over the top. This sweet finishing touch will make your bars even more irresistible!
Now, your Cherry Pie Bars are ready to be sliced and served. Enjoy this sweet and buttery treat with family and friends!
Variations of Cherry Pie Bars A Sweet & Buttery Treat!
While Cherry Pie Bars are delicious as they are, you can easily switch things up! Here are some fun variations to try. These options will keep your dessert game fresh and exciting.
Using Different Fruits
Cherry Pie Bars are versatile, and you can use various fruits to create your own unique flavors. For instance, try using blueberries, raspberries, or peaches instead of cherries. Each fruit brings its own sweetness and tartness, making the bars a delightful treat. If you want to mix it up, consider combining fruits, like cherries and blueberries, for a colorful and flavorful twist. Just remember to adjust the sugar based on the sweetness of the fruit you choose!
Gluten-Free Options
If you or someone you know is gluten-sensitive, you can still enjoy these Cherry Pie Bars! Simply substitute the all-purpose flour with a gluten-free flour blend. Many blends work well in baking, so choose one that you like. Additionally, make sure your baking powder is gluten-free. This way, everyone can indulge in this sweet and buttery treat without worry!
These variations not only cater to different tastes but also allow you to experiment in the kitchen. So, don’t hesitate to get creative with your Cherry Pie Bars!
Cooking Note for Cherry Pie Bars A Sweet & Buttery Treat!
When making Cherry Pie Bars, a few cooking notes can help ensure your dessert turns out perfectly every time. These tips will guide you through the process and enhance your baking experience.
First, always use fresh or high-quality frozen cherries for the filling. Fresh cherries will give you the best flavor, while frozen cherries can be a convenient option when fresh ones are out of season. If using frozen cherries, there’s no need to thaw them before cooking; just add them directly to the saucepan. This will help maintain their shape and texture.
Next, be mindful of the sugar content. Depending on the sweetness of your cherries, you may want to adjust the amount of sugar in the filling. Taste the mixture before adding the full amount of sugar, and feel free to reduce it if your cherries are already sweet.
Additionally, ensure your butter is softened to room temperature before mixing it into the crust. This will help create a smooth and creamy texture, making it easier to blend with the sugar. If you forget to take the butter out in advance, you can cut it into small pieces and microwave it for about 10 seconds. Just be careful not to melt it!
Lastly, let your Cherry Pie Bars cool completely before slicing. This will help the filling set and make it easier to cut clean squares. If you’re in a hurry, you can place the pan in the refrigerator for a quicker cooling process.
By following these cooking notes, you’ll be well on your way to creating delicious Cherry Pie Bars that everyone will love. Happy baking!
Serving Suggestions for Cherry Pie Bars A Sweet & Buttery Treat!
Once your Cherry Pie Bars are ready, it’s time to think about how to serve them! These bars are delicious on their own, but with a few simple additions, you can elevate them to a whole new level. Here are some delightful serving suggestions that will impress your guests and make your dessert even more enjoyable.
Pairing with Ice Cream
One of the best ways to enjoy Cherry Pie Bars is by pairing them with a scoop of ice cream. The creamy texture of ice cream complements the sweet and tart cherry filling perfectly. Vanilla ice cream is a classic choice, but you can also try flavors like almond or even chocolate for a fun twist. Simply place a warm Cherry Pie Bar on a plate and add a scoop of your favorite ice cream on top. The combination of warm and cold will create a delightful contrast that everyone will love!
For an extra touch, drizzle some chocolate or caramel sauce over the ice cream. You can also sprinkle some chopped nuts or whipped cream on top for added texture and flavor. This simple addition transforms your Cherry Pie Bars into a decadent dessert that’s perfect for any occasion.
Presentation Ideas
Presentation is key when serving desserts, and Cherry Pie Bars are no exception. To make your bars look as good as they taste, consider these presentation ideas:
- Dust with Powdered Sugar: Before serving, lightly dust the top of the bars with powdered sugar. This adds a beautiful touch and makes them look more inviting.
- Serve on Colorful Plates: Use vibrant plates or platters to serve your Cherry Pie Bars. The bright colors will enhance the visual appeal and make your dessert stand out.
- Add Fresh Cherries: Garnish each serving with a fresh cherry or two. This not only adds a pop of color but also hints at the delicious filling inside.
- Use a Cake Stand: For gatherings, consider placing your Cherry Pie Bars on a decorative cake stand. This elevates the presentation and makes it feel special.
With these serving suggestions, your Cherry Pie Bars will not only taste amazing but also look stunning on the table. Enjoy sharing this sweet and buttery treat with family and friends!
Tips for Perfect Cherry Pie Bars A Sweet & Buttery Treat!
To ensure your Cherry Pie Bars turn out perfectly every time, consider these helpful tips. From selecting the right cherries to storing leftovers, these suggestions will enhance your baking experience and the overall taste of your dessert.
Choosing the Right Cherries
The type of cherries you use can significantly impact the flavor of your Cherry Pie Bars. Fresh, ripe cherries are ideal for the best taste. Look for cherries that are firm, plump, and have a deep color. Sweet cherries, like Bing or Rainier, are great for a sweeter filling, while tart cherries, such as Montmorency, add a delightful tang. If you opt for frozen cherries, choose high-quality brands without added sugars. Remember, using the right cherries will elevate your dessert and make it even more delicious!
Storing Leftovers
If you have any Cherry Pie Bars left after your gathering, storing them properly is essential to maintain their freshness. Allow the bars to cool completely before cutting them into squares. Once cut, place them in an airtight container. You can store them at room temperature for up to three days. If you want to keep them longer, consider refrigerating them, where they can last for about a week. For even longer storage, you can freeze the bars. Wrap them tightly in plastic wrap and then place them in a freezer-safe container. They can be frozen for up to three months. When you’re ready to enjoy them, simply thaw them in the refrigerator overnight.
By following these tips, you’ll create Cherry Pie Bars that are not only delicious but also easy to store and enjoy later. Happy baking!
Breakdown of Time for Cherry Pie Bars A Sweet & Buttery Treat!
Understanding the time needed to make Cherry Pie Bars is essential for planning your baking session. Here’s a simple breakdown of the time you’ll need for each step, ensuring you can enjoy these sweet and buttery treats without any rush.
Prep Time
The prep time for Cherry Pie Bars is approximately 20-25 minutes. This includes gathering your ingredients, preparing the crust, and making the cherry filling. It’s a straightforward process, so you won’t spend too long in the kitchen. Just make sure to have everything ready before you start, and you’ll be on your way to delicious bars in no time!
Cooking Time
Once you’ve assembled your Cherry Pie Bars, the cooking time is about 30-35 minutes. During this time, the bars will bake to golden perfection, and the cherry filling will bubble up beautifully. Keep an eye on them to ensure they don’t over-bake. The aroma of cherries and buttery crust will fill your kitchen, making the wait worthwhile!
Total Time
In total, you can expect to spend around 60-70 minutes from start to finish. This includes both prep and cooking time. With such a quick turnaround, you can whip up these Cherry Pie Bars for any occasion, whether it’s a last-minute dessert or a planned gathering. Enjoy the process, and soon you’ll have a delightful treat to share!
Nutritional Information for Cherry Pie Bars A Sweet & Buttery Treat!
When indulging in Cherry Pie Bars, it’s helpful to know the nutritional content. This way, you can enjoy your sweet treat while being mindful of your dietary choices. Below is a breakdown of the key nutritional information for one serving of Cherry Pie Bars, which is typically a square measuring about 2 inches by 2 inches.
Calories
Each serving of Cherry Pie Bars contains approximately 250 calories. This calorie count includes the buttery crust, the juicy cherry filling, and the sweet glaze. While these bars are a delightful treat, it’s good to enjoy them in moderation, especially if you’re watching your calorie intake.
Protein
In terms of protein, each serving provides about 2 grams. The protein content mainly comes from the butter and flour used in the crust. While Cherry Pie Bars are not a significant source of protein, they do offer a satisfying treat that can be enjoyed alongside a balanced diet.
Sodium
Each serving of Cherry Pie Bars contains roughly 150 milligrams of sodium. This amount is relatively low, making these bars a suitable dessert option for most people. However, if you are on a low-sodium diet, it’s always wise to keep track of your overall sodium intake throughout the day.
By understanding the nutritional information of Cherry Pie Bars, you can enjoy this sweet and buttery treat while being aware of its impact on your diet. Remember, balance is key, and these bars can be a delightful addition to your dessert repertoire!
FAQs about Cherry Pie Bars A Sweet & Buttery Treat!
Can I use frozen cherries for the filling?
Absolutely! Frozen cherries work wonderfully in Cherry Pie Bars. They are convenient and can save you time, especially when fresh cherries are out of season. Just remember, there’s no need to thaw them before cooking. Add them directly to the saucepan with the other filling ingredients. This way, they will maintain their shape and flavor, giving you a delicious filling!
How do I store leftover cherry pie bars?
Storing leftover Cherry Pie Bars is easy! First, let them cool completely before cutting them into squares. Once cut, place the bars in an airtight container. You can keep them at room temperature for up to three days. If you want to enjoy them longer, store them in the refrigerator for about a week. For even longer storage, wrap them tightly in plastic wrap and place them in a freezer-safe container. They can be frozen for up to three months. Just thaw them in the refrigerator overnight when you’re ready to enjoy!
Can I make these bars ahead of time?
Yes, you can definitely make Cherry Pie Bars ahead of time! They are perfect for preparing in advance for parties or gatherings. You can bake them a day or two before your event and store them in an airtight container. Just remember to add the glaze right before serving for that fresh touch. This way, you can enjoy your time with guests without the stress of last-minute baking!
What can I substitute for the butter in the crust?
If you’re looking for a butter substitute in the crust, there are several options! You can use margarine or a plant-based butter for a dairy-free version. Coconut oil is another great alternative, giving a slight coconut flavor. Just make sure to melt it before mixing it into the crust. For a healthier option, you can also try using unsweetened applesauce or Greek yogurt, but keep in mind that this may change the texture slightly. Experiment with these substitutes to find the one that works best for you!
Conclusion on Cherry Pie Bars A Sweet & Buttery Treat!
In conclusion, Cherry Pie Bars are a delightful and easy dessert that everyone can enjoy. With their buttery crust, juicy cherry filling, and sweet glaze, these bars are perfect for any occasion. Whether you’re hosting a summer barbecue, celebrating a birthday, or simply craving a sweet treat, these bars will surely impress your family and friends.
Not only are they simple to make, but they also allow for creativity in the kitchen. You can experiment with different fruits or even try gluten-free options to cater to various dietary needs. Plus, with the helpful tips and serving suggestions provided, you can elevate your Cherry Pie Bars to a whole new level.
So, gather your ingredients, follow the steps, and enjoy the process of baking these sweet and buttery treats. Remember, the joy of baking is not just in the final product but also in the love and care you put into each step. Share your Cherry Pie Bars with loved ones, and watch as they savor every bite. Happy baking!
Relevant Recipes Link:
Looking to explore more delicious recipes? Try these must-try options:
- Creamy Peanut Butter Ice Cream: A Sweet Delight
- Garlic Butter Steak & Lobster Tail: A Luxurious Combination
- Cheesy Spinach Stuffed Bread: A Flavorful Twist
For more fantastic recipes and food inspiration, follow us on Pinterest!