Introduction to Cheesy Baked Bell Pepper Slices
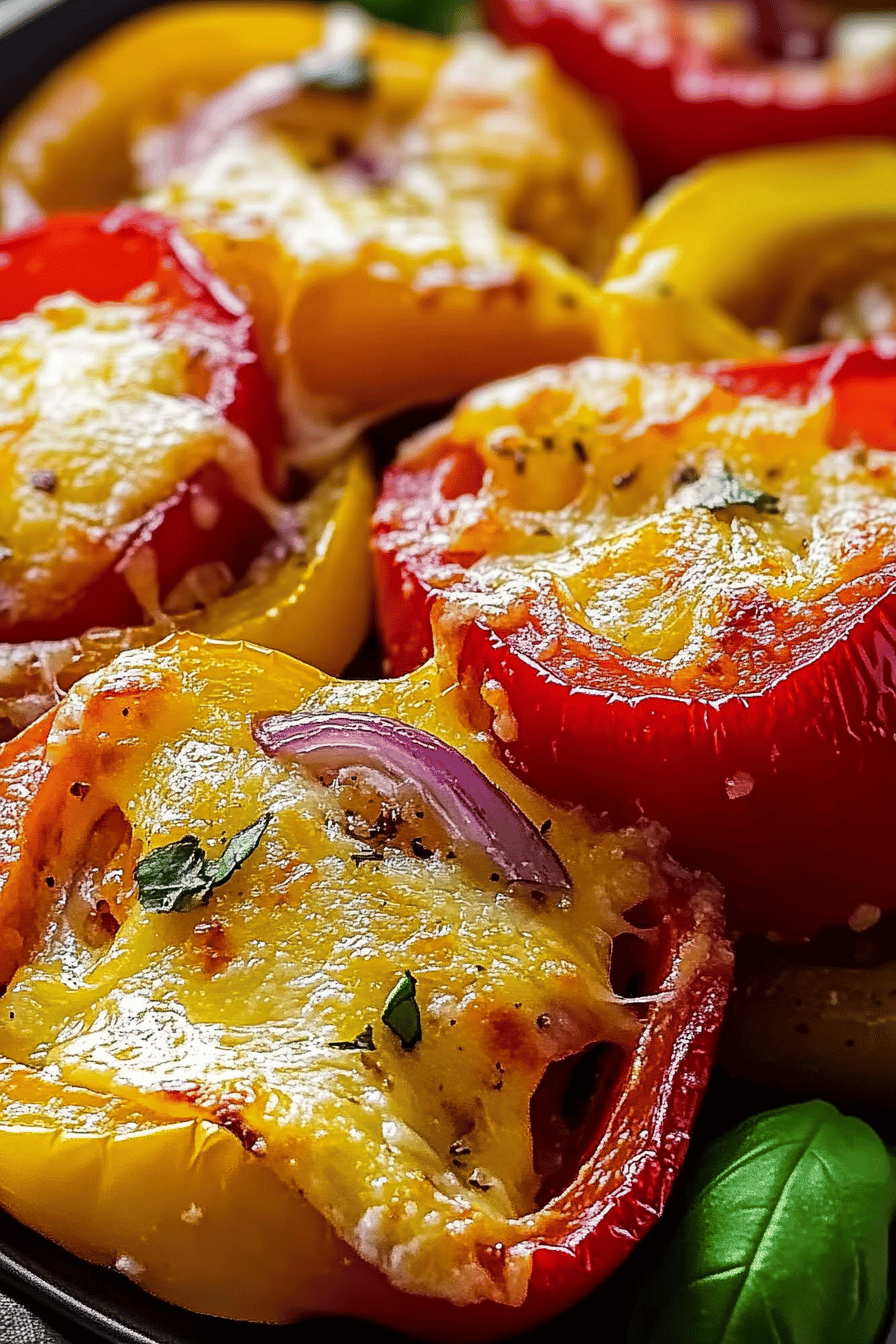
Are you ready to indulge in a delicious and healthy treat? Cheesy Baked Bell Pepper Slices are here to satisfy your cravings! These colorful bites are not only visually appealing but also packed with flavor. Imagine vibrant bell peppers, savory onions, and gooey melted cheese coming together in perfect harmony. Whether you need a quick snack, a tasty appetizer, or a delightful side dish, this recipe has got you covered!
What Makes Cheesy Baked Bell Pepper Slices Special?
What sets Cheesy Baked Bell Pepper Slices apart is their unique combination of ingredients. The bell peppers provide a crunchy texture, while the onions add a hint of sweetness. When you bake them, the cheese melts beautifully, creating a rich and creamy topping. This dish is not just about taste; it’s also about the vibrant colors that make your plate pop! Plus, it’s a fantastic way to enjoy vegetables without sacrificing flavor.
The Appeal of Low-Carb Snacks
In today’s health-conscious world, low-carb snacks are gaining popularity. Cheesy Baked Bell Pepper Slices fit perfectly into this trend. They are a great alternative to traditional snacks that are often high in carbs and calories. By using bell peppers as the base, you can enjoy a satisfying treat without the guilt. These slices are perfect for anyone looking to maintain a balanced diet while still enjoying delicious food. So, if you’re on a low-carb journey or just want to try something new, this recipe is a must-try!
Ingredients for Cheesy Baked Bell Pepper Slices
To create your own Cheesy Baked Bell Pepper Slices, you’ll need a few simple ingredients. These items are easy to find and will help you whip up this delightful dish in no time. Here’s what you’ll need:
- 4 medium-sized bell peppers (any color you prefer)
- 1 medium onion, finely chopped
- 1 cup shredded cheese (cheddar, mozzarella, or a blend)
- 2 tablespoons olive oil
- 1 teaspoon garlic powder
- Salt and pepper to taste
- Optional: Fresh herbs like parsley or basil for garnish
These ingredients come together to create a mouthwatering dish that’s not only healthy but also bursting with flavor. The bell peppers serve as a crunchy base, while the onions add a sweet touch. The cheese, of course, is the star of the show, providing that gooey goodness we all love. Feel free to mix and match the types of cheese you use to find your perfect flavor combination!
Now that you have your ingredients ready, let’s move on to the next step: preparing your Cheesy Baked Bell Pepper Slices!
Step-by-Step Preparation of Cheesy Baked Bell Pepper Slices
Now that you have your ingredients ready, it’s time to dive into the fun part: preparing your Cheesy Baked Bell Pepper Slices! Follow these simple steps to create a dish that’s sure to impress your family and friends.
Step 1: Prepping the Bell Peppers
First things first, let’s get those bell peppers ready! Start by washing them thoroughly under cool water. This step is important to remove any dirt or pesticides. Next, slice each bell pepper in half lengthwise. Remove the seeds and the white membranes inside. These parts can be bitter, so it’s best to discard them. Once you’ve done that, place the bell pepper halves cut-side up on a baking sheet lined with parchment paper. This will make cleanup easier later!
Step 2: Sautéing the Onions
While your bell peppers are prepped, it’s time to sauté the onions. Heat the olive oil in a skillet over medium heat. Once the oil is hot, add the finely chopped onions. Sauté them for about 5-7 minutes, or until they become soft and translucent. Stir occasionally to prevent them from burning. If you like a little extra flavor, sprinkle in the garlic powder during the last minute of cooking. This will give your onions a delicious aroma!
Step 3: Assembling the Cheesy Baked Bell Pepper Slices
Now comes the fun part—assembling your Cheesy Baked Bell Pepper Slices! Take a spoonful of the sautéed onions and place it into each bell pepper half. Spread it evenly to cover the bottom. Next, grab your shredded cheese and sprinkle a generous amount on top of the onions. Don’t be shy with the cheese; it’s what makes this dish so delightful! If you want to add a little extra flavor, you can also sprinkle some salt and pepper over the cheese.
Step 4: Baking to Perfection
It’s time to bake your Cheesy Baked Bell Pepper Slices! Preheat your oven to 375°F (190°C). Once the oven is ready, place the baking sheet with the stuffed bell peppers inside. Bake for about 20-25 minutes, or until the cheese is bubbly and golden brown. The bell peppers should be tender but still hold their shape. Keep an eye on them to avoid overcooking. Once they’re done, remove them from the oven and let them cool for a few minutes before serving. Enjoy your delicious creation!
Variations of Cheesy Baked Bell Pepper Slices
While the classic Cheesy Baked Bell Pepper Slices are already a hit, there are many fun ways to mix things up! You can easily customize this recipe to suit your taste or to use up ingredients you have on hand. Let’s explore some exciting variations that will keep your taste buds dancing!
Adding Different Cheeses
Cheese lovers rejoice! One of the best parts of this recipe is the flexibility with cheese. You can experiment with different types to create unique flavors. For a sharp taste, try using aged cheddar. If you prefer something creamier, mozzarella is a great choice. You can even mix cheeses for a delightful blend! Consider adding feta for a tangy kick or pepper jack for a spicy twist. The options are endless, and each cheese will bring its own character to the dish. So, don’t hesitate to get creative and find your favorite combination!
Incorporating Additional Vegetables
Want to boost the nutrition and flavor of your Cheesy Baked Bell Pepper Slices? Adding more vegetables is a fantastic idea! You can include finely chopped mushrooms, zucchini, or spinach to the sautéed onions. These veggies not only enhance the taste but also add extra vitamins and minerals. If you’re feeling adventurous, try adding some diced tomatoes or olives for a Mediterranean flair. The key is to chop the vegetables small enough so they cook evenly and fit nicely in the bell pepper halves. This way, you can enjoy a colorful and nutritious dish that’s packed with goodness!
Cooking Note for Cheesy Baked Bell Pepper Slices
When it comes to making Cheesy Baked Bell Pepper Slices, a few cooking notes can help you achieve the best results. First, always choose fresh bell peppers. Look for ones that are firm and have vibrant colors. This ensures they will hold up well during baking and provide the best flavor.
Another important tip is to keep an eye on the baking time. Ovens can vary, so it’s wise to check your peppers a few minutes before the suggested time. You want the cheese to be bubbly and golden, but the peppers should still be slightly crisp. Overcooking can lead to mushy peppers, which may not be as enjoyable.
Additionally, if you prefer a bit of crunch, consider broiling the peppers for the last few minutes of cooking. This will give the cheese a nice golden finish while keeping the peppers firm. Just be sure to watch them closely to prevent burning!
Lastly, let your Cheesy Baked Bell Pepper Slices cool for a few minutes before serving. This allows the cheese to set slightly, making them easier to handle. Enjoy your delicious creation with family and friends, and don’t forget to share your variations!
Serving Suggestions for Cheesy Baked Bell Pepper Slices
Now that you’ve created your delicious Cheesy Baked Bell Pepper Slices, it’s time to think about how to serve them! This dish is versatile and can be enjoyed in various ways. Here are some fantastic serving suggestions to elevate your dining experience.
Pairing with Dips
One of the best ways to enjoy Cheesy Baked Bell Pepper Slices is by pairing them with your favorite dips. Dips can add an extra layer of flavor and make your dish even more exciting. Here are a few dip ideas:
- Ranch Dressing: A classic choice that complements the cheesy goodness perfectly.
- Salsa: Fresh salsa adds a zesty kick that pairs well with the sweetness of the bell peppers.
- Guacamole: Creamy guacamole brings a rich texture that balances the crunch of the peppers.
- Hummus: For a healthy option, try serving your slices with hummus. It adds a nutty flavor that’s delightful!
Feel free to get creative with your dips! You can even make your own by mixing yogurt with herbs and spices for a refreshing twist. Dipping your Cheesy Baked Bell Pepper Slices will surely make them a hit at any gathering!
Serving as a Side Dish
Cheesy Baked Bell Pepper Slices also make a fantastic side dish. They pair wonderfully with a variety of main courses. Here are some ideas for what to serve alongside:
- Grilled Chicken: The flavors of grilled chicken complement the cheesy peppers beautifully.
- Steak: A juicy steak with these cheesy bites creates a satisfying meal.
- Vegetarian Dishes: Serve them with a hearty vegetable stir-fry or a quinoa salad for a complete vegetarian meal.
- Pasta: These slices can add a colorful touch to any pasta dish, enhancing both flavor and presentation.
Whether you choose to serve them as a snack with dips or as a side dish with your favorite meal, Cheesy Baked Bell Pepper Slices are sure to impress. Their vibrant colors and delicious flavors will make any table look inviting and appetizing!
Tips for Perfect Cheesy Baked Bell Pepper Slices
To make your Cheesy Baked Bell Pepper Slices truly shine, a few tips can help you achieve perfection. From selecting the right bell peppers to ensuring even cooking, these suggestions will elevate your dish to the next level. Let’s dive into some helpful tips!
Choosing the Right Bell Peppers
When it comes to bell peppers, not all are created equal. Choosing the right ones can make a big difference in flavor and texture. Here are some tips to help you pick the best bell peppers:
- Look for Firmness: Choose bell peppers that feel firm to the touch. Avoid any that have soft spots or wrinkles, as these may be overripe.
- Check the Color: Vibrant colors indicate freshness. Red, yellow, and orange peppers tend to be sweeter than green ones, so pick according to your taste preference.
- Inspect the Skin: The skin should be smooth and shiny. Dull skin can indicate that the pepper is past its prime.
- Size Matters: Medium-sized peppers are ideal for this recipe. They hold their shape well and provide the perfect amount of filling.
By selecting the right bell peppers, you’ll ensure that your Cheesy Baked Bell Pepper Slices are not only delicious but also visually appealing!
Ensuring Even Cooking
Even cooking is key to achieving the perfect Cheesy Baked Bell Pepper Slices. Here are some tips to help you ensure that every bite is cooked to perfection:
- Uniform Slicing: When you slice the bell peppers, make sure the halves are of equal size. This helps them cook evenly in the oven.
- Preheat the Oven: Always preheat your oven before baking. This ensures that the peppers start cooking immediately, leading to better texture.
- Use a Baking Sheet: Line your baking sheet with parchment paper. This not only prevents sticking but also allows for even heat distribution.
- Rotate the Pan: Halfway through baking, rotate the baking sheet. This helps the peppers cook evenly and prevents any hot spots in the oven.
By following these tips, you’ll create Cheesy Baked Bell Pepper Slices that are perfectly cooked, with a delightful crunch and gooey cheese topping. Enjoy the process and savor the delicious results!
Breakdown of Time for Cheesy Baked Bell Pepper Slices
Understanding the time needed to prepare and cook your Cheesy Baked Bell Pepper Slices is essential for planning your meal. Here’s a simple breakdown to help you manage your time effectively.
Prep Time
The prep time for Cheesy Baked Bell Pepper Slices is quite short. You’ll need about 15-20 minutes to wash, slice, and prepare the bell peppers and onions. This includes:
- Washing the bell peppers
- Slicing them in half and removing seeds
- Chopping the onions and sautéing them
With a little organization, you can have everything ready to go in no time!
Cooking Time
Once your ingredients are prepped, the cooking time is approximately 20-25 minutes. This includes:
- Baking the stuffed bell peppers until the cheese is bubbly and golden
- Allowing them to cool slightly before serving
Keep an eye on them as they bake to ensure they reach that perfect golden brown without overcooking.
Total Time
In total, you can expect to spend about 35-45 minutes from start to finish. This includes both prep and cooking time. It’s a quick and easy recipe that fits perfectly into a busy schedule, making it ideal for weeknight dinners or last-minute gatherings!
Now that you know the time breakdown, you can easily fit this delicious dish into your meal planning. Enjoy the process and the delightful flavors of your Cheesy Baked Bell Pepper Slices!
Nutritional Information for Cheesy Baked Bell Pepper Slices
Understanding the nutritional content of your Cheesy Baked Bell Pepper Slices is essential for maintaining a balanced diet. This dish is not only delicious but also offers a variety of nutrients. Here’s a breakdown of the key nutritional components you can expect from a serving of these tasty bites.
Calories
Each serving of Cheesy Baked Bell Pepper Slices contains approximately 150-200 calories. This makes it a great option for those looking to enjoy a flavorful snack or side dish without consuming too many calories. The exact calorie count may vary based on the type and amount of cheese used, as well as any additional ingredients you choose to add.
Protein
Protein is an important nutrient for building and repairing tissues. In each serving of Cheesy Baked Bell Pepper Slices, you can expect to find around 8-10 grams of protein. This protein primarily comes from the cheese and any additional ingredients like sautéed onions or extra vegetables. Including protein in your snacks can help keep you feeling full and satisfied!
Sodium
Sodium content can vary based on the cheese and any added seasonings. On average, a serving of Cheesy Baked Bell Pepper Slices contains about 300-400 milligrams of sodium. If you’re watching your sodium intake, consider using low-sodium cheese or adjusting the amount of salt you add during preparation. This way, you can enjoy your dish while keeping your health goals in mind.
Overall, Cheesy Baked Bell Pepper Slices are a nutritious and satisfying option that fits well into a healthy lifestyle. With their low-calorie count, decent protein content, and customizable sodium levels, they make for a delightful addition to any meal or snack time!
FAQs about Cheesy Baked Bell Pepper Slices
Can I make Cheesy Baked Bell Pepper Slices ahead of time?
Absolutely! You can prepare Cheesy Baked Bell Pepper Slices ahead of time, making them a convenient option for busy days. To do this, follow the recipe up to the baking step. Once you’ve assembled the bell peppers with the sautéed onions and cheese, cover them with plastic wrap or foil and store them in the refrigerator. They can be kept for up to 24 hours before baking. When you’re ready to enjoy them, simply preheat your oven and bake as directed. You may need to add a few extra minutes to the cooking time if they are cold from the fridge.
What can I substitute for cheese in Cheesy Baked Bell Pepper Slices?
If you’re looking for a cheese substitute, there are several options available! For a dairy-free alternative, consider using vegan cheese made from nuts or soy. These products melt well and can provide a similar texture to traditional cheese. Another option is to use nutritional yeast, which has a cheesy flavor and is packed with nutrients. If you’re avoiding cheese for dietary reasons, you can also try using hummus or a creamy avocado spread as a topping. These alternatives will still give you a delicious and satisfying flavor while keeping the dish enjoyable!
Are Cheesy Baked Bell Pepper Slices gluten-free?
Yes, Cheesy Baked Bell Pepper Slices are naturally gluten-free! The main ingredients—bell peppers, onions, and cheese—do not contain gluten. However, if you’re using any pre-packaged ingredients, such as certain types of cheese or seasonings, it’s always a good idea to check the labels for gluten content. To ensure your dish remains gluten-free, stick to fresh ingredients and avoid any processed items that may contain gluten. Enjoy this tasty treat without worry!
Conclusion on Cheesy Baked Bell Pepper Slices
In conclusion, Cheesy Baked Bell Pepper Slices are a delightful addition to any meal or snack time. They combine vibrant colors, rich flavors, and a satisfying crunch that makes them irresistible. Whether you’re looking for a healthy appetizer, a side dish, or a quick snack, this recipe checks all the boxes. Plus, it’s easy to customize, allowing you to experiment with different cheeses and vegetables to suit your taste.
Why You Should Try This Recipe Today
So, why wait? Try making Cheesy Baked Bell Pepper Slices today! Not only are they simple to prepare, but they also offer a nutritious option that everyone will love. With their low-carb nature, they fit perfectly into a healthy lifestyle without sacrificing flavor. Imagine serving these colorful bites at your next gathering or enjoying them as a cozy snack while watching your favorite show.
By following this recipe, you’ll create a dish that’s not only delicious but also visually appealing. The combination of melted cheese, sautéed onions, and fresh bell peppers is sure to impress your family and friends. Plus, you can feel good about serving a dish that’s packed with nutrients and flavor.
So grab your ingredients, preheat that oven, and get ready to enjoy the delightful taste of Cheesy Baked Bell Pepper Slices. Your taste buds will thank you!
Relevant Recipes Link:
Craving more cheesy and creamy recipes? Dive into these delectable dishes:
- Cheesy Baked Ziti Casserole: A Comforting Classic
- Cheesy Baked Pork Chops: Irresistibly Cheesy
- Creamy Roasted Red Pepper Chicken Pasta: A Flavorful Favorite
For more fantastic recipes and food inspiration, follow us on Pinterest!