Introduction to Caffeine Cascade Dream Ice Cream
Welcome to the world of Caffeine Cascade Dream Ice Cream! This delightful dessert is not just any ordinary ice cream; it’s a celebration of coffee and cream that will tantalize your taste buds. Imagine a creamy, dreamy scoop that combines the rich flavors of coffee with the smoothness of heavy cream. It’s a treat that promises to refresh and invigorate, making it perfect for any occasion.
What Makes Caffeine Cascade Dream Ice Cream Special?
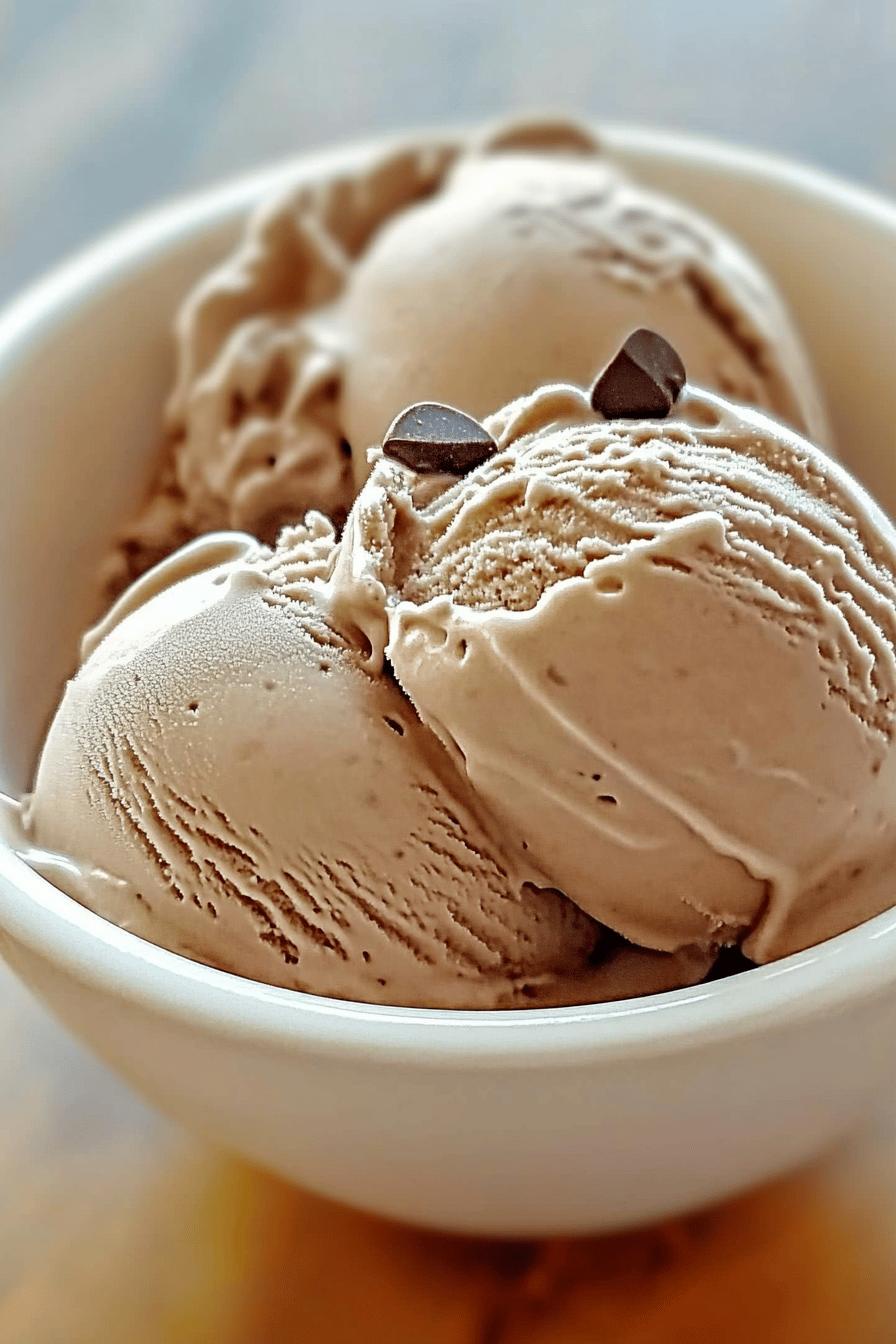
What sets Caffeine Cascade Dream Ice Cream apart is its unique blend of ingredients. The heavy cream and whole milk create a velvety texture, while the chilled brewed coffee adds a bold flavor that coffee enthusiasts adore. The addition of sugar and vanilla extract enhances the sweetness, making each bite a delightful experience. Plus, if you choose to add dark chocolate chips, you’ll get a wonderful contrast of flavors that elevates this ice cream to a whole new level. It’s not just dessert; it’s an indulgent escape!
The Perfect Treat for Coffee Lovers
If you’re a coffee lover, this ice cream is your dream come true. It captures the essence of your favorite brew in a frozen form. Whether you enjoy it on a hot summer day or as a cozy treat during the colder months, Caffeine Cascade Dream Ice Cream is sure to satisfy your cravings. It’s a simple yet luxurious way to enjoy coffee, and it’s easy to make at home. So, grab your ingredients and get ready to whip up a batch of this delightful dessert!
Ingredients for Caffeine Cascade Dream Ice Cream
Creating your own Caffeine Cascade Dream Ice Cream is a breeze! You’ll need a few simple ingredients that come together to make this delicious treat. Here’s what you’ll need:
- 2 cups heavy cream: This gives the ice cream its rich and creamy texture.
- 1 cup whole milk: Whole milk adds a smoothness that balances the cream.
- 1 cup chilled brewed coffee: Use your favorite coffee for the best flavor.
- 3/4 cup granulated sugar: This sweetens the mixture and enhances the coffee flavor.
- 1 teaspoon vanilla extract: Vanilla adds a lovely aroma and depth to the ice cream.
- Optional: 1/2 cup dark chocolate chips: For a delightful crunch and extra flavor.
These ingredients are easy to find and can be adjusted based on your taste preferences. For instance, you can use less sugar if you prefer a less sweet treat. The optional dark chocolate chips can be replaced with nuts or other mix-ins if you like. The beauty of this recipe lies in its flexibility, allowing you to customize it to your liking!
Step-by-Step Preparation of Caffeine Cascade Dream Ice Cream
Now that you have all your ingredients ready, it’s time to dive into the fun part: making your Caffeine Cascade Dream Ice Cream! Follow these simple steps to create a deliciously creamy treat that will impress your friends and family.
Step 1: Gather Your Ingredients
Before you start, make sure you have everything you need. Gather your heavy cream, whole milk, chilled brewed coffee, sugar, vanilla extract, and any optional mix-ins like dark chocolate chips. Having everything in one place will make the process smoother and more enjoyable.
Step 2: Brew the Coffee
Next, it’s time to brew your coffee. Use your favorite coffee beans for the best flavor. Brew about 1 cup of coffee and let it cool down. Chilling the coffee is important because it helps maintain the creamy texture of the ice cream. You can even brew it a few hours ahead of time or the night before to save time.
Step 3: Mix the Base
In a large mixing bowl, combine the heavy cream, whole milk, chilled brewed coffee, sugar, and vanilla extract. Whisk everything together until the sugar is fully dissolved. This step is crucial as it ensures that your ice cream will be sweet and flavorful. The mixture should be smooth and creamy, with no lumps. If you’re adding dark chocolate chips, fold them in gently at this stage.
Step 4: Churn the Ice Cream
Now comes the exciting part! Pour your mixture into an ice cream maker. Follow the manufacturer’s instructions for churning. Typically, it takes about 20 to 30 minutes for the ice cream to reach a soft-serve consistency. Keep an eye on it, as you want it to be creamy and fluffy, not too hard.
Step 5: Freeze and Set
Once your ice cream has reached the desired consistency, transfer it to an airtight container. Smooth the top with a spatula and cover it tightly. Place the container in the freezer for at least 4 hours, or until it’s firm. This final freezing step is essential for achieving that perfect scoopable texture. When you’re ready to enjoy, let it sit at room temperature for a few minutes before scooping. This will make serving easier!
And there you have it! Your very own Caffeine Cascade Dream Ice Cream is ready to be enjoyed. Each scoop is a delightful blend of coffee and cream that will surely satisfy your sweet tooth.
Variations of Caffeine Cascade Dream Ice Cream
While the classic Caffeine Cascade Dream Ice Cream is already a treat, there are many ways to enhance its flavor and texture. Let’s explore some exciting variations that can take your ice cream experience to the next level. Whether you want to add a twist or try something new, these ideas will inspire you!
Adding Flavor Enhancements
To elevate your Caffeine Cascade Dream Ice Cream, consider adding different flavor enhancements. Here are a few ideas:
- Caramel Swirl: Drizzle some caramel sauce into the ice cream mixture before churning. This will create a delightful caramel ribbon throughout your ice cream.
- Hazelnut Extract: Replace the vanilla extract with hazelnut extract for a nutty flavor that pairs beautifully with coffee.
- Espresso Powder: For a stronger coffee flavor, mix in a teaspoon of espresso powder. This will intensify the coffee taste without adding extra liquid.
- Cocoa Powder: Add a couple of tablespoons of cocoa powder to create a mocha version of your ice cream. It’s a delicious combination of chocolate and coffee!
These enhancements can be mixed and matched to suit your taste. Feel free to experiment and find your perfect flavor combination!
Alternative Mix-Ins for Caffeine Cascade Dream Ice Cream
Mix-ins can add texture and surprise to your ice cream. Here are some alternative mix-ins to consider:
- Chopped Nuts: Add chopped almonds, walnuts, or pecans for a crunchy texture that complements the creaminess.
- Toffee Bits: For a sweet and crunchy addition, fold in toffee bits. They add a delightful caramel flavor.
- Fresh Fruit: Consider adding fresh berries or banana slices for a fruity twist. They provide a refreshing contrast to the rich ice cream.
- Cookie Crumbles: Crushed cookies, like Oreos or chocolate chip cookies, can add a fun texture and flavor to your ice cream.
Mix-ins are a great way to personalize your Caffeine Cascade Dream Ice Cream. Choose your favorites and enjoy the creative process!
Cooking Note for Caffeine Cascade Dream Ice Cream
When making Caffeine Cascade Dream Ice Cream, a few cooking notes can help ensure your ice cream turns out perfectly every time. First, always use high-quality ingredients. The better the coffee and cream, the richer the flavor of your ice cream will be. Freshly brewed coffee is key, as it provides the best taste. If possible, use coffee that you’ve brewed within a few hours for optimal freshness.
Another important tip is to chill your mixing bowl and ice cream maker bowl before starting. This helps the ice cream mixture freeze faster, resulting in a creamier texture. You can place the bowl in the freezer for about 30 minutes before you begin mixing. Additionally, if you’re using an ice cream maker, make sure the bowl is completely frozen according to the manufacturer’s instructions. A well-prepared bowl will help your ice cream churn to the right consistency.
Lastly, don’t rush the freezing process. After churning, allow your ice cream to set in the freezer for at least 4 hours. This step is crucial for achieving that perfect scoopable texture. If you try to scoop it too soon, it may be too soft and difficult to serve. Patience is key to enjoying a delightful dessert!
Serving Suggestions for Caffeine Cascade Dream Ice Cream
Now that you’ve made your delicious Caffeine Cascade Dream Ice Cream, it’s time to think about how to serve it! This creamy treat can be enjoyed in many creative ways. Let’s explore some fun serving suggestions that will make your dessert experience even more delightful.
Creative Ways to Serve
Serving your ice cream can be just as fun as making it! Here are some creative ideas:
- Ice Cream Sundae: Scoop your Caffeine Cascade Dream Ice Cream into a bowl and top it with whipped cream, chocolate syrup, and a cherry. This classic sundae is sure to impress!
- Affogato Style: Pour a shot of hot espresso over a scoop of your ice cream. The hot coffee will melt the ice cream slightly, creating a deliciously creamy treat.
- Ice Cream Sandwich: Use two cookies to create an ice cream sandwich. Place a generous scoop of your ice cream between two chocolate chip cookies for a fun and tasty dessert.
- In a Cone: Serve your ice cream in a waffle cone for a classic ice cream shop experience. You can even dip the cone in melted chocolate and sprinkles for an extra treat!
These serving ideas can add a fun twist to your dessert and make it even more enjoyable for everyone!
Pairing with Other Desserts
Caffeine Cascade Dream Ice Cream pairs wonderfully with other desserts. Here are some delicious combinations:
- Brownies: Serve a scoop of ice cream on top of warm brownies. The combination of rich chocolate and creamy ice cream is heavenly!
- Fruit Tart: A slice of fruit tart with your ice cream adds a refreshing contrast. The tartness of the fruit complements the sweetness of the ice cream.
- Pancakes: For a breakfast treat, top warm pancakes with a scoop of ice cream and drizzle with maple syrup. It’s a delightful way to start your day!
- Chocolate Cake: Pair your ice cream with a slice of chocolate cake for a double chocolate delight. The creamy ice cream balances the richness of the cake perfectly.
These pairings can elevate your dessert experience and impress your guests. Enjoy experimenting with different combinations!
Tips for Perfecting Caffeine Cascade Dream Ice Cream
Making the perfect Caffeine Cascade Dream Ice Cream is an art. To help you achieve that creamy, dreamy texture and rich flavor, here are some essential tips. Avoiding common mistakes and knowing how to store your ice cream properly can make all the difference in your homemade treat.
Common Mistakes to Avoid
Even the best recipes can go awry if you’re not careful. Here are some common pitfalls to watch out for:
- Using Warm Coffee: Always use chilled brewed coffee. Warm coffee can cause the cream to melt, resulting in a less creamy texture.
- Not Whisking Enough: Make sure to whisk the mixture thoroughly until the sugar is completely dissolved. This ensures a smooth and sweet ice cream.
- Over-Churning: Keep an eye on your ice cream maker. Over-churning can lead to a grainy texture. Stop once it reaches a soft-serve consistency.
- Skipping the Freezing Step: Don’t rush the freezing process. Allow your ice cream to set for at least 4 hours. This step is crucial for achieving the right scoopable texture.
By avoiding these mistakes, you’ll be on your way to creating a delightful ice cream that everyone will love!
Storage Tips for Homemade Ice Cream
Proper storage is key to maintaining the quality of your Caffeine Cascade Dream Ice Cream. Here are some helpful tips:
- Use an Airtight Container: Store your ice cream in an airtight container to prevent ice crystals from forming. This keeps your ice cream smooth and creamy.
- Label and Date: Don’t forget to label your container with the date. Homemade ice cream is best enjoyed within 2 to 3 weeks for optimal flavor.
- Keep it Cold: Store your ice cream in the back of the freezer, where it’s coldest. Avoid placing it in the door, as the temperature fluctuates more there.
- Let it Sit Before Serving: When you’re ready to enjoy your ice cream, let it sit at room temperature for a few minutes. This makes scooping easier and enhances the flavor.
Following these storage tips will help you enjoy your Caffeine Cascade Dream Ice Cream at its best. Now, you’re all set to create and savor this delightful treat!
Breakdown of Time for Caffeine Cascade Dream Ice Cream
Understanding the time needed to make your Caffeine Cascade Dream Ice Cream can help you plan better. Here’s a simple breakdown of the time involved in each step of the process. This way, you can enjoy your delicious treat without any surprises!
Prep Time
The prep time for Caffeine Cascade Dream Ice Cream is quite short. You’ll need about 15 to 20 minutes to gather your ingredients, brew the coffee, and mix everything together. This includes:
- Gathering all ingredients and tools.
- Brewing and cooling the coffee.
- Mixing the cream, milk, coffee, sugar, and vanilla.
With everything ready, you’ll be set to move on to the next steps!
Cooking Time
Cooking time mainly involves churning the ice cream. This process typically takes about 20 to 30 minutes in an ice cream maker. During this time, the mixture transforms into a creamy, soft-serve consistency. Here’s what to keep in mind:
- Churning time can vary based on your ice cream maker.
- Make sure to monitor the mixture closely to avoid over-churning.
Once it reaches the right consistency, you’ll be ready for the final freezing step!
Total Time
In total, you should expect to spend about 4 to 5 hours to make your Caffeine Cascade Dream Ice Cream. This includes:
- 15 to 20 minutes for prep.
- 20 to 30 minutes for churning.
- At least 4 hours for freezing and setting.
While the active time is relatively short, the freezing time is essential for achieving that perfect scoopable texture. So, plan ahead and enjoy the anticipation of your delicious homemade ice cream!
Nutritional Information for Caffeine Cascade Dream Ice Cream
Understanding the nutritional information of your Caffeine Cascade Dream Ice Cream can help you enjoy it mindfully. This delicious treat is not only a delightful dessert but also contains various nutrients. Here’s a breakdown of the calories and macronutrients you can expect in each serving.
Calories and Macronutrients
Each serving of Caffeine Cascade Dream Ice Cream (approximately 1/2 cup) contains the following nutritional values:
- Calories: About 250 calories
- Fat: 18 grams
- Saturated Fat: 11 grams
- Carbohydrates: 24 grams
- Sugar: 20 grams
- Protein: 3 grams
These values can vary based on the specific ingredients you use, especially if you opt for lower-fat milk or sugar substitutes. It’s always a good idea to check the labels of your ingredients for the most accurate information.
Health Considerations
While Caffeine Cascade Dream Ice Cream is a delightful treat, it’s important to enjoy it in moderation. Here are some health considerations to keep in mind:
- Caloric Intake: With around 250 calories per serving, be mindful of your overall daily caloric intake, especially if you’re watching your weight.
- Sugar Content: The ice cream contains a significant amount of sugar. If you’re monitoring your sugar intake, consider reducing the amount of sugar in the recipe or using a sugar substitute.
- Caffeine Sensitivity: Since this ice cream contains coffee, it does have caffeine. If you’re sensitive to caffeine, enjoy it earlier in the day to avoid sleep disturbances.
- Allergies: Be cautious if you have dairy allergies or lactose intolerance. You can substitute dairy ingredients with non-dairy alternatives to make a lactose-free version.
By keeping these considerations in mind, you can enjoy your Caffeine Cascade Dream Ice Cream as a delightful part of a balanced diet. Treat yourself to this creamy indulgence while being aware of your nutritional choices!
FAQs about Caffeine Cascade Dream Ice Cream
Can I use decaf coffee for Caffeine Cascade Dream Ice Cream?
Absolutely! If you prefer to enjoy the creamy goodness without the caffeine kick, decaf coffee is a great option. It will still provide that rich coffee flavor without keeping you awake at night. Just brew your decaf coffee as you normally would, chill it, and follow the recipe as usual. You’ll still get to indulge in the delightful taste of Caffeine Cascade Dream Ice Cream!
How long does Caffeine Cascade Dream Ice Cream last in the freezer?
Your homemade Caffeine Cascade Dream Ice Cream can last in the freezer for about 2 to 3 weeks. To keep it fresh, store it in an airtight container. This will help prevent ice crystals from forming and maintain its creamy texture. However, for the best flavor and quality, try to enjoy it within the first couple of weeks. After that, it may start to lose some of its delightful taste and texture.
Can I make Caffeine Cascade Dream Ice Cream without an ice cream maker?
Yes, you can! If you don’t have an ice cream maker, you can still make this delicious treat. Simply follow the recipe up to the churning step. After mixing your ingredients, pour the mixture into a shallow dish and place it in the freezer. Every 30 minutes, stir the mixture with a fork to break up any ice crystals. Repeat this process for about 3 to 4 hours, or until the ice cream reaches your desired consistency. It may take a bit longer, but you’ll still end up with a tasty Caffeine Cascade Dream Ice Cream!
What are some good toppings for Caffeine Cascade Dream Ice Cream?
There are so many delicious toppings you can add to your Caffeine Cascade Dream Ice Cream! Here are some tasty ideas:
- Whipped Cream: A dollop of whipped cream adds a light and fluffy touch.
- Chocolate Syrup: Drizzle some chocolate syrup for a rich, sweet contrast.
- Caramel Sauce: A swirl of caramel sauce brings a delightful sweetness.
- Chopped Nuts: Sprinkle some chopped almonds or walnuts for a crunchy texture.
- Fresh Berries: Add fresh strawberries or raspberries for a fruity burst.
- Dark Chocolate Shavings: For an extra chocolatey touch, sprinkle some dark chocolate shavings on top.
Feel free to mix and match these toppings to create your perfect scoop of Caffeine Cascade Dream Ice Cream!
Conclusion: Enjoying Your Caffeine Cascade Dream Ice Cream
Now that you’ve crafted your very own Caffeine Cascade Dream Ice Cream, it’s time to savor the fruits of your labor! This delightful dessert is not just a treat; it’s an experience that brings together the rich flavors of coffee and the creamy goodness of ice cream. Each scoop is a celebration of indulgence, perfect for any occasion.
Whether you enjoy it on a sunny afternoon or as a cozy dessert after dinner, this ice cream is sure to impress. The versatility of the recipe allows you to customize it to your liking, making it a fun project for family and friends. You can experiment with different mix-ins and toppings, creating a unique dessert every time.
As you dig into your Caffeine Cascade Dream Ice Cream, take a moment to appreciate the effort you put into making it. The joy of homemade ice cream is not just in the taste but also in the memories created while making it. Share it with loved ones, or keep it all to yourself—either way, you’re in for a treat!
So, grab a scoop, sit back, and enjoy the creamy, caffeinated bliss of your Caffeine Cascade Dream Ice Cream. It’s a delightful way to cool down and indulge your coffee cravings. Happy scooping!
Relevant Recipes Link:
Craving more delightful ice cream recipes to satisfy your sweet tooth? You’ll love these:
- Creamy Caramel Apple Ice Cream: A Must-Try Dessert
- Salted Caramel Swirl Ice Cream: A Must-Try Treat
- Honey Lavender Ice Cream: A Delightful Summer Treat
For more fantastic recipes and food inspiration, follow us on Pinterest!